|
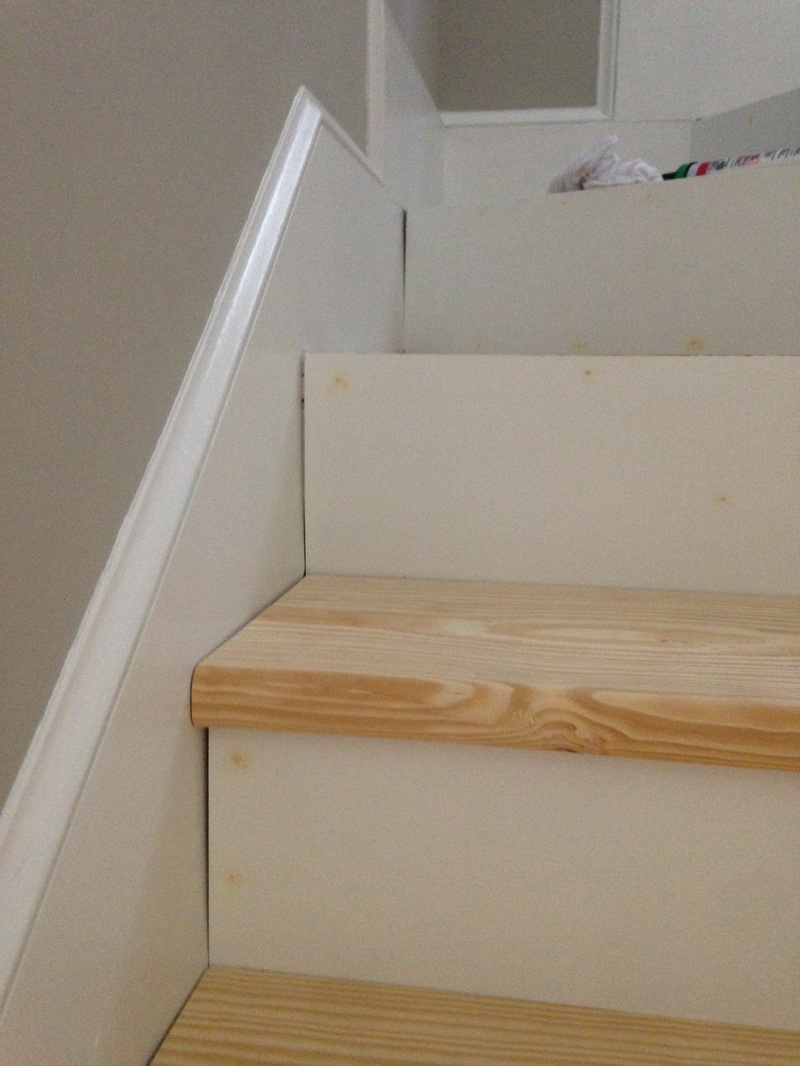
Update 1: Curved stairs. I left the last post explaining how I am creating the curved - or as I was corrected the other day, angled - stairs. Now, since these treads are only 0.75" thick, I needed to double up the fronts to make them appear as thick as the other boards. It was pretty simple. I just ripped a 1.5" wide piece of 0.75" thick wood, glued, clamped, and finished nailed it to the angled tread. I then sanded and routered the edges to make them appear just like the other treads. 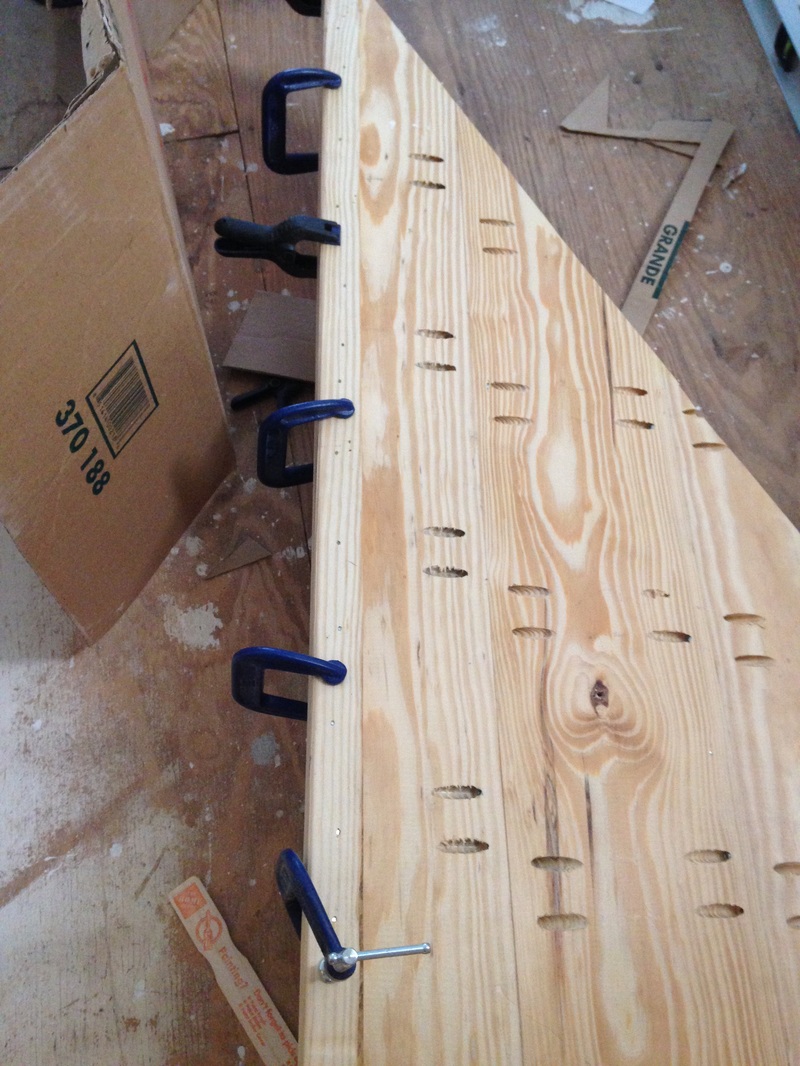 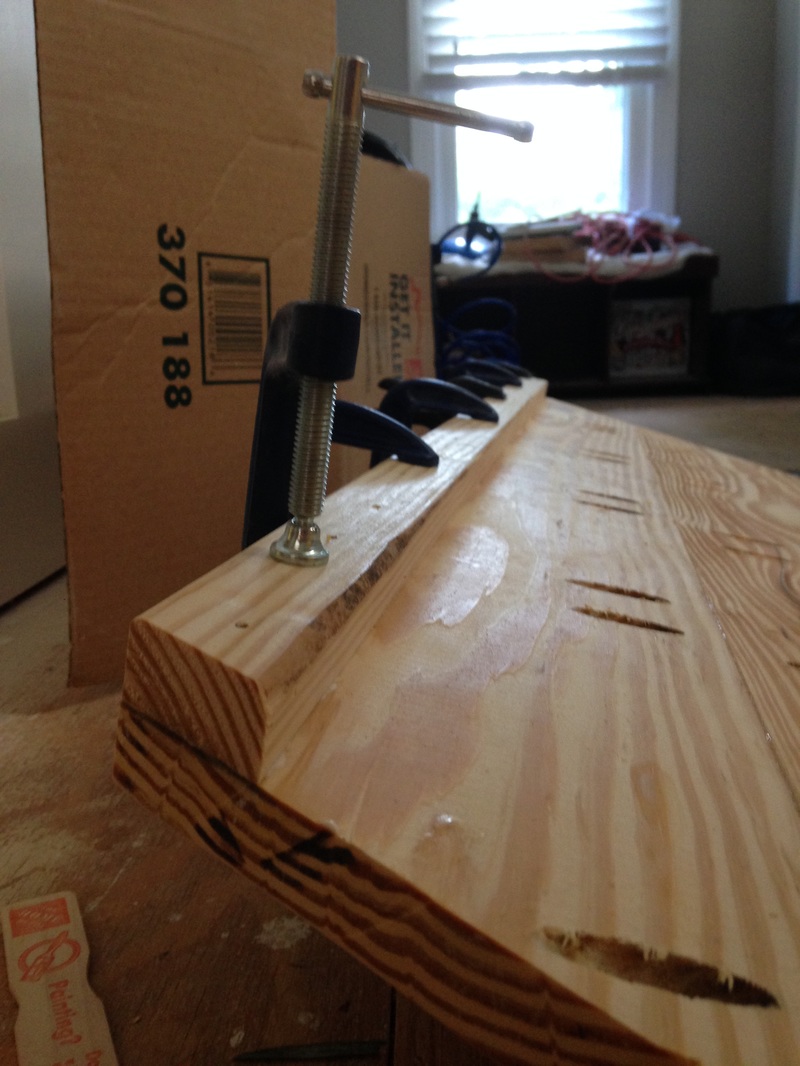 Below, you can see how skinny the angled boards are compared to the straight treads.  Gluing and clamping the new bottom lips on. 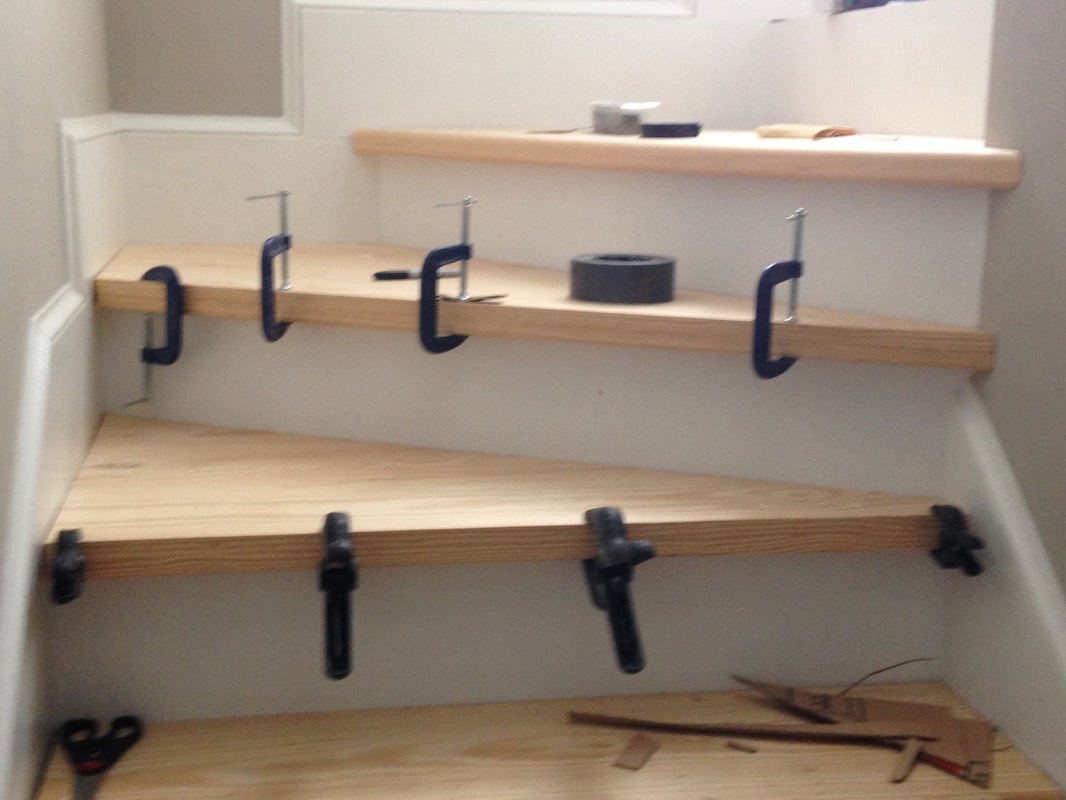 Can you even tell which ones are the 1.5" thick treads and which ones are the "pretend" 1.5" thick treads? :) 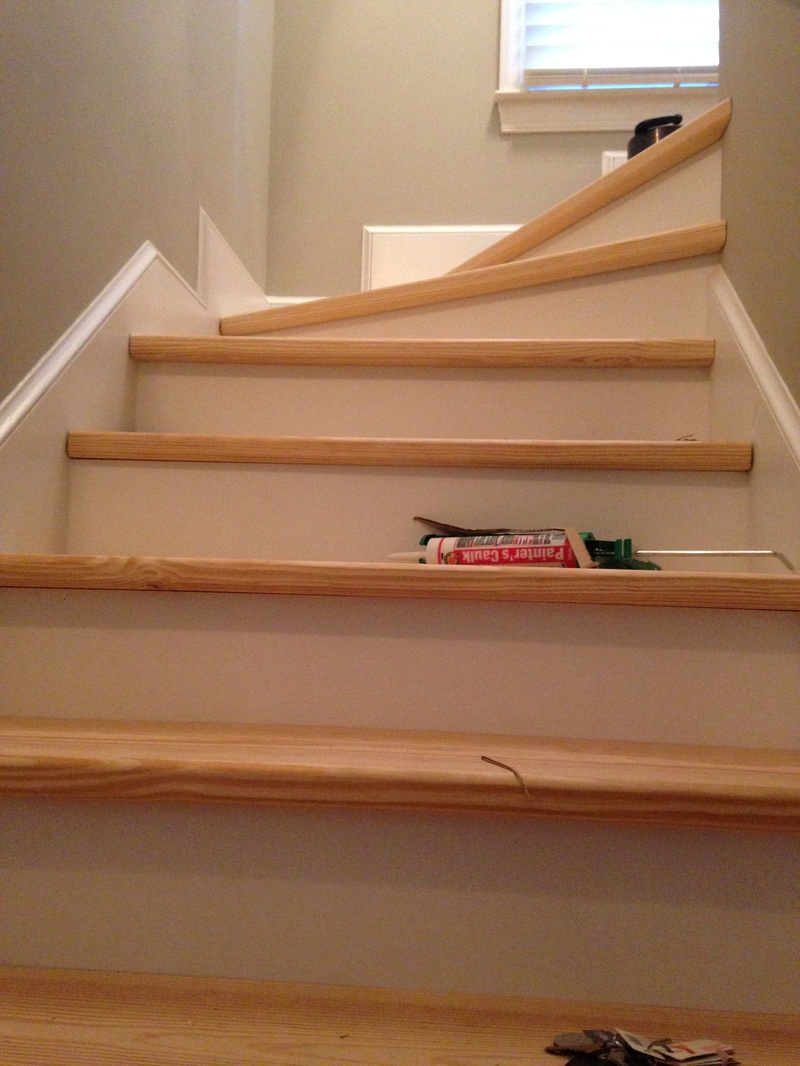 After staring at my beautiful work for a long time, one thing started to bother me. The third angled tread kind of.... stuck out... a bit along the wall. See below. 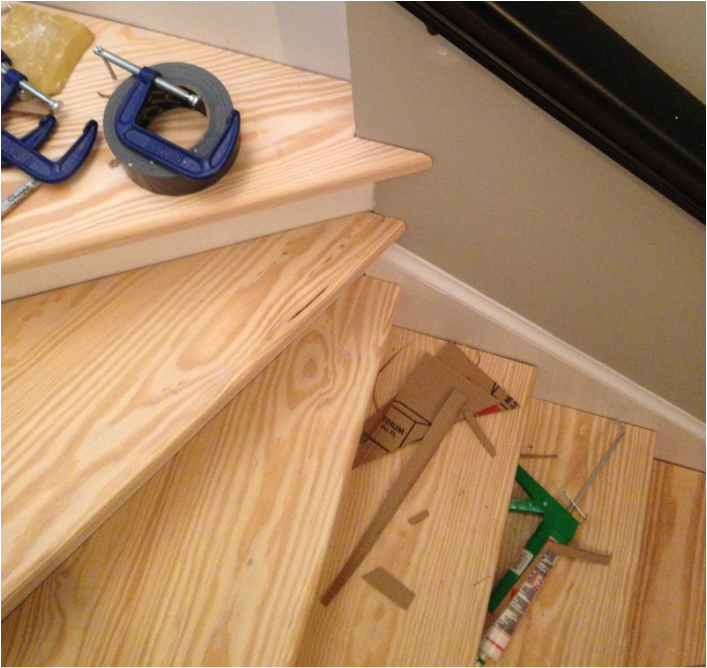 I decided to lop of about a half-inch of the end, router it a bit, and then place it back. I'm much happier with this look than the previous, but it makes me want to adjust the tread right below it as well to give those stairs a more cohesive look. 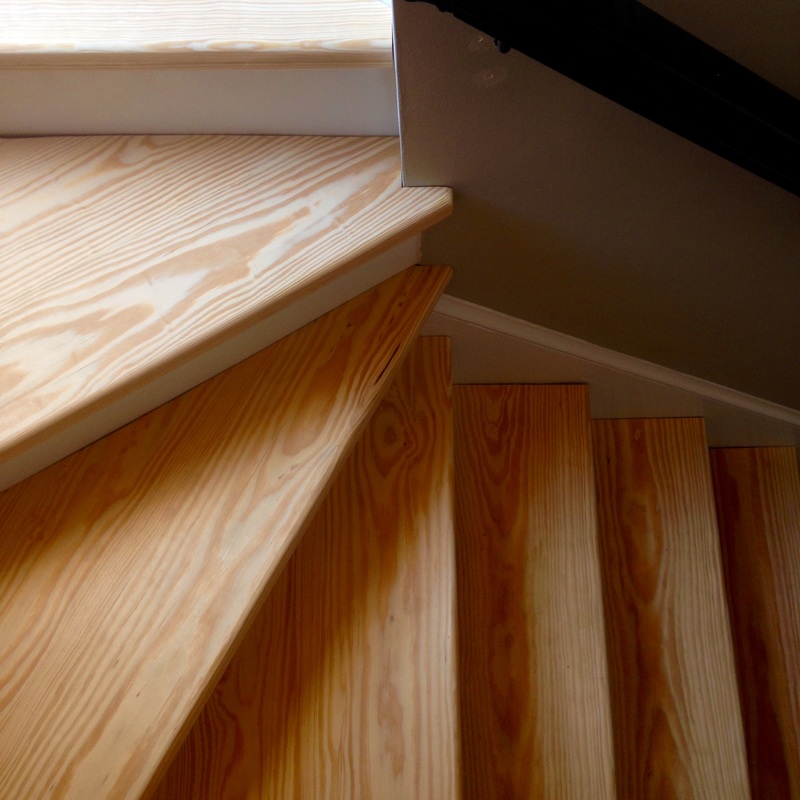 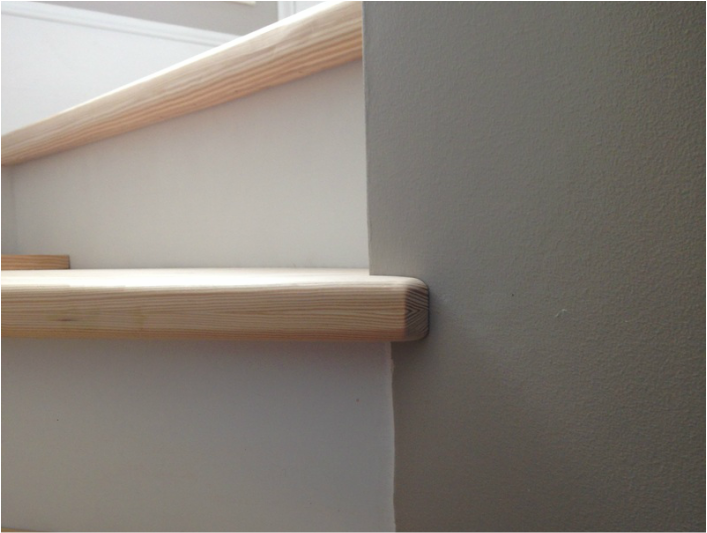 Update 2: Semi-Reveal. These posts have been a little long winded, so I figured I'd recap what the stairs used to look like compared to what they look like now. 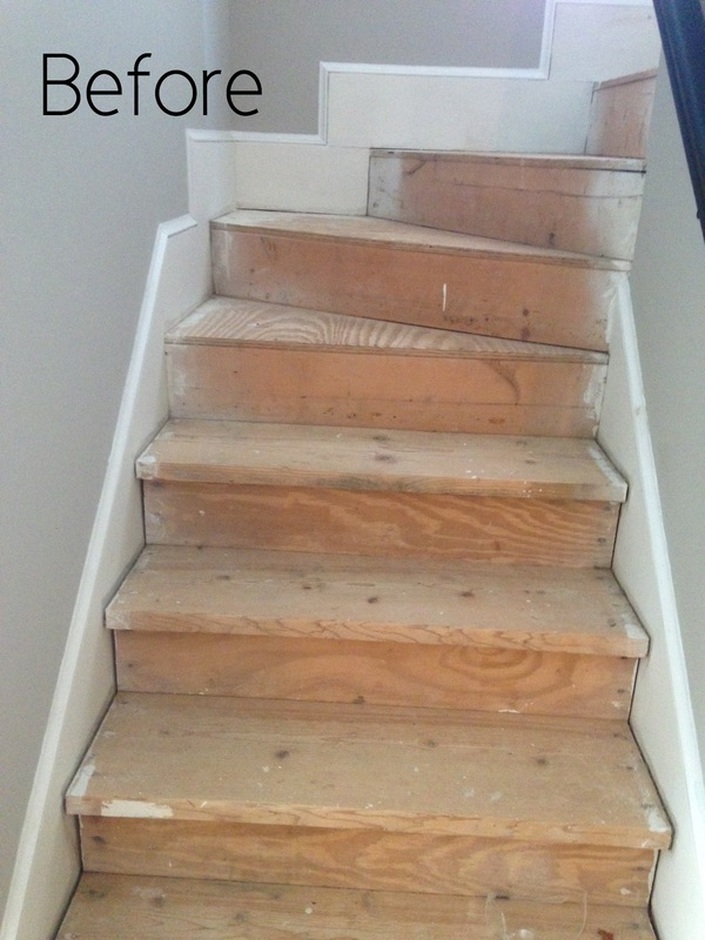 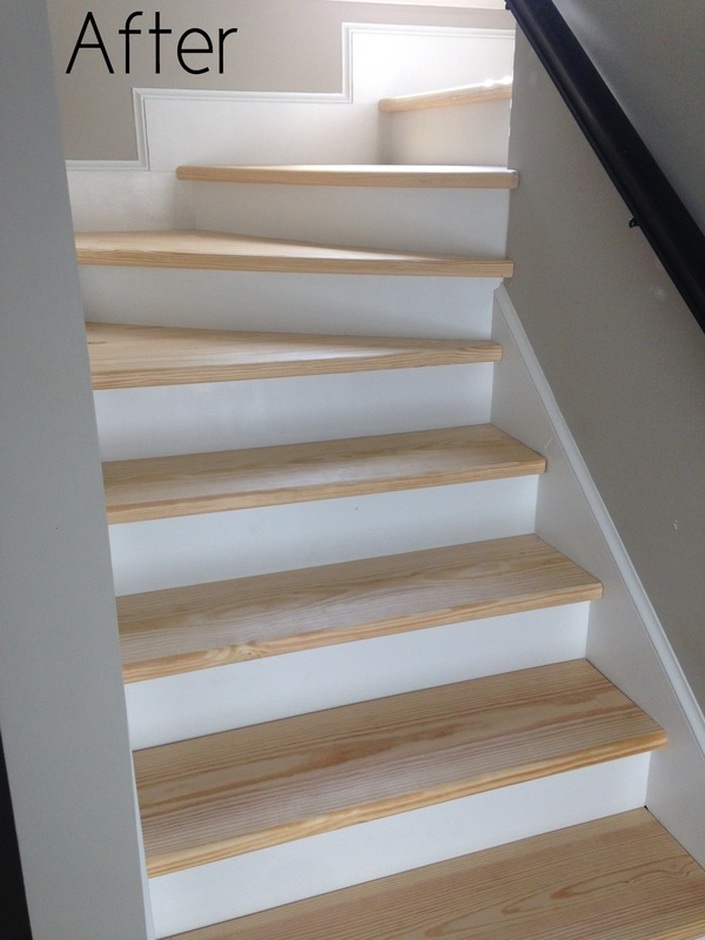 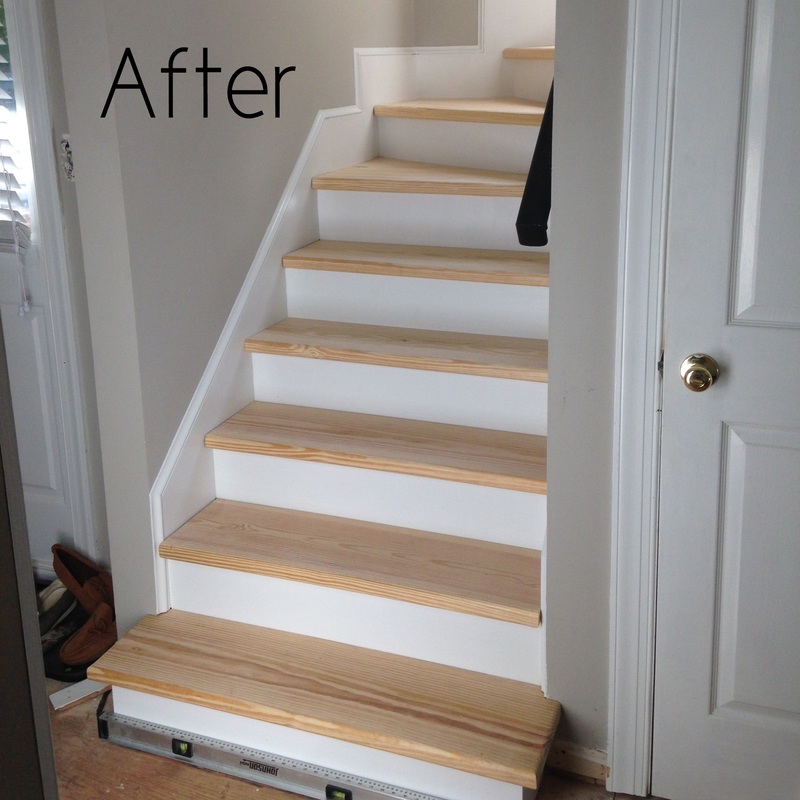 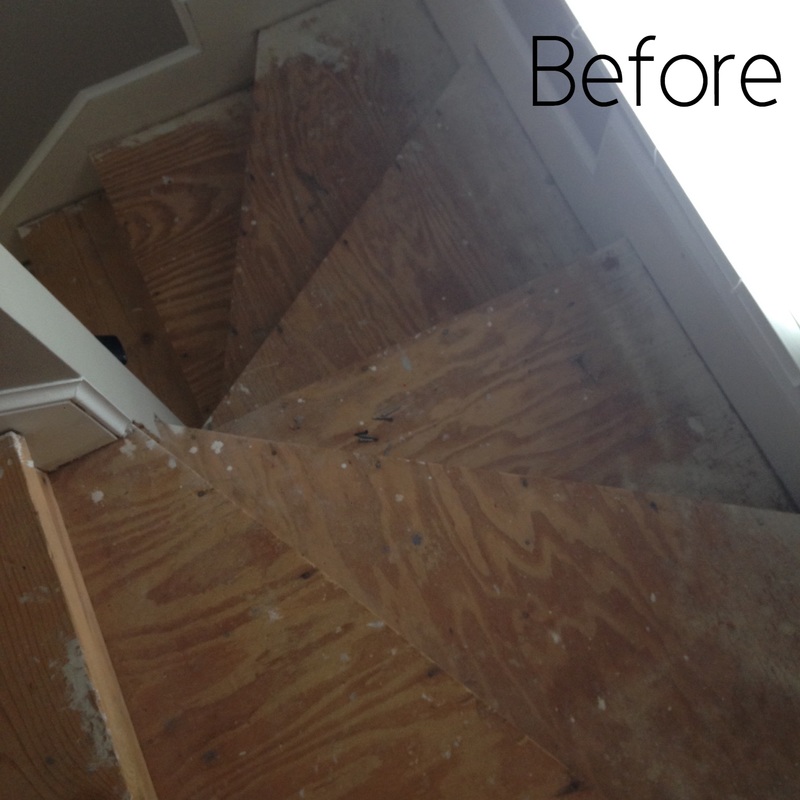  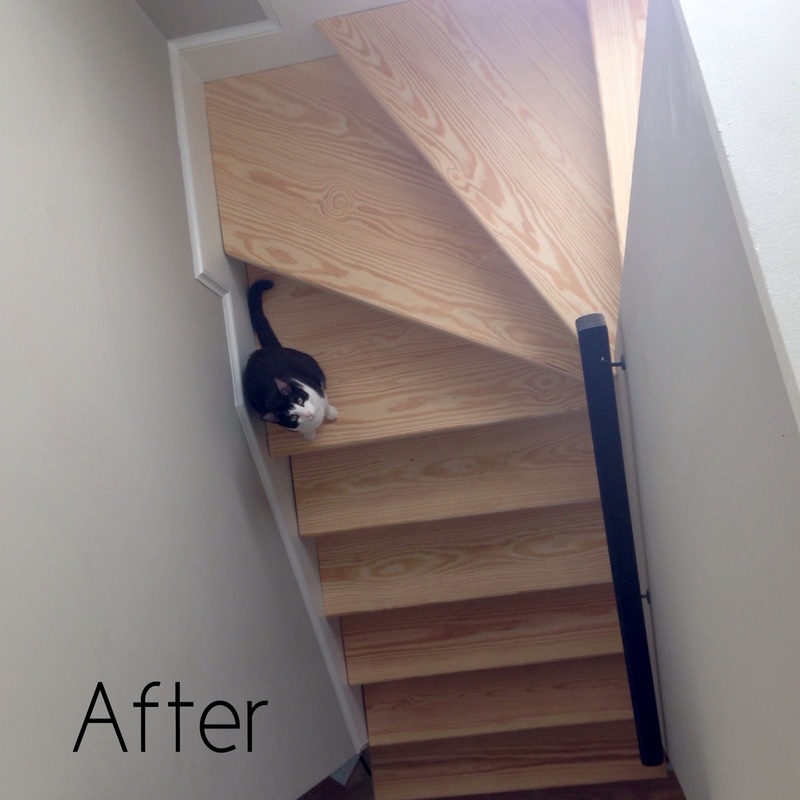
2 Comments
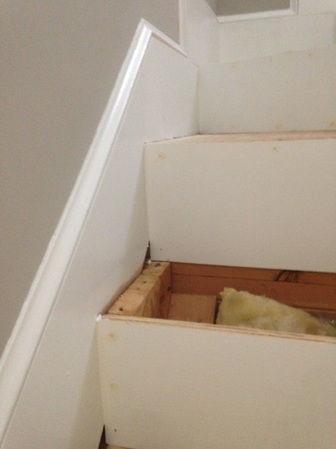
Update 1: Risers. For the treads that were being completely replaced, the risers were also replaced. I used 3/4" sanded plywood, painted them white, and heavy-duty glue and nailed them onto the stringers. They look great! For the risers that go around the curved stairs, I used 1/4" luan. I was initially thinking I would use 1/2" plywood, but am glad I went with the luan. I had a lot of scrap around in my basement that worked great (and kept the costs down). Again, I painted them white and glued and nailed them onto the existing plywood risers.
I filled in the nail holes with wood filler and caulked the edges to give the risers that "finished" look. I slapped on one more coat of paint and the risers are finished! 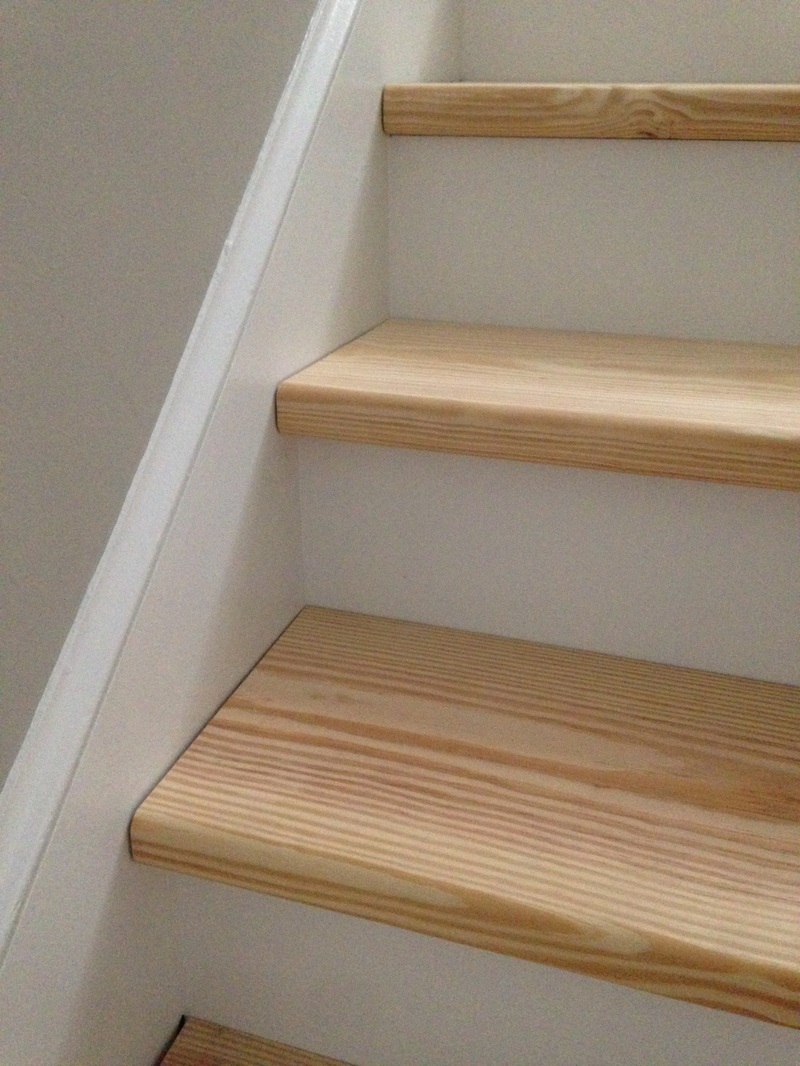 Update 2: The Curved Stairs (Part 1). These are definitely the most stressful (and expensive) part of the stair replacement process. It took me a while to figure out how I wanted to approach this project, but the first thing I did was create a template. Yes, I made it out of dusty old cardboard moving boxes. It was fun. The template isn't perfect, but I dealt with the imperfections later by scribing the wood to the riser. 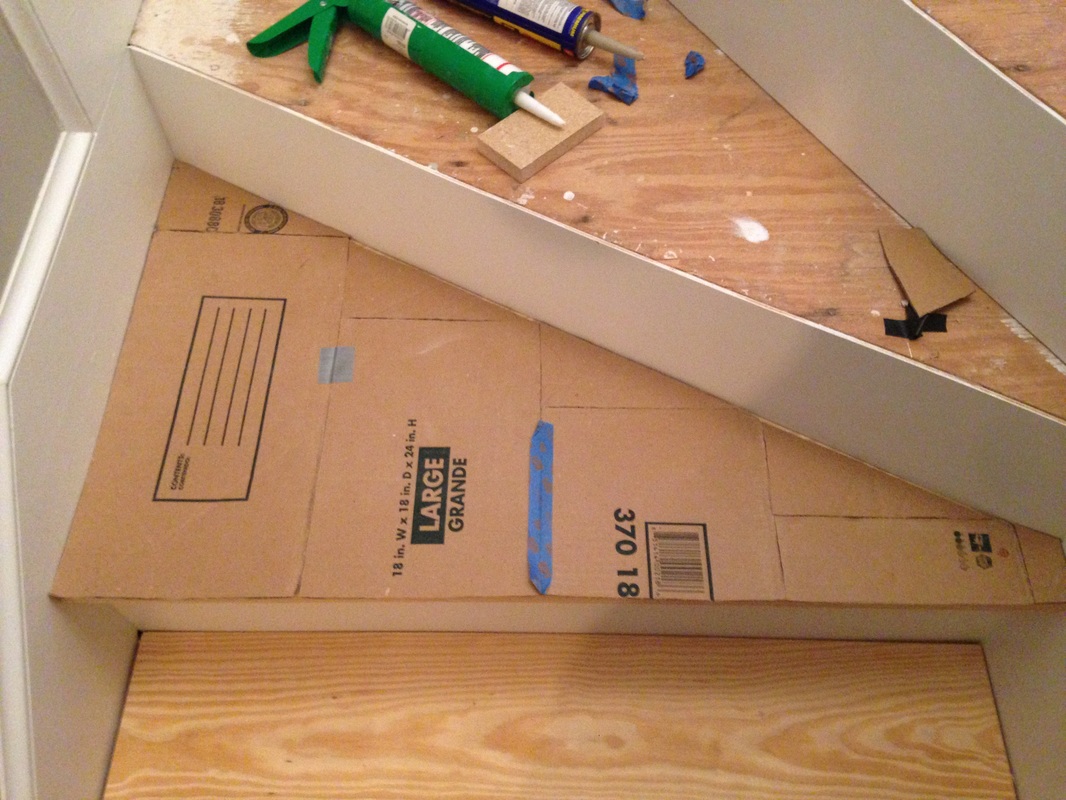 Next, I hit my first dilemma. I should stress that I am not replacing the plywood treads that are there currently - I am simply placing wood on top of the plywood base. According to my dad, stairs should rise 7.5", but could go as high as 8.25" (but really not any more - even 8.25" is high). Currently, from tread to tread, I have an approximate 7.5" rise. Since I am not replacing the existing plywood, by placing a piece of wood on top will increase the rise. Hmmm... what to do. I knew immediately that I could not use the 1.5" thick wood I have been using for the rest of the stairs - it would make the rise too big. Instead, I used basic 1"x8" (really 0.75"x7.25") pine lumber. This increased the rise to just under 8", which is within the allowed amount! Yay! Then, I cut the pieces down to create a makeshift triangular tread, like so: 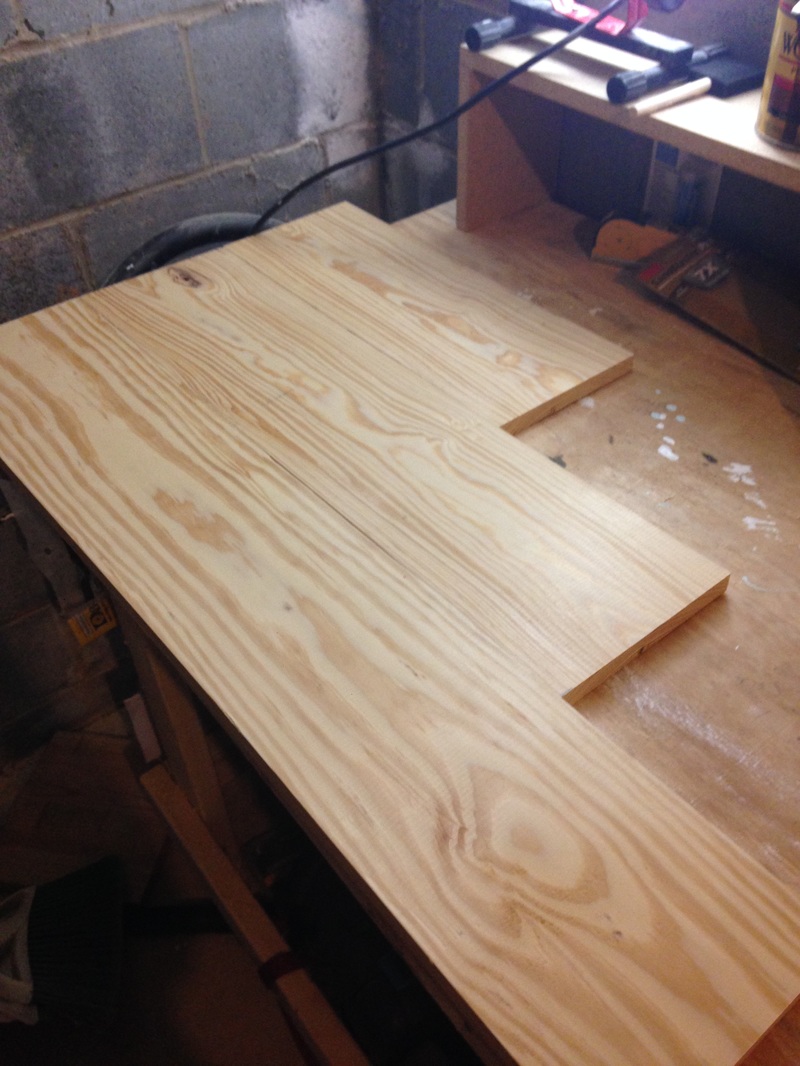 Next, I broke out my handy Kreg Jig and cut pocket holes in the back to attach the boards together (with wood glue as well). I then sanded the seams and filled in any small cracks and holes with wood filler. 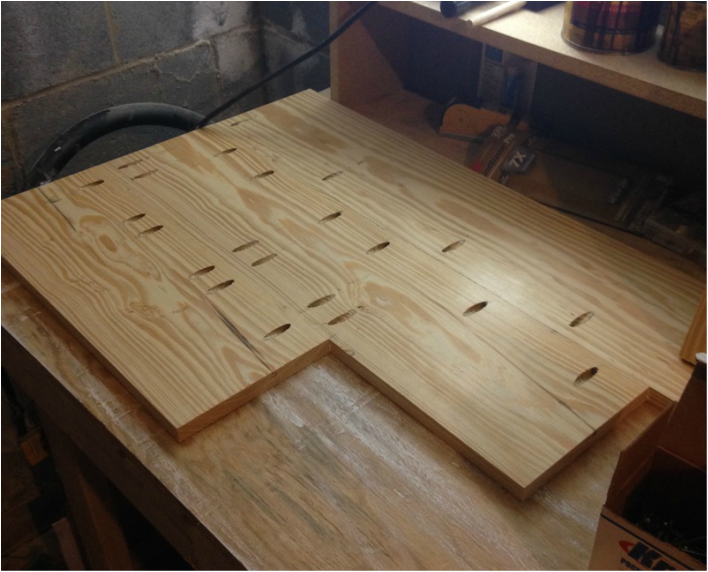 I then used my template again to trace the lines onto the wood. I tried my best to rip one straight line on my table saw. 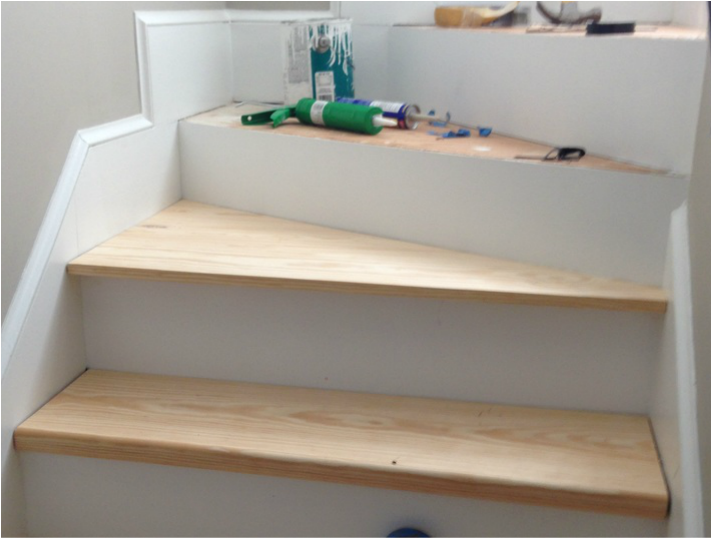 The cut wasn't perfect, so I went ahead and scribed the wood to the riser, and cut it again. 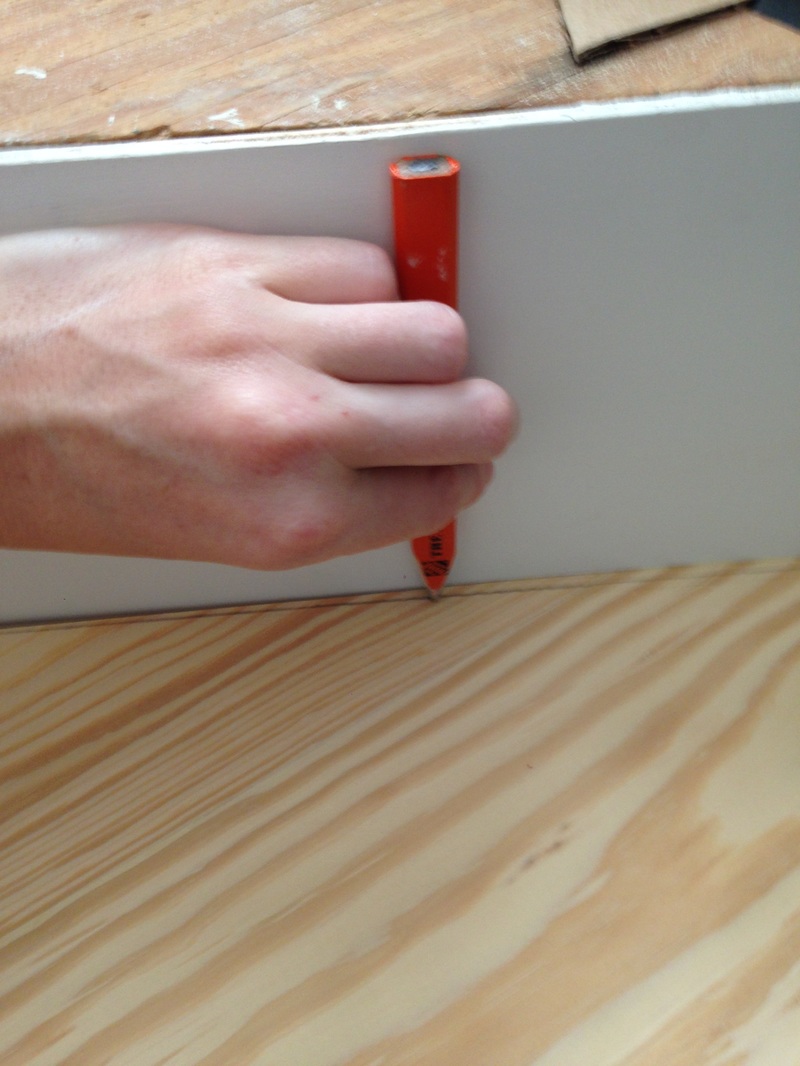 It didn't end up being perfect, but as I've learned through this process... caulk solves lots of problems! 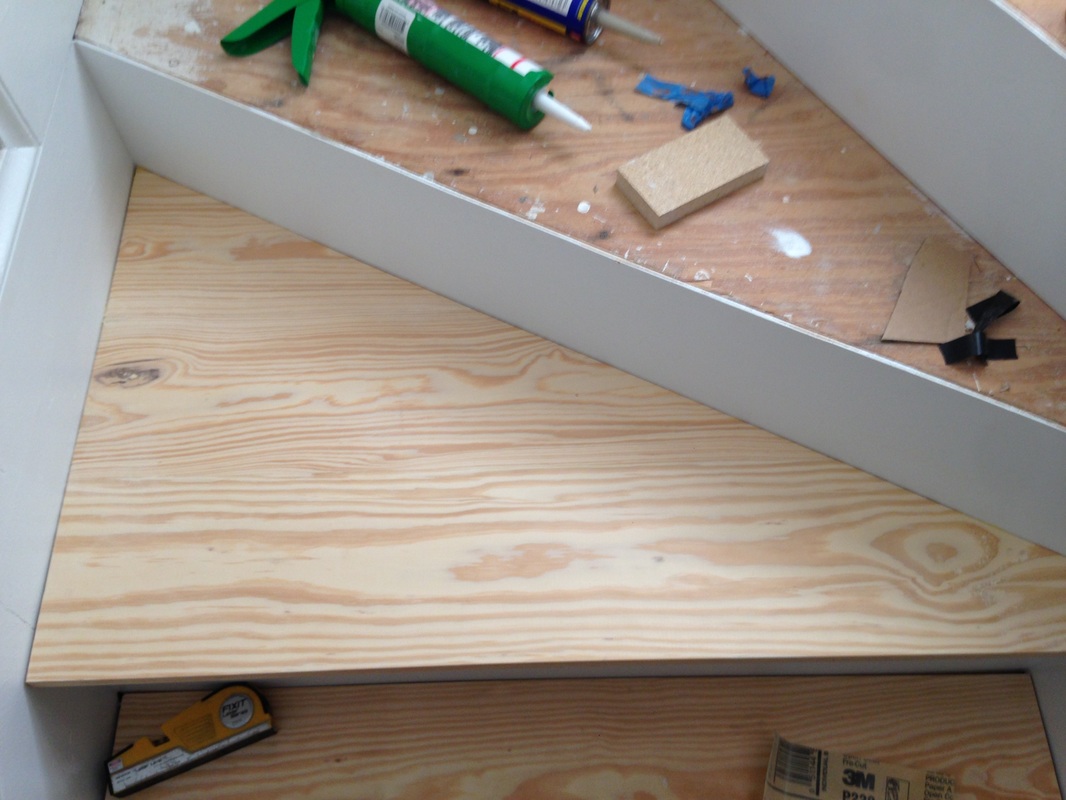 The last part of the process is making the front appear to be 1.5" thick, like the rest of my treads. There was a simple solution - create a "lip" on the front of the tread with another piece of 0.75" thick wood. It would give the tread the illusion of being 1.5" thick, even though it really isn't. Brilliant! I haven't done this yet, but in future posts!
This will just be a quick update on the stairs. So far, there has only been one surprise besides my missing stringer: the treads of my stairs are attached to the riser behind them with nails. Didn't see that one coming, but does reinforce the idea that the third stringer may not actually be necessary. Update 1: The routed edge of my stairs. I'm not sure what bit I used as it was already attached to the router when I picked it up, but it worked perfectly for my stairs. I routed both the top and bottom of the tread for a semi-beveled look. On the first stair only, I routed the exposed left and right edges as well. Shout out to Carolyn and Garland for letting me borrow the router again! 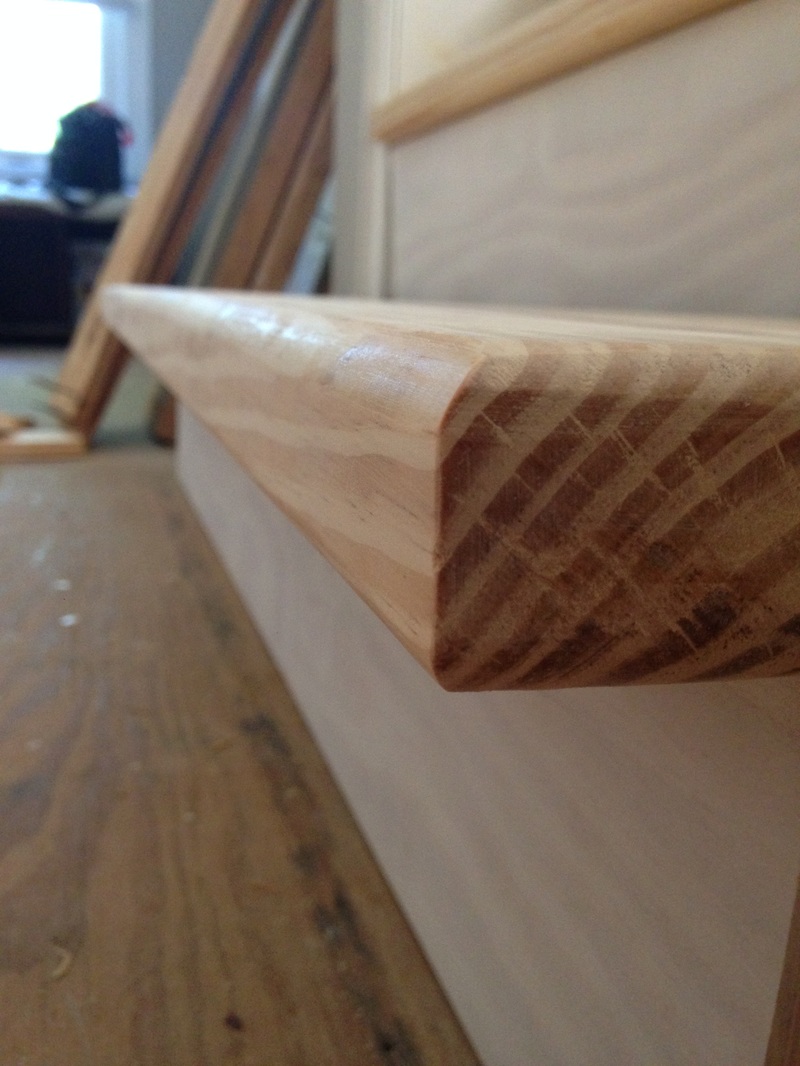 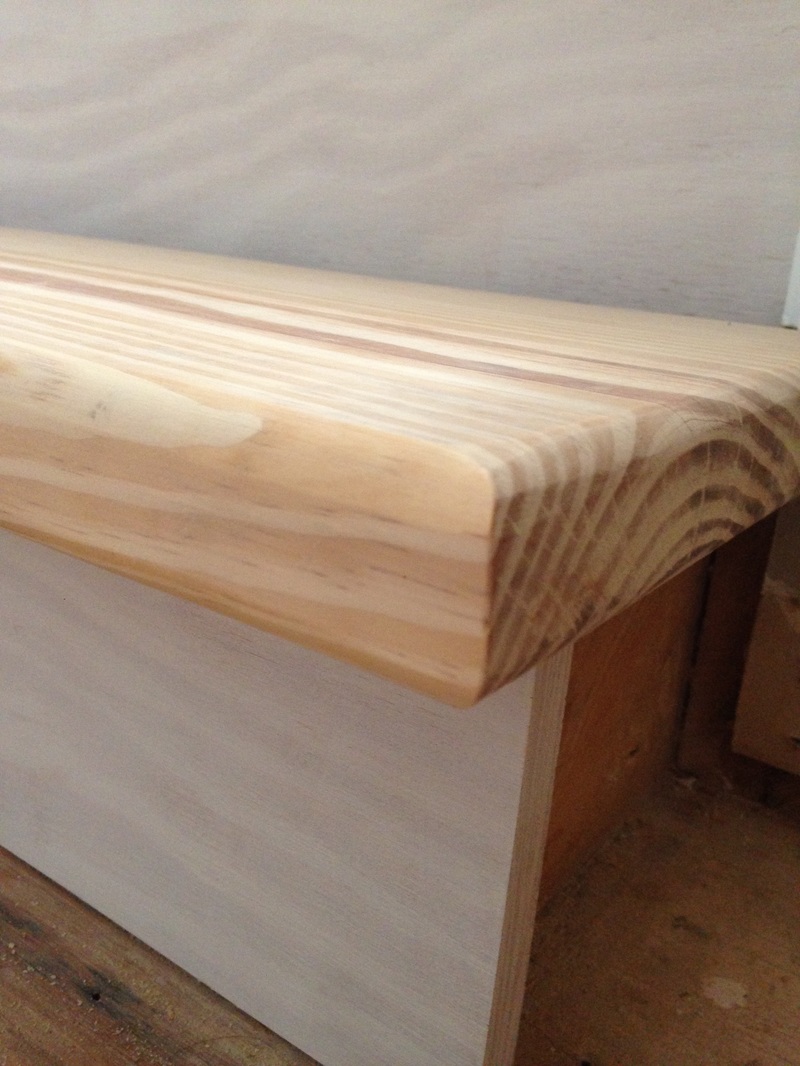 Update 2: New risers. Every tread that isn't curved is getting ripped out along with their attached riser. I decided to replace the existing risers with 3/4" sanded plywood, which I sanded down again, oil primed, and painted white. In order to complete this part of the project, I bought a 4'X8' piece of plywood, had the guys at Lowe's cut it into four 2'X4' pieces, sanded and painted each piece, then measured each riser individually. I then ripped the plywood using my Dewalt table saw to the dimensions I needed. Each riser is just slightly different, but should be relatively close to 7.5". The picture below shows the dry fit of the oil primed risers. 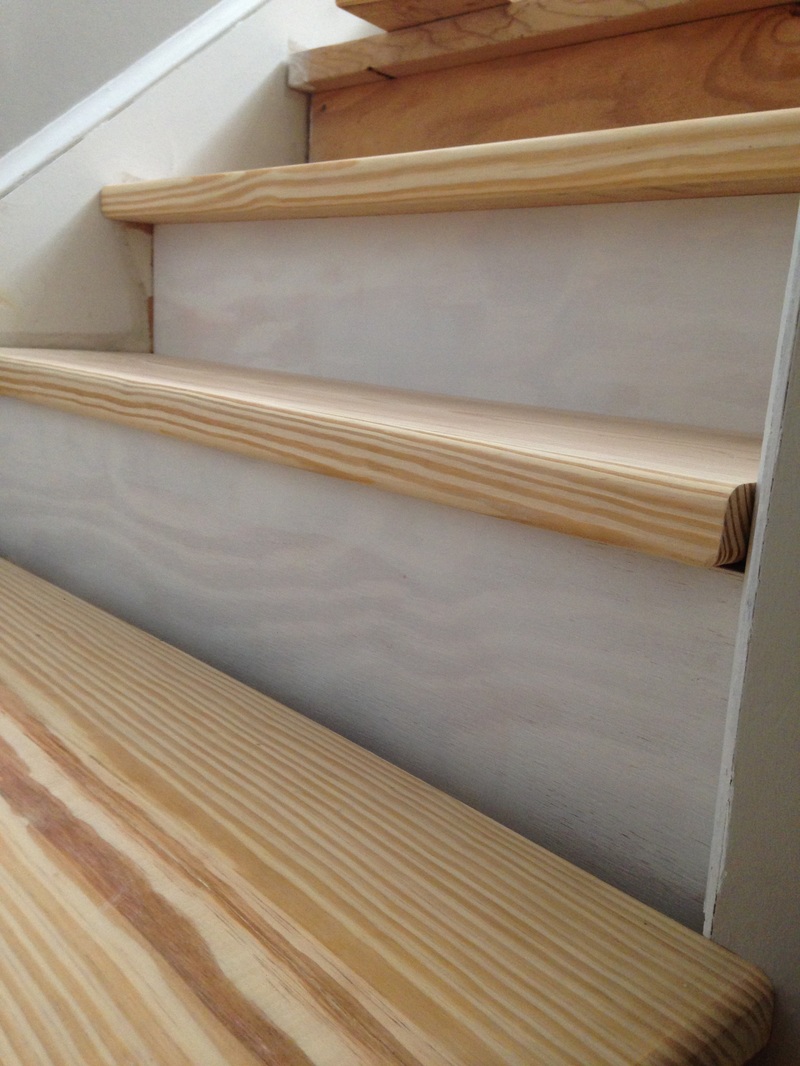 Update 3: Fitting the first tread. You can see in the picture above that the bottom tread has a nice gap between the wall and the riser. This is because this tread overhangs on each side by 1.5", and thus hits the wall before hitting the riser. Today, I measured and cut little rectangles out of the sides to make it fit. You can see below that my first attempt was close, but not quite snug. I trimmed off a bit more and now it fits great. 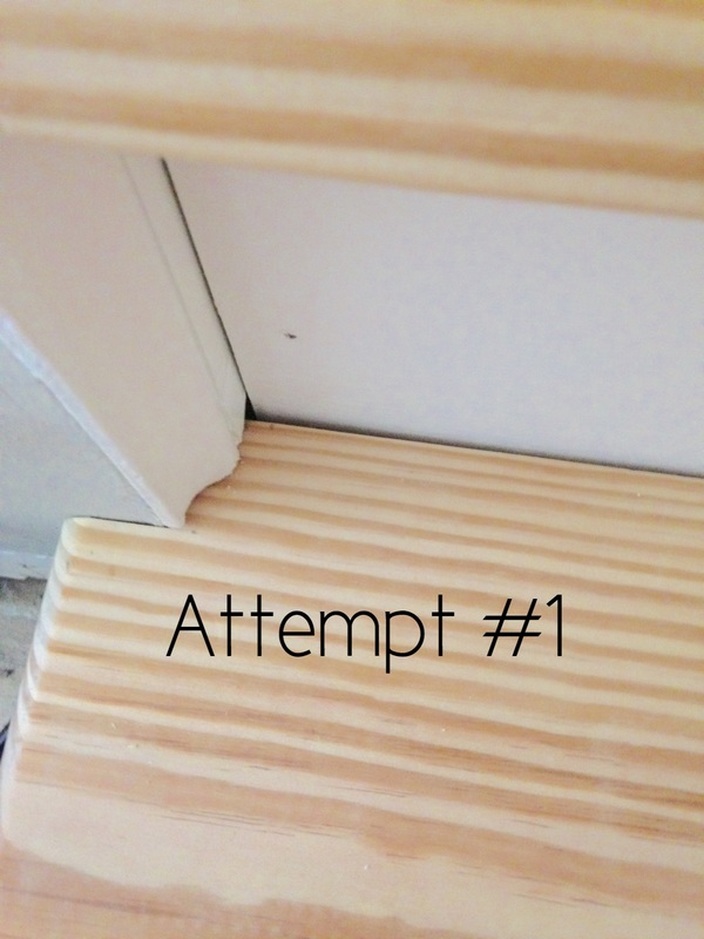 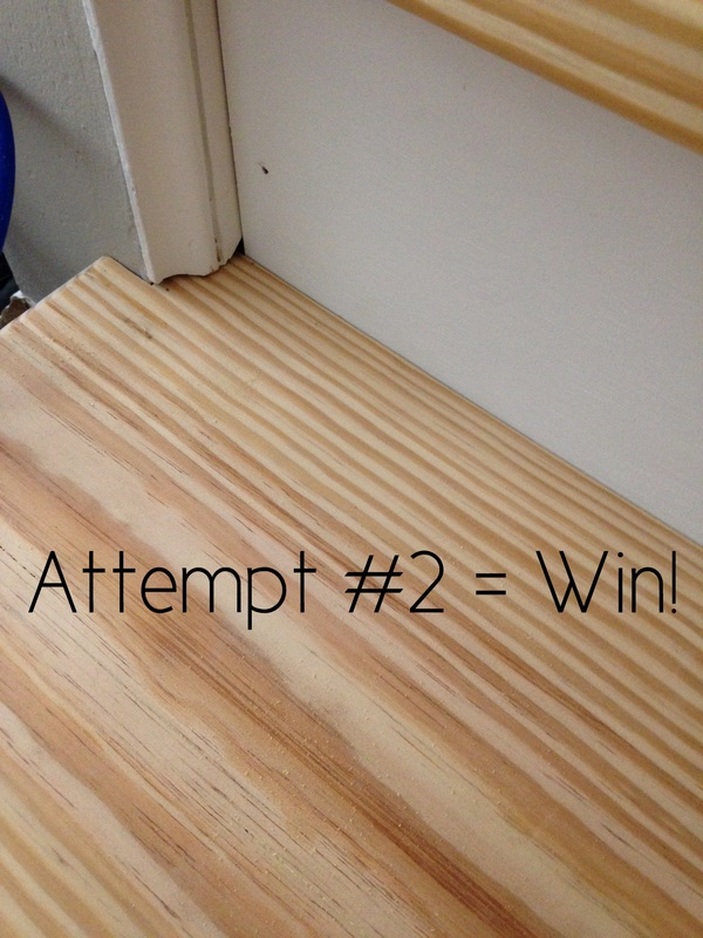  So let's talk about pine real quick. Everything I have used in my house so far is made out of pine. When finishing the wood, however, pine is a real pain. You can read all about why pine is this way on Google, but in a nutshell, pine is a soft wood that absorbs stain differently from grain to grain. Take a look at the picture below as an example. 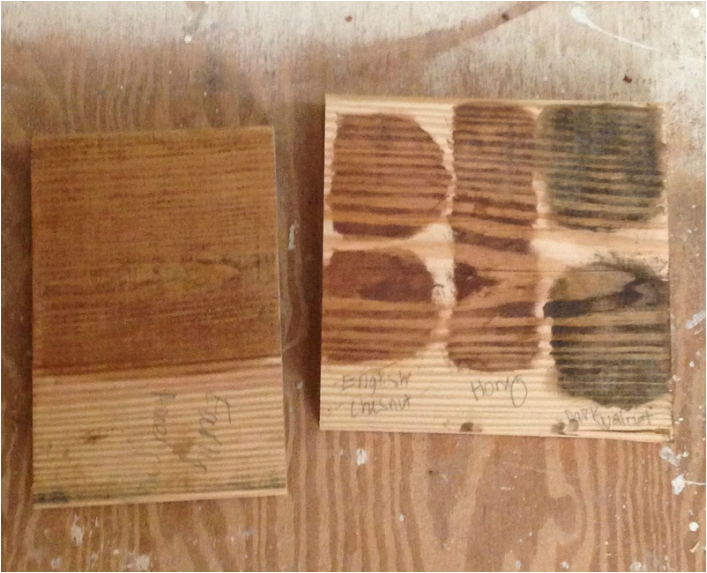 Look at all those lines and the blotchiness! YUCK! The stain on the far left is Early American, which clearly looks like it has soaked into the pine the best. The other three are English Chestnut, Honey, and Dark Walnut (all Minwax). I'm in the process of testing stains for my stairs (yay!), but when I slapped these on the pine and saw the result... I cringed. Thus, we enter the pre-stain conditioner. 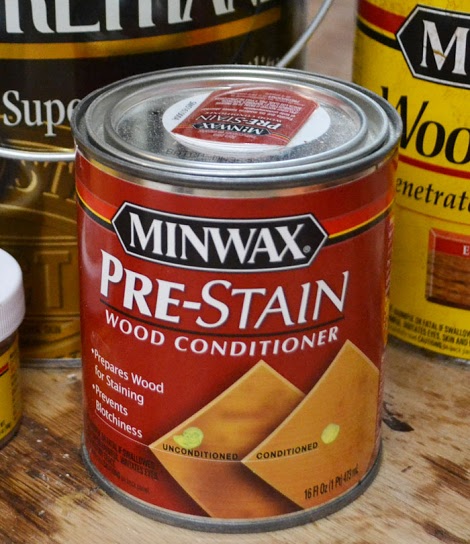 This stuff is great. You just put it on with a rag, brush, or foam pad, let it soak in, and after 10-15 minutes, wipe off the extra. Then, put on the stain. Look at the difference! 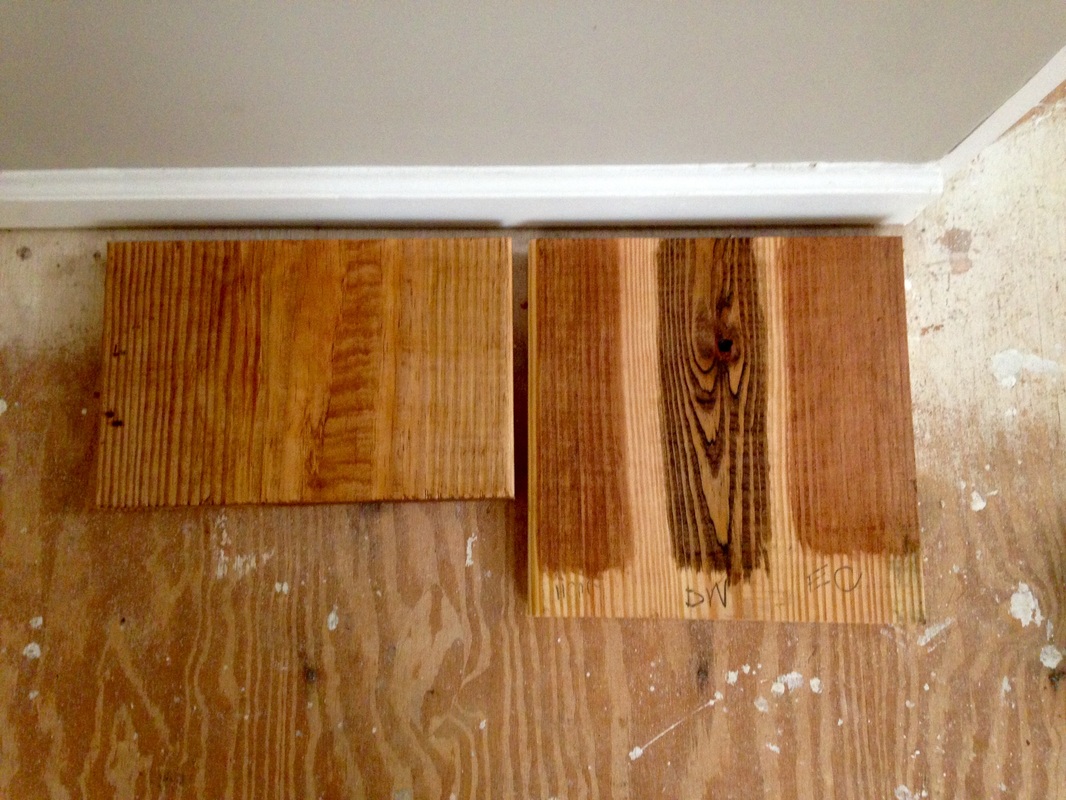 Lesson? Use pre-stain conditioner on your pine! It will make all the difference!!!!!!
If you haven't heard by now, I sent my flooring back to the manufacturer to be tested for formaldehyde. No, I did not get it from Lumber Liquidators, but another flooring store in town (which has been nothing but awesome through this process). Until I get word that the laminate is good-to-go (the manufacturer has been dodging my flooring store's calls and emails for the past month), I can't work on my poor floor. In the meantime, I have decided to tackle my stairs. 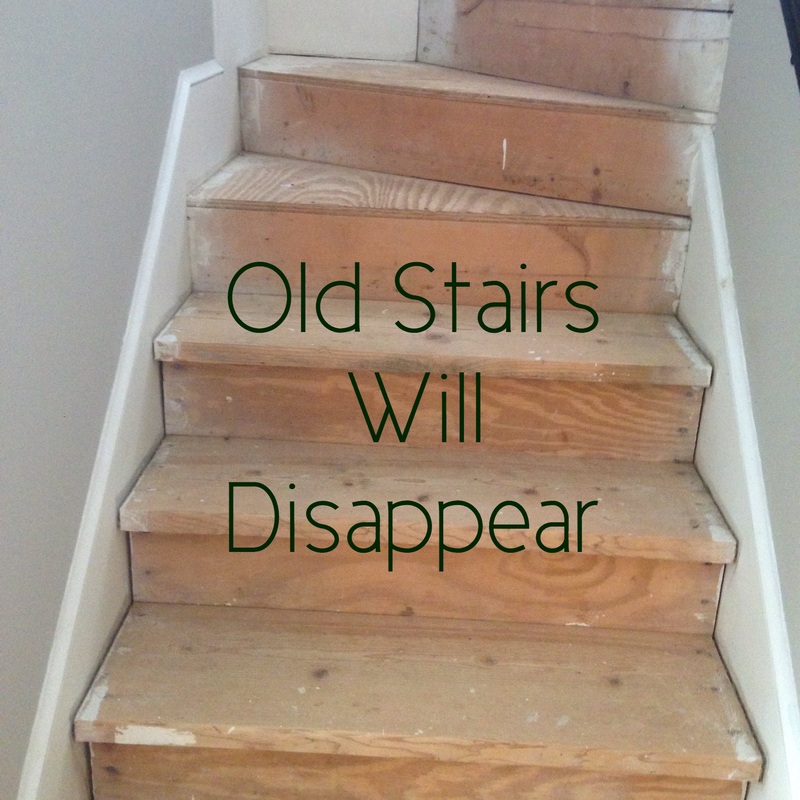 I've been wanting to start the project for a while, but honestly have been a bit intimidated by the idea. The other day, however, I was bored and had the urge to tear shit up, so I started hammering at my stairs. FYI - stairs are a bitch, but soon they will be my bitch. 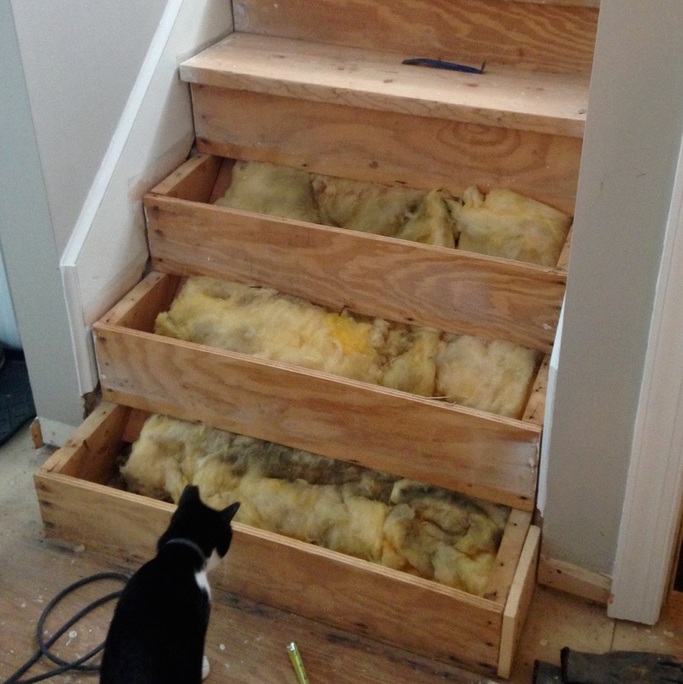 I've learned that there have been a lot of strange building techniques that went into my house (and by strange I mean wrong), including the stairs. Quick lesson - the things that your stairs sit on are called stringers. You're supposed to have three (one going down the middle and one next to each wall), however you can clearly see I'm missing my middle stringer. Fabulous. I'm not worrying too much about it because, honestly, if my old stairs worked fine without it, then so should the new stairs. I'm going simple on the stairs for now, which I know will get complicated soon enough with the curved stairs in the middle. I'm replacing what is there with the exact same thing - 2"X10" pine, and new plywood risers. Simple. The pine you can buy at any big box store. I bought 2"X12"X12' pine, had the guys at Lowe's cut it into three 48" pieces, sanded them down, ripped and cut them to size. 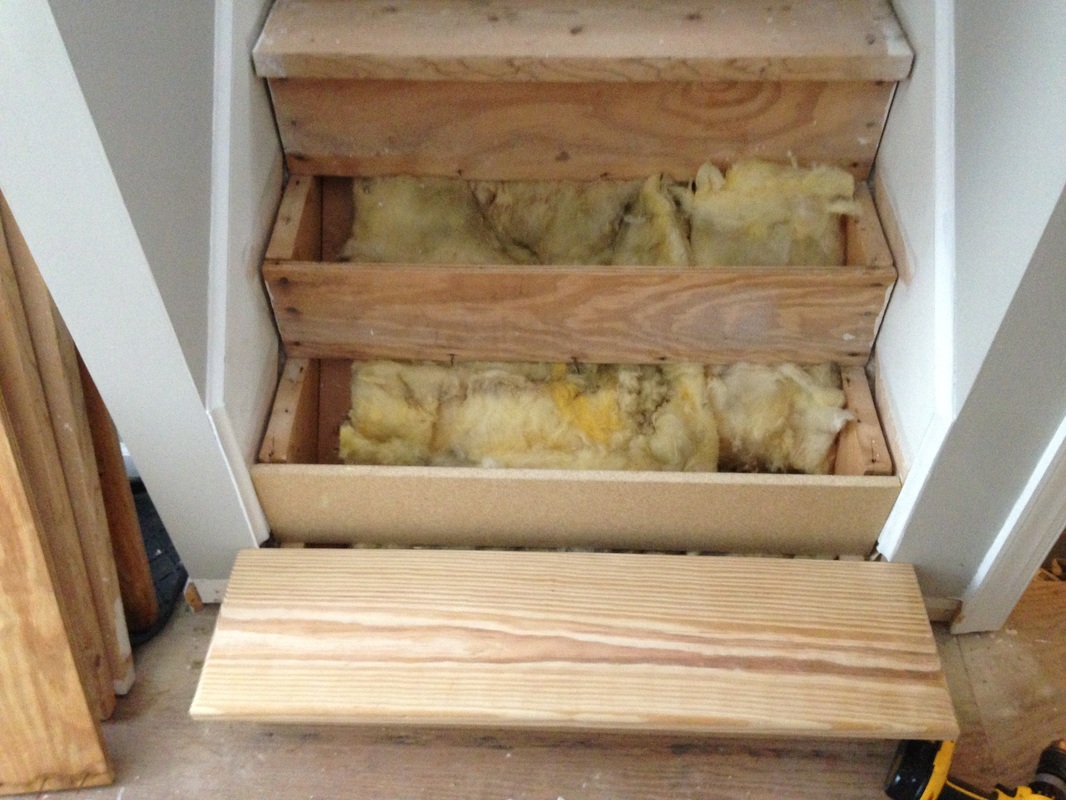 Mmmmm.... look how pretty! I won't go into huge detail now, but I also decided to router the edges for a semi-beveled look (both on the top and bottom of the tread). I think it gives it a more professional look for something that is oh so cheap. 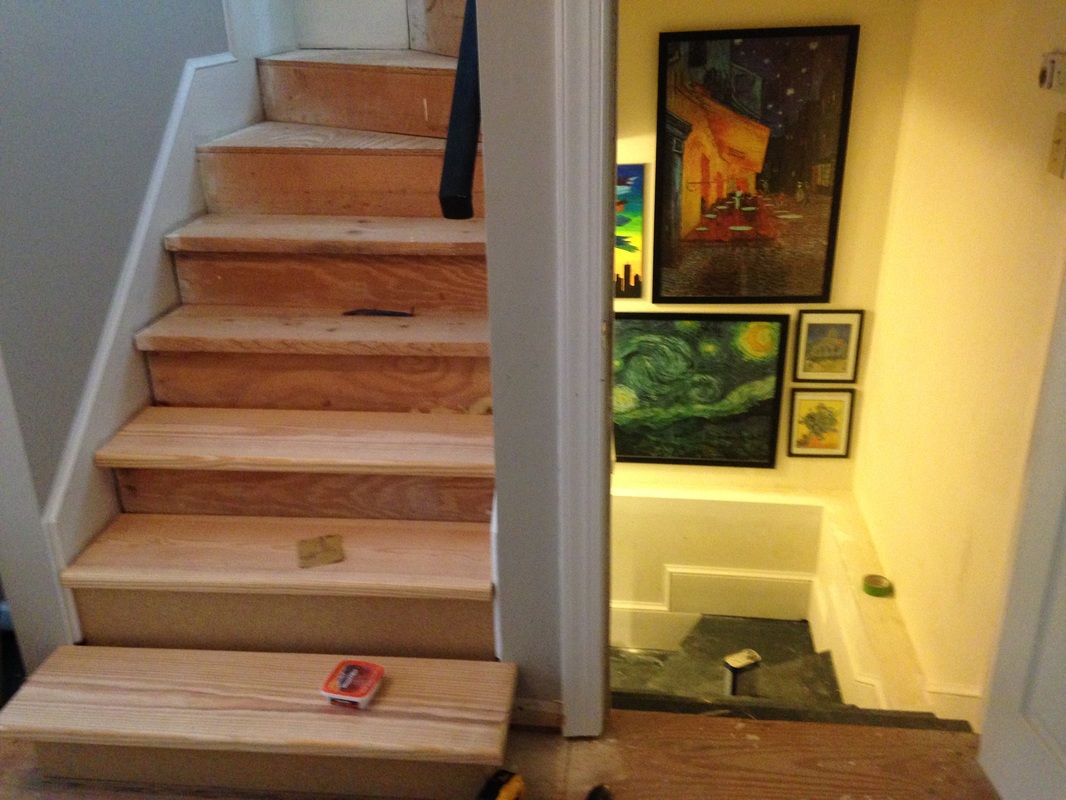 |

about meHi! I'm Lauren! I'm a twenty-something teacher and homeowner in North Carolina. I love math, decorating, and getting down and dirty learning new things about home renovation and repair. Categories
All
Archives
December 2018
|
 RSS Feed
