|
So apparently I never wrote a post about how we framed up the master bathroom. Well, to recap, this summer we ripped down the ceiling in the kitchen when we tore down the kitchen wall. When we removed the ceiling, it exposed the plumbing to the master bathroom. Not like this mattered one way or the other, except that I wanted to gut the bathroom - so this was the time to do it. Pressure was on because we really, really wanted to finish the kitchen, but that could not be complete until the master bath was replumbed. 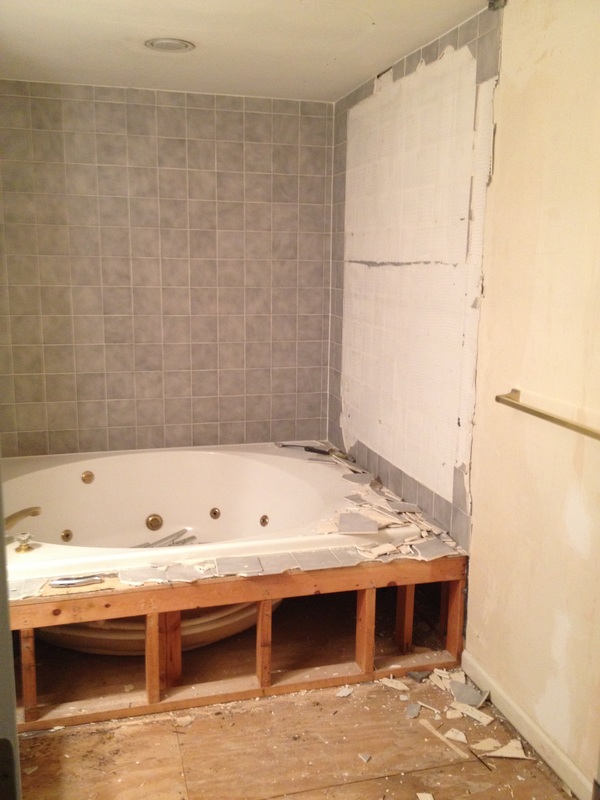 First on the list was to remove the old garden tub. Thanks to my awesome students, that was easily accomplished. Check! Next, we had to figure out some sort of layout. I went back and forth on this for a while, but finally decided to move the toilet across from where it was originally (and now behind the door), install a double vanity, have a smaller stand-up shower, and a relatively large closet (where the tub used to be). 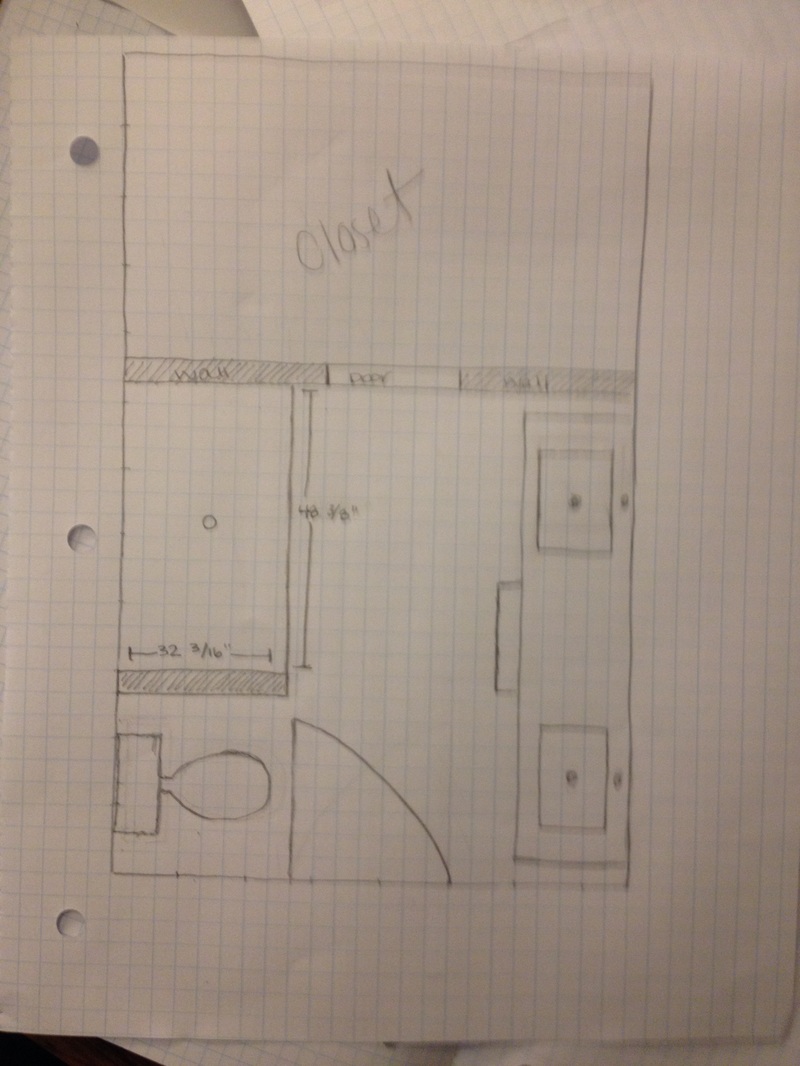 My dad was really the one who convinced me to go with a double vanity. He said, poignantly, it was better for resale. On a plus side, it could actually work in this space. The downside - the toilet is behind the door when it opens. Hopefully, however, no one is opening the door on you when you are using the golden throne! Since we gutted the bath, it was time to put it all back together. We now had my makeshift frame, so Brian and I put Terry to work to help us get the framing done. I was skeptical about putting the closet in the bathroom, however I'm really happy we decided to because it helped support the ceiling in the space. For real - framing up that wall alone raised the ceiling by about 2 inches! Yikes! 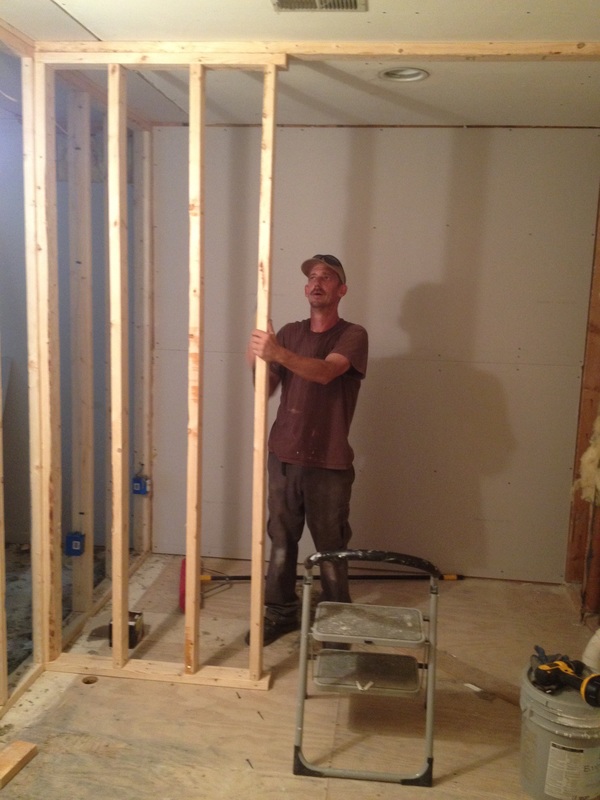 We were originally going to go with a pocket door (I bought the kit and framed the walls accordingly), however after some chats with my pops and his insistence on the walls being perfectly level (or else it is the worst experience in the world), I've decided that a barn door might work better. 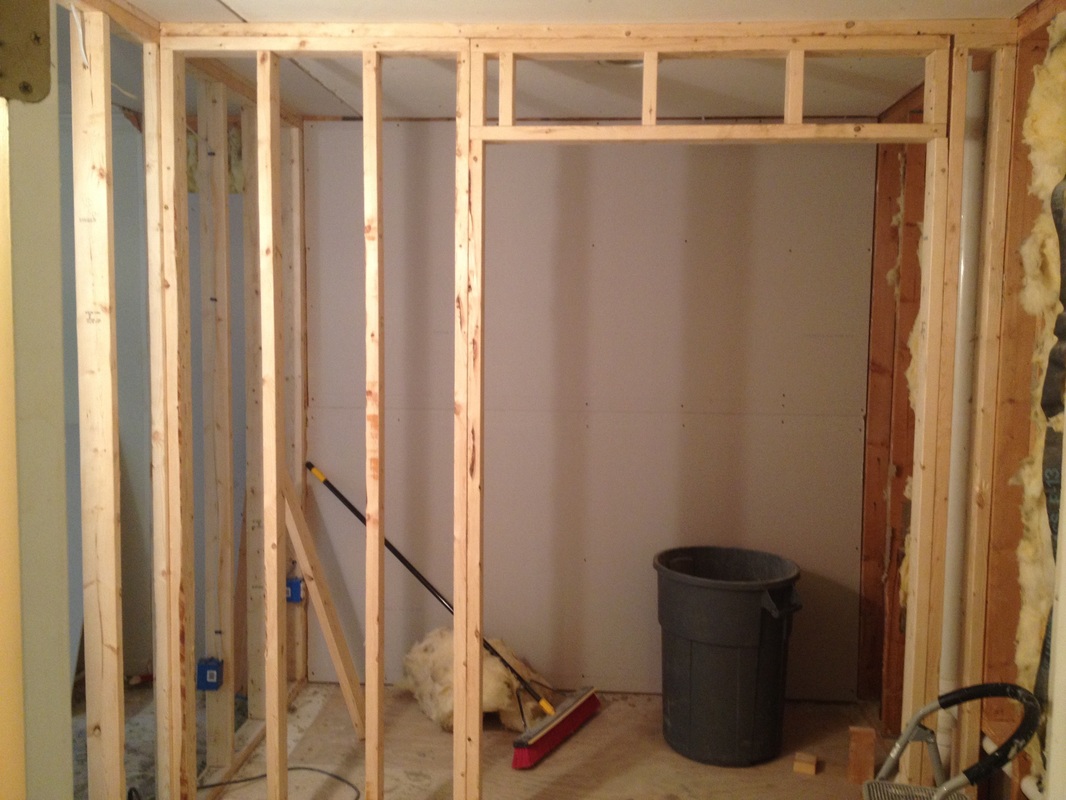 The bathroom stayed like this for about 2 months until the shower pan came in the mail. Tim-the-plumber then came in and replumbed the entire space. He moved the toilet from one side of the room to the other, and plumbed the right wall for my double sinks. (Tim also "forced" me to make my DIY double vanity so that he could get the measurements right.) Once he was satisfied that nothing would leak, Brian and I continued framing in the shower. 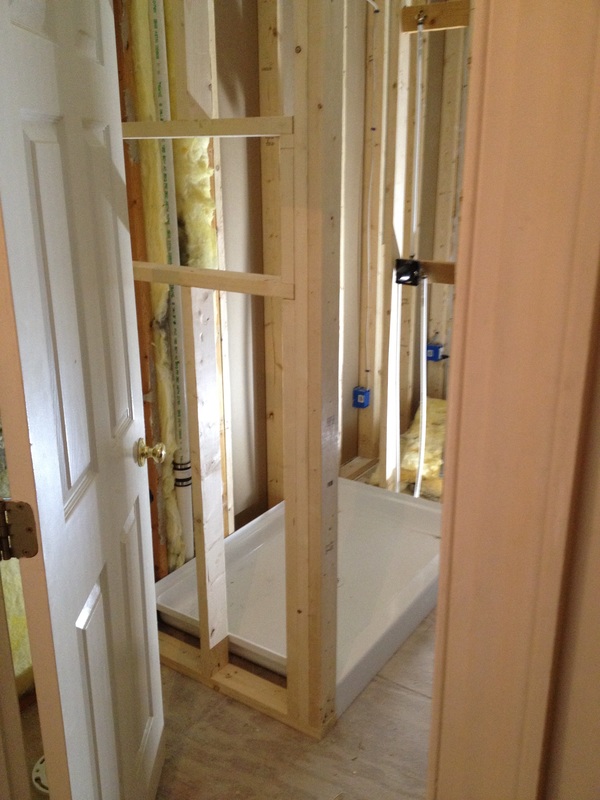 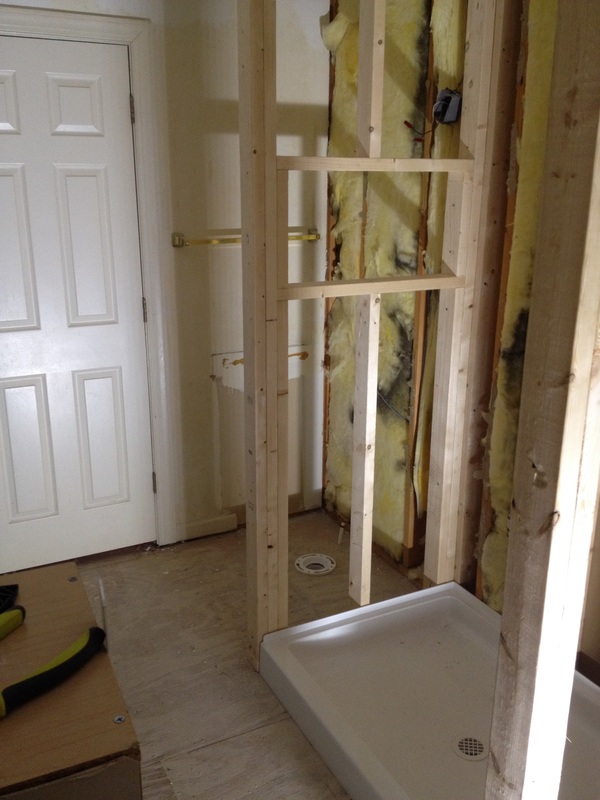 Below is a view from the toilet area, looking at my almost finished DIY double-vanities. 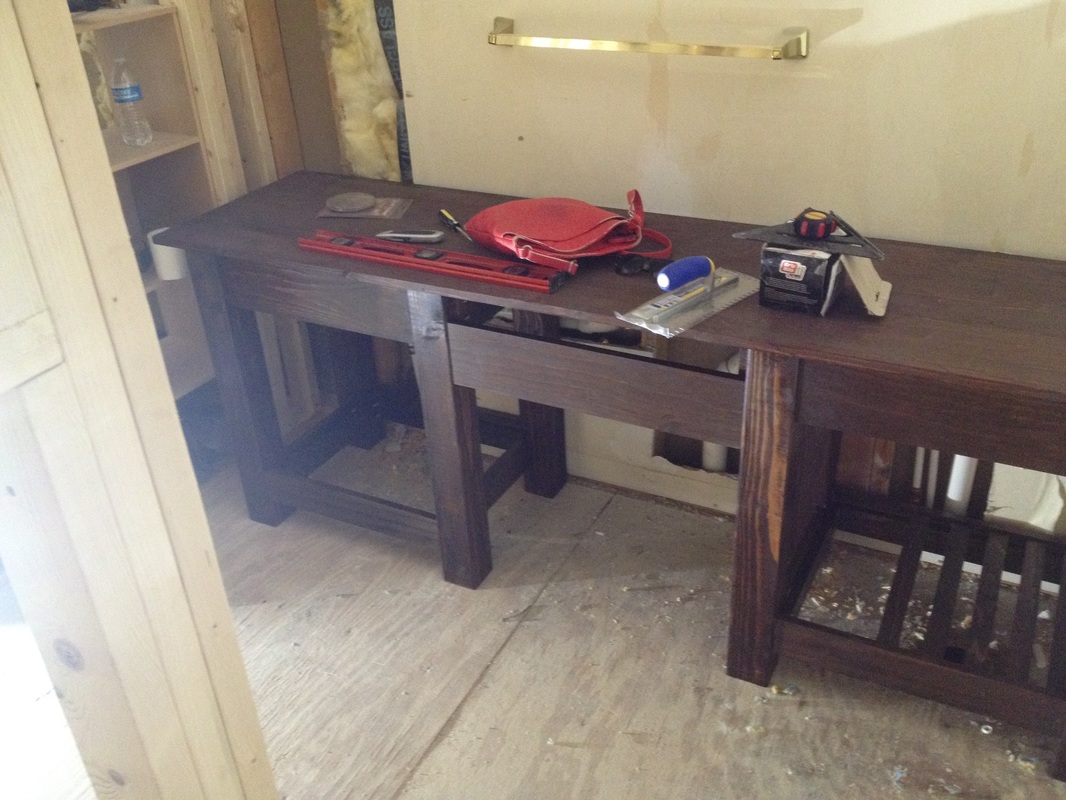 My only regret in the entire bathroom experience is that we stupidly didn't lay luan down before framing up the walls. Oh well. You live and you learn!
0 Comments
Leave a Reply. |

about meHi! I'm Lauren! I'm a twenty-something teacher and homeowner in North Carolina. I love math, decorating, and getting down and dirty learning new things about home renovation and repair. Categories
All
Archives
December 2018
|
 RSS Feed
