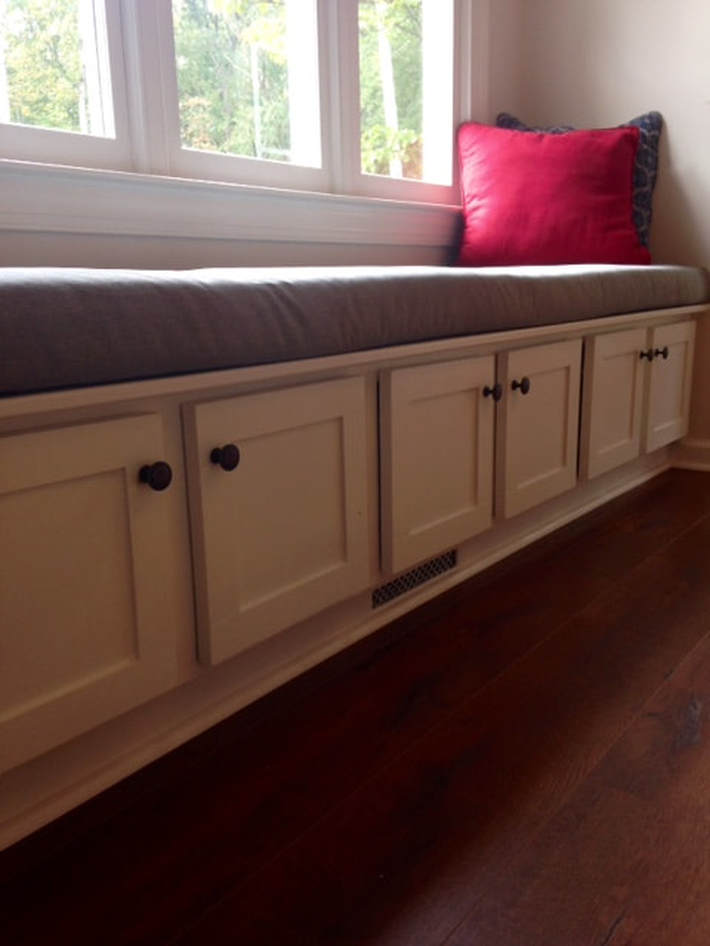
 I've been meaning to post this for a while, but as the school year got back underway... I've been a bit on the lazy side with the blog. This summer, I spent my time with two main projects: a window seat and a dining table. The dining table was actually built first (post to come), and after it was built, I felt like the space behind it needed to be filled. I'm actually really happy with the way the window seat turned out, but FYI - it was definitely more expensive than I thought it was going to be. 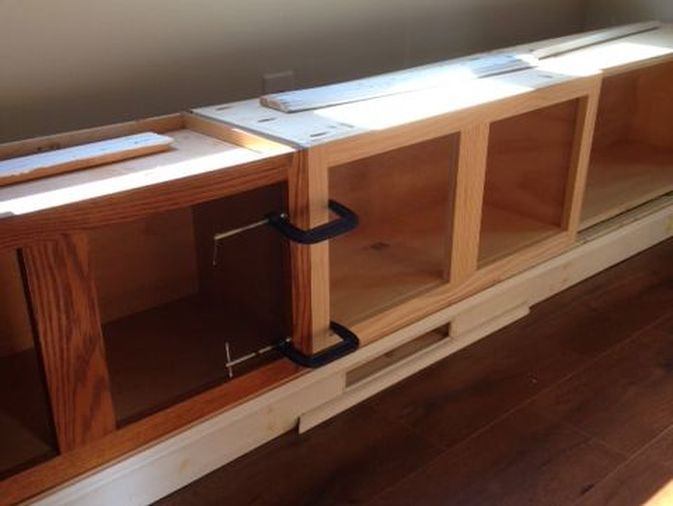 So my original idea was that I would salvage microwave cabinets from Habitat ReStore and create the window seat from those, however after some major searching and lots of driving to five different ReStores, I was only able to find one microwave cabinet (I snagged it for a whopping $12). I decided instead of searching for more, I would just spend a day and build two others. I happened to have enough scrap wood and plywood to get this done for (almost) free. The cabinets are 30" wide, 14" tall, and 12" deep. 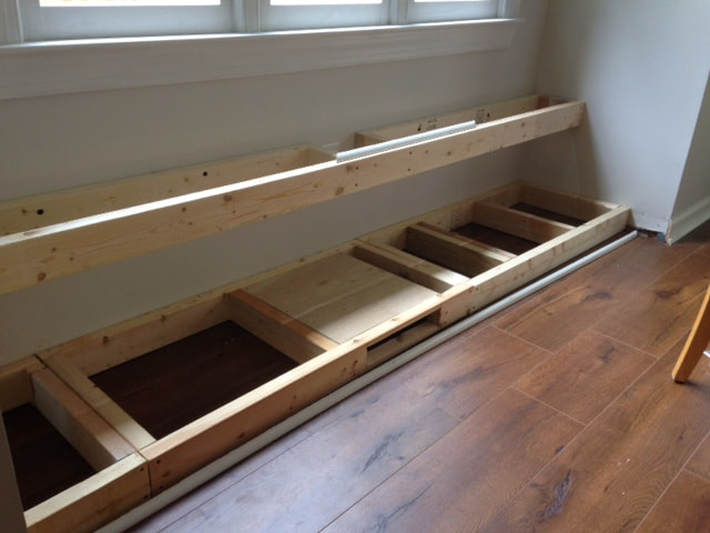 After building the boxes, I then had to frame up the floor and the wall behind the cabinets. The reason for the wall frame is simply to make the window seat larger - a 12" window seat would definitely not work in the space, so I built it up without having the make the boxes deeper. I tried to use as much scrap wood as possible for the frame, hence the million pieces. I also built a box within the floor frame to help direct the air out of the air duct. I did this by ripping a 1/4" off of a couple 2X4's, then attaching a piece of luan to the top. I also cut out a rectangular piece so the air could escape. 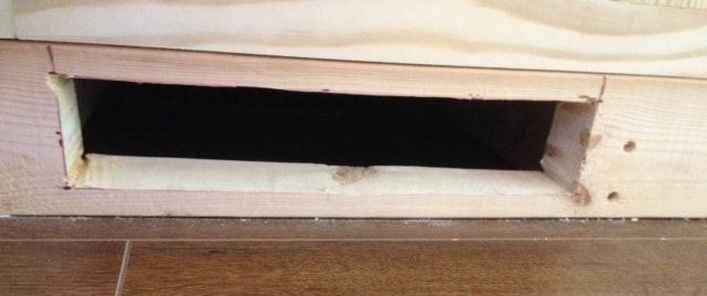 The moulding around the floor also needed to be cut to allow for the air to escape. I measured it out, cut the rectangle with the jigsaw, and then used a small piece of moulding to frame out the edges on the inside. I debated on routing the inside instead of adding the extra moulding, but decided against it. I then bought a piece of decorative metal from Hobby Lobby, cut to size, and stapled it to the inside frame. 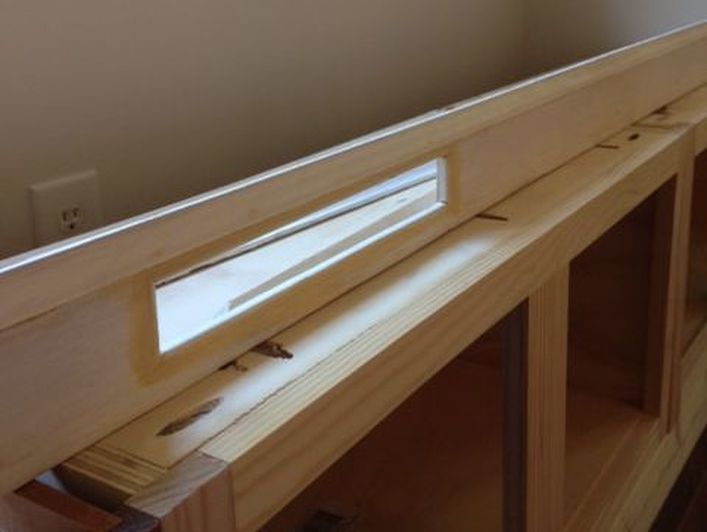 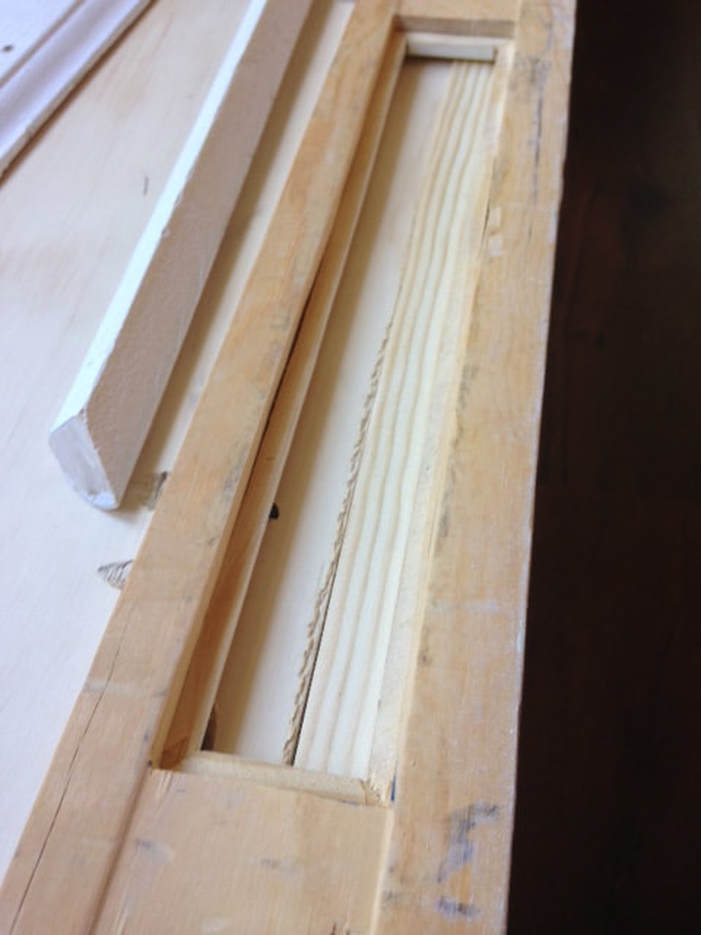 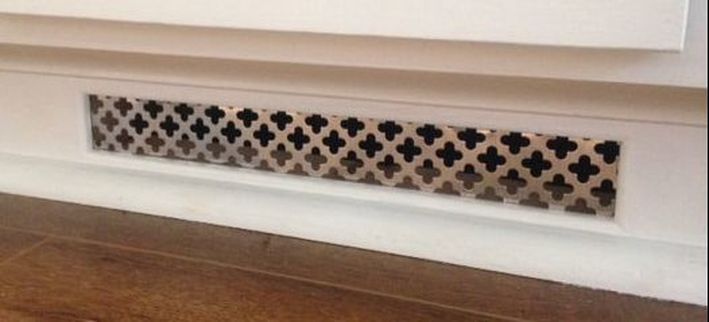 Instead of building my own doors, I went to a local building materials shop in town and found pre-made oak wood doors for a whopping $5 each. I primed, painted, and attached the doors using hinges I bought through Woodworker Express. They had exactly what I needed and were the cheapest place around! The top is made out of 3/4" plywood with a piece of moulding glued to the unfinished edge. The pulls are from Amazon and are leftover from my kitchen cabinets. 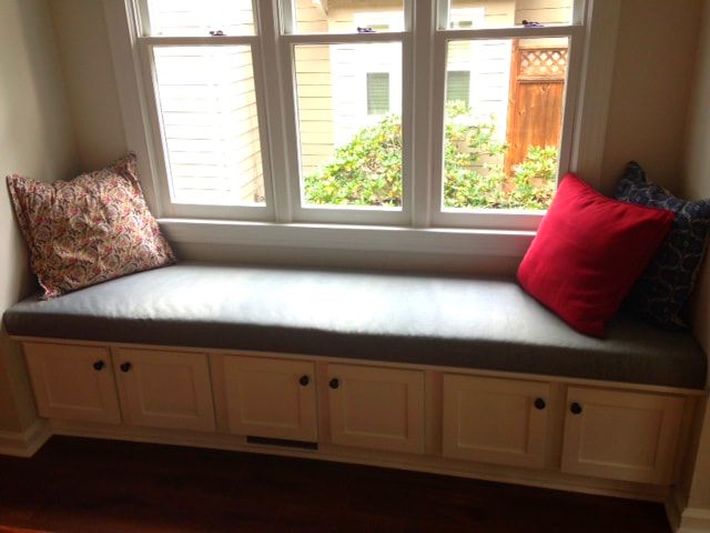 I made the cushion on top TODAY (maybe this is why I'm posting so late....). Although I had a student volunteer her time to sew me a top (I am NOT a sewer), I'm simply too impatient to wait and used the "no sew" technique demonstrated here (sans the spray adhesive). The fabric is a green heather canvas that I found at a fabric outlet for $15 while on vacation in Virginia. I still have an entire ROLL leftover, so if I do ever decide to have my student sew me a top, I'll have plenty for her to tackle the project. 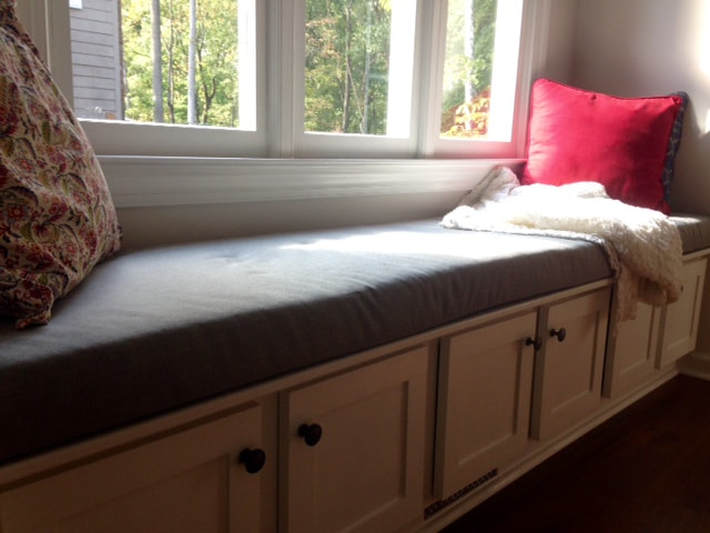 Can I get a sigh of relief? It's finally finished! And look who loves their new seat!!!!! 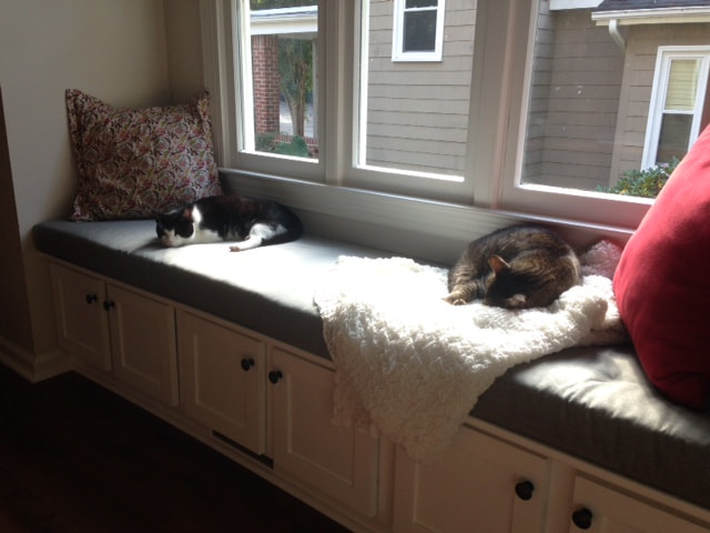
1 Comment
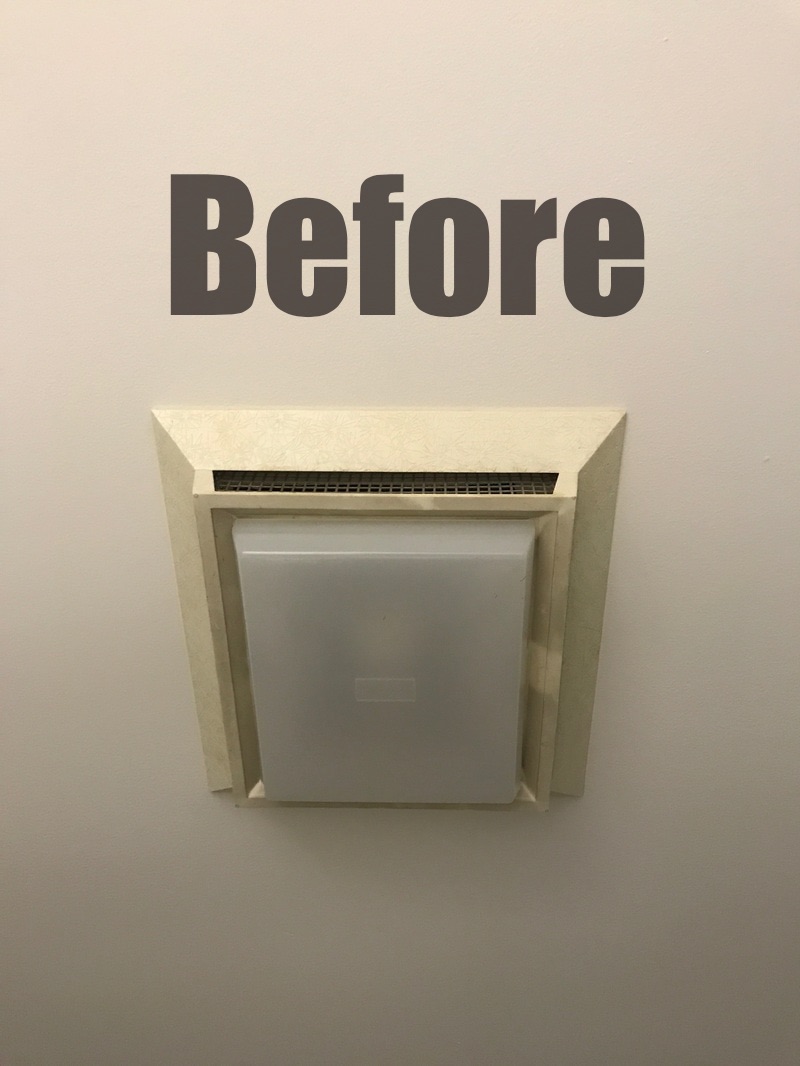
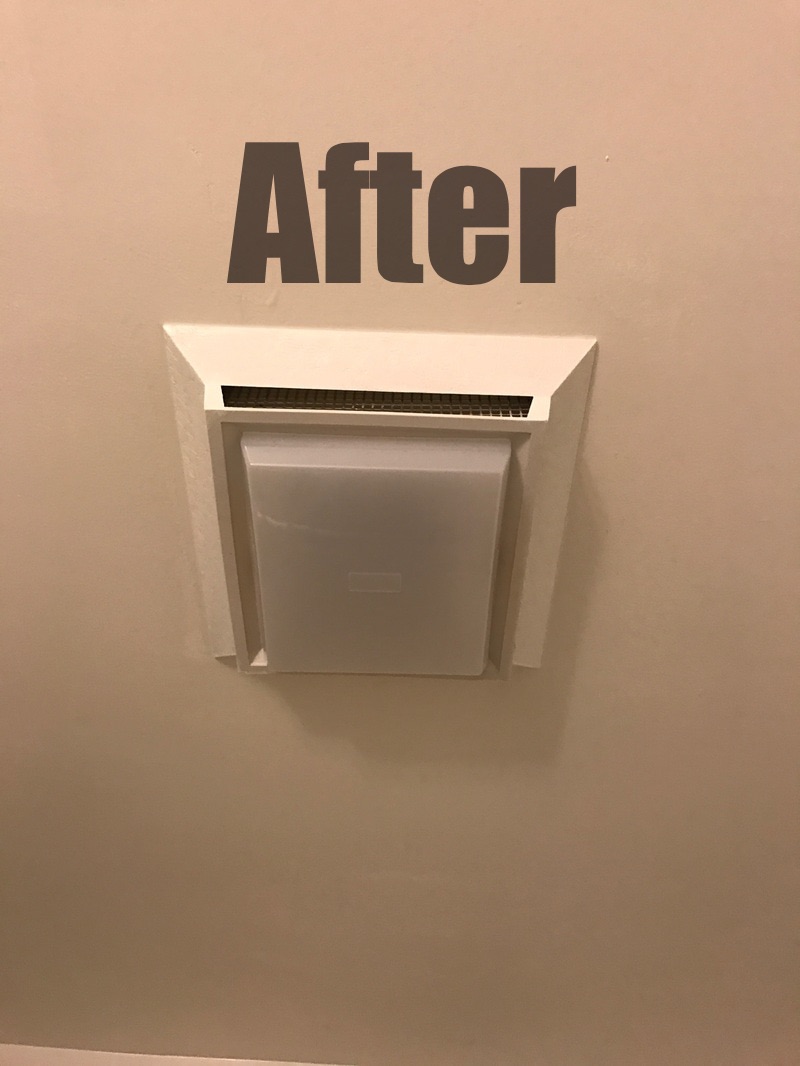
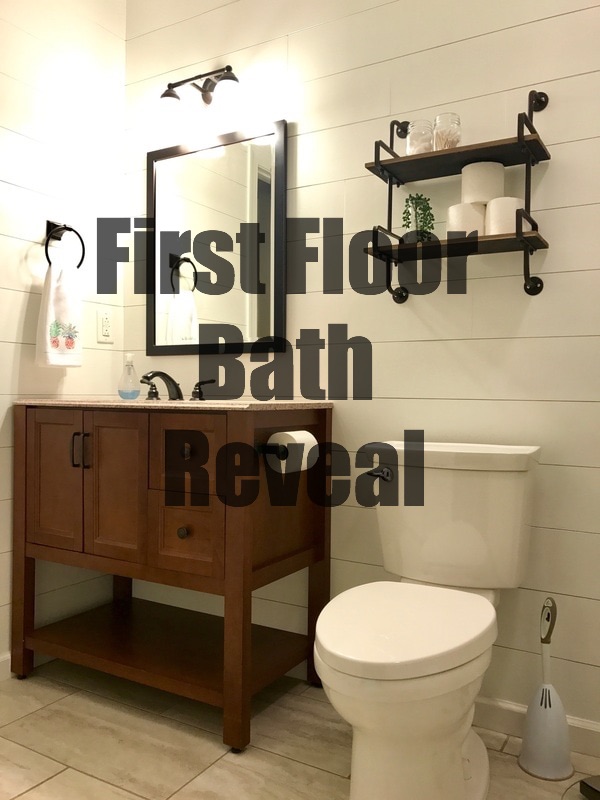 After 4 weekends, the first floor bath is *officially* (but not really) finished. I know, I know, you're probably wondering at this point "What do you have left to do?" Honestly, I swear I am almost done; just one more coat of paint on the baseboards and moulding! Just as a reminder of where we started two years ago.... 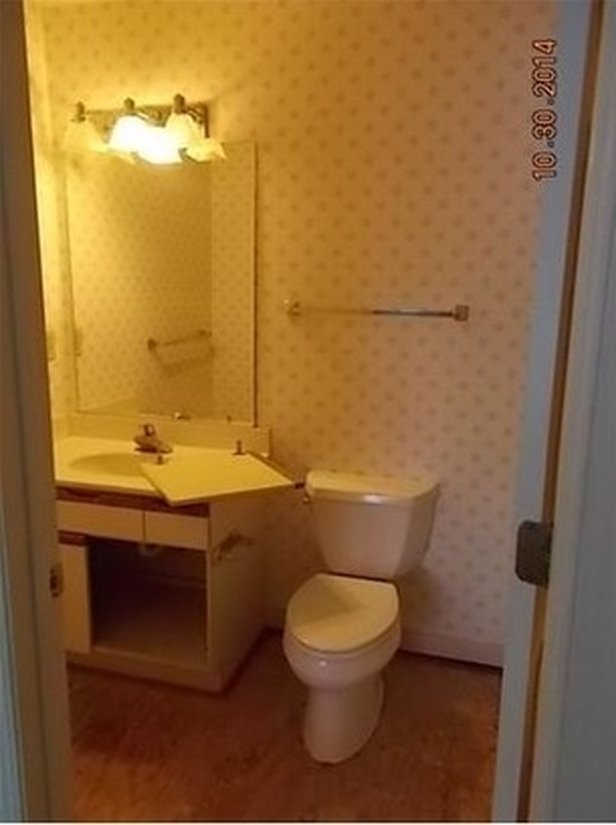 To now.... 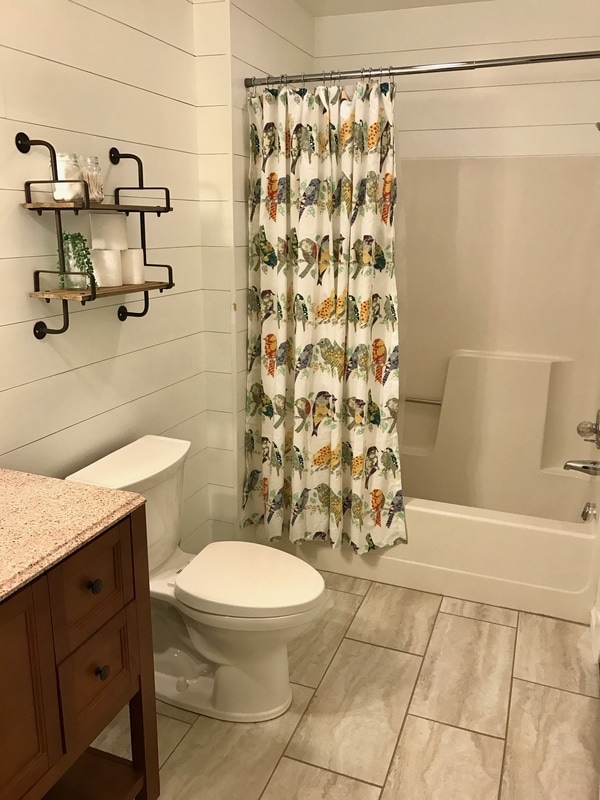 I love, love, LOVE the shiplap walls, but I felt like the white walls needed some color somehow. I went on a search to find a colorful shower curtain and World Market had the winner! The bird shower curtain was about $25 with a coupon, and I replaced the old tension rod with this $8 one from World Market as well. 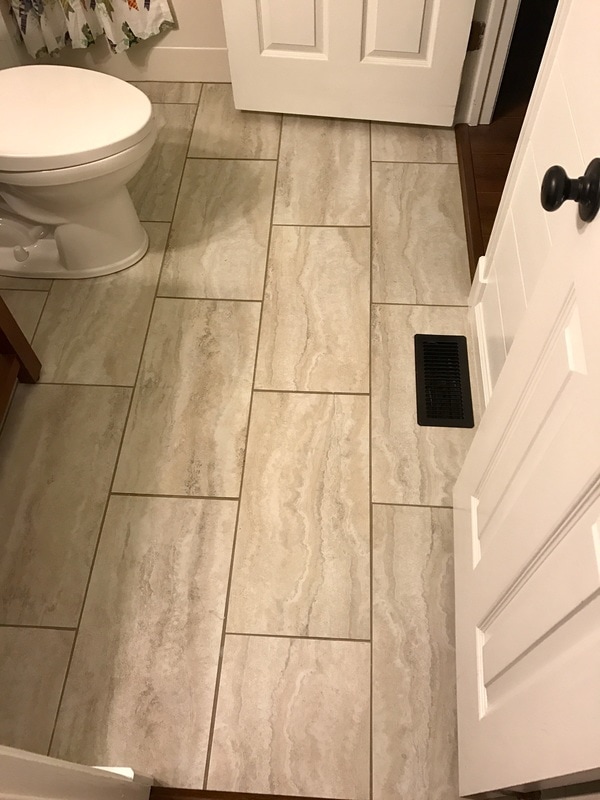 I put down the floor almost two years ago, but I tried my best to really clean it up. I scrubbed away the grout haze and swept, vacuumed, and scrubbed the floor some more. I also spray painted the rusty old floor vent cover oil rubbed bronze. One of the smallest (but biggest) changes in the room was the shower fan. New fans are pretty expensive, and mine was working perfectly fine but it was pretty gross. A couple coats of spray paint and it was as good as new!
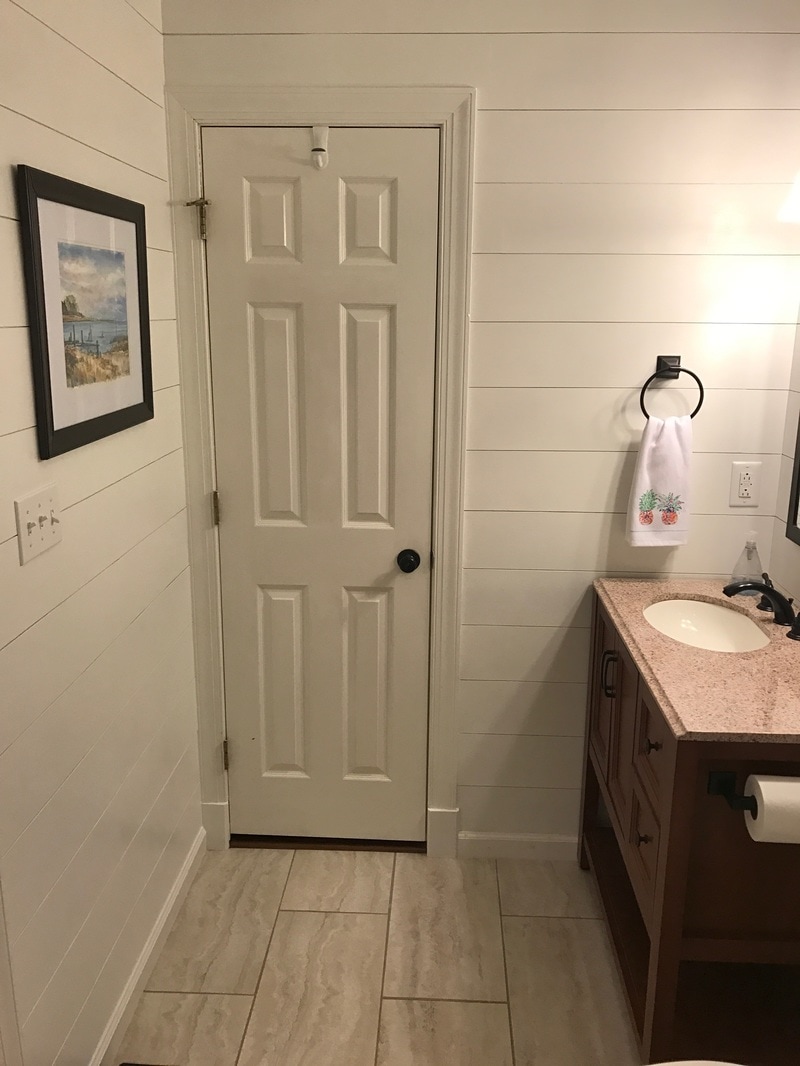 Brian's grandmother painted the watercolor on the wall. Its so beautiful and fits right in with the beach theme! I love it! We picked up the frame from Marshall's for $10, and spray painted it oil rubbed bronze. The original color wasn't great, but for ten bucks, I decided it was something we could easily change. 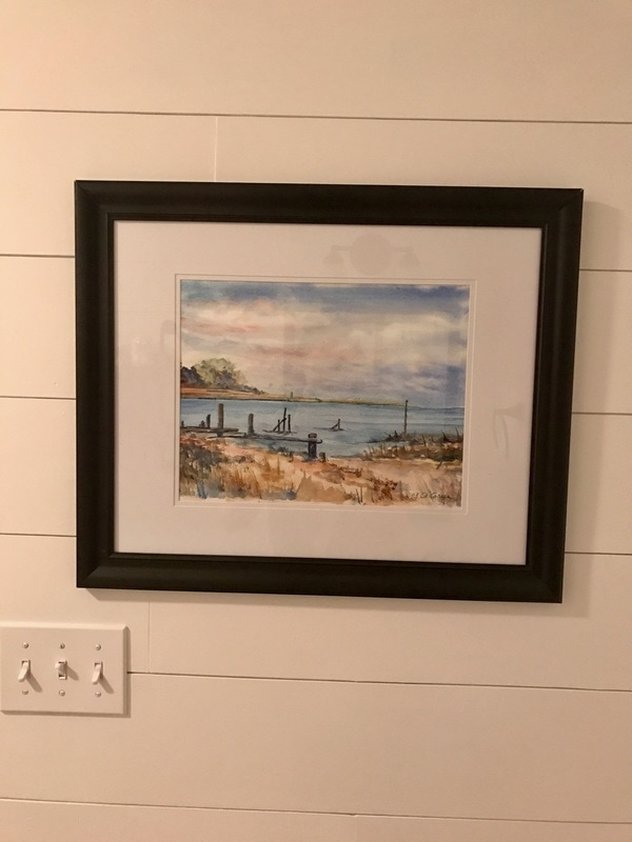 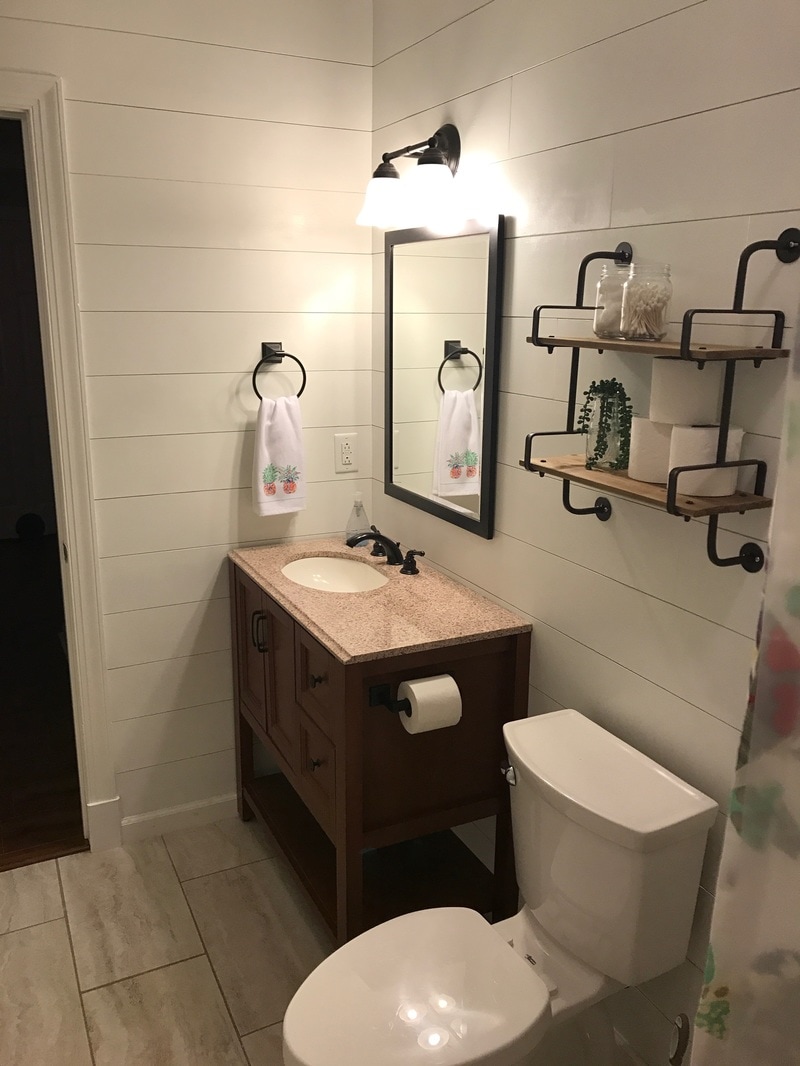 I ordered both the hand towel ring and the toilet roll holder from Amazon. The mirror is from Lowe's, and the vanity and light are from the Home Depot (although I'm not sure I would recommend the vanity anymore). The vanity is beautiful and sturdy, however the laminated wood is peeling off in some areas on the doors and drawers. This vanity literally never gets used so I don't understand why it is peeling off. 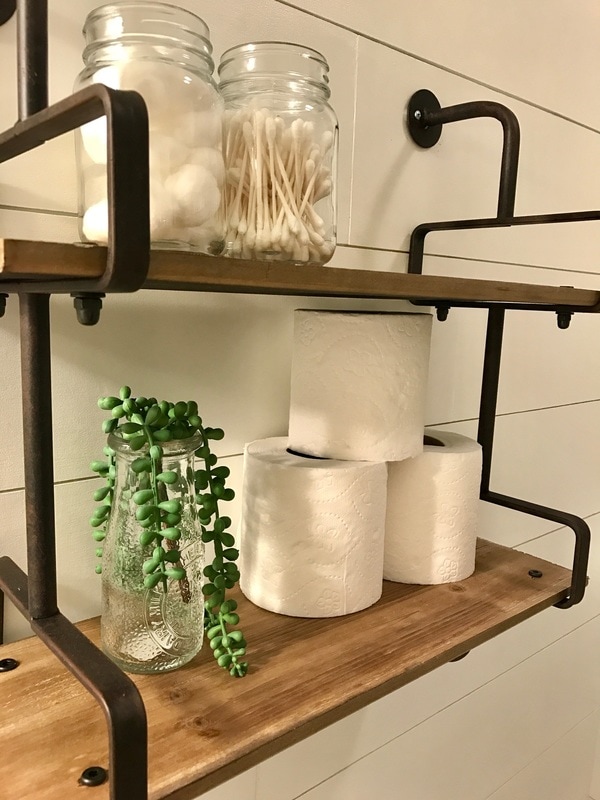 The adorable shelf above the toilet is from Hobby Lobby. I snagged it on sale for $25. I love it! 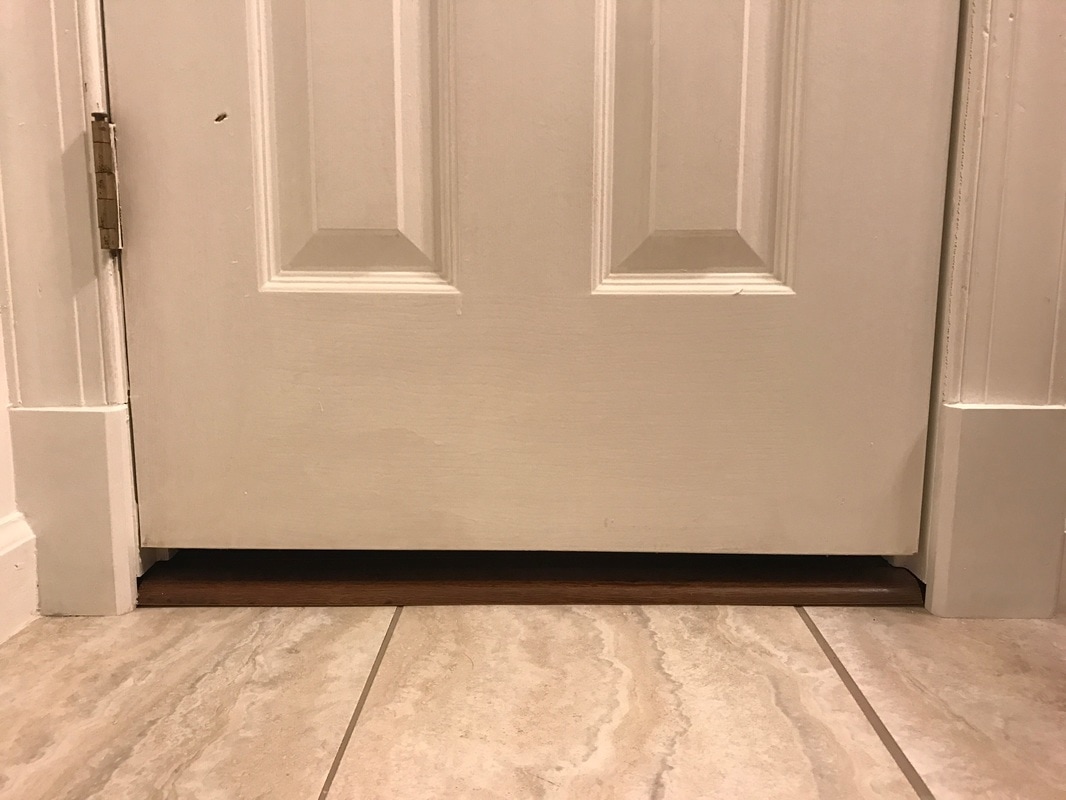 And look at those plinth blocks! No more giant gaps!!! Woot woot!! 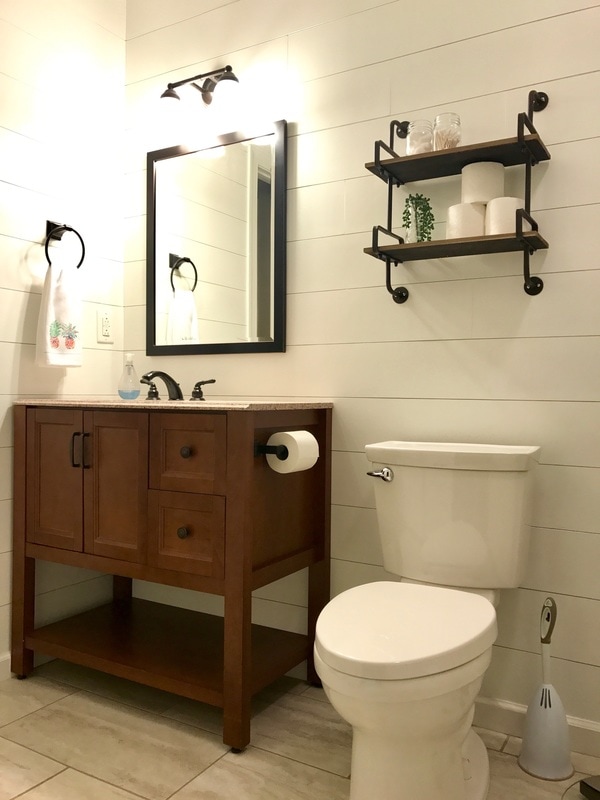 I have to admit, I LOVE this bathroom! I am so happy it turned out so well, and I am so happy that it is finally done. So, what do you guys think?
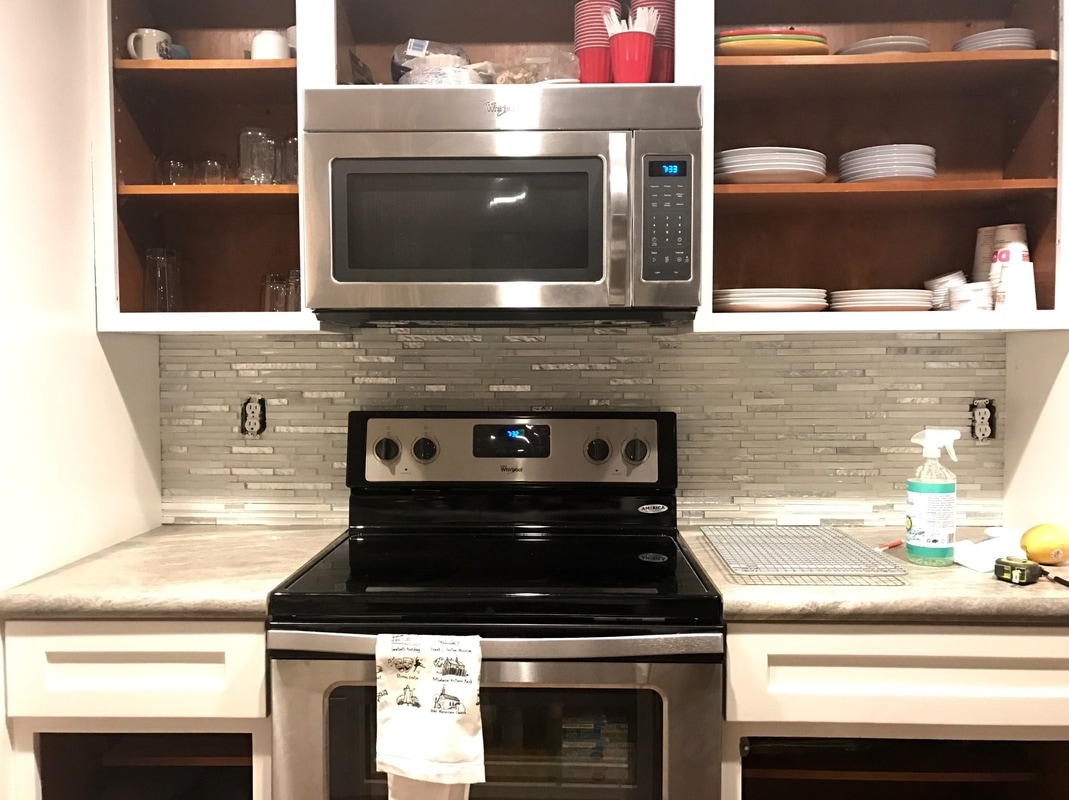 Before Christmas, Brian and I installed the backsplash behind the stove in the kitchen. We mulled over different designs for a while, but ultimately a beach-y blue/white/silver won out. You can find a link to the backsplash here. Below is about the best image I have of the backsplash prior to our installation - a bit boring (minus the silly kitties).  Of all the things that needed to get done, the backsplash was not high on the list. I was just sick of looking at WHITE. Everything in the house is WHITE. WHITE walls. WHITE cabinets. WHITE ceiling. WHITE WHITE WHITE. I needed some color in my life! 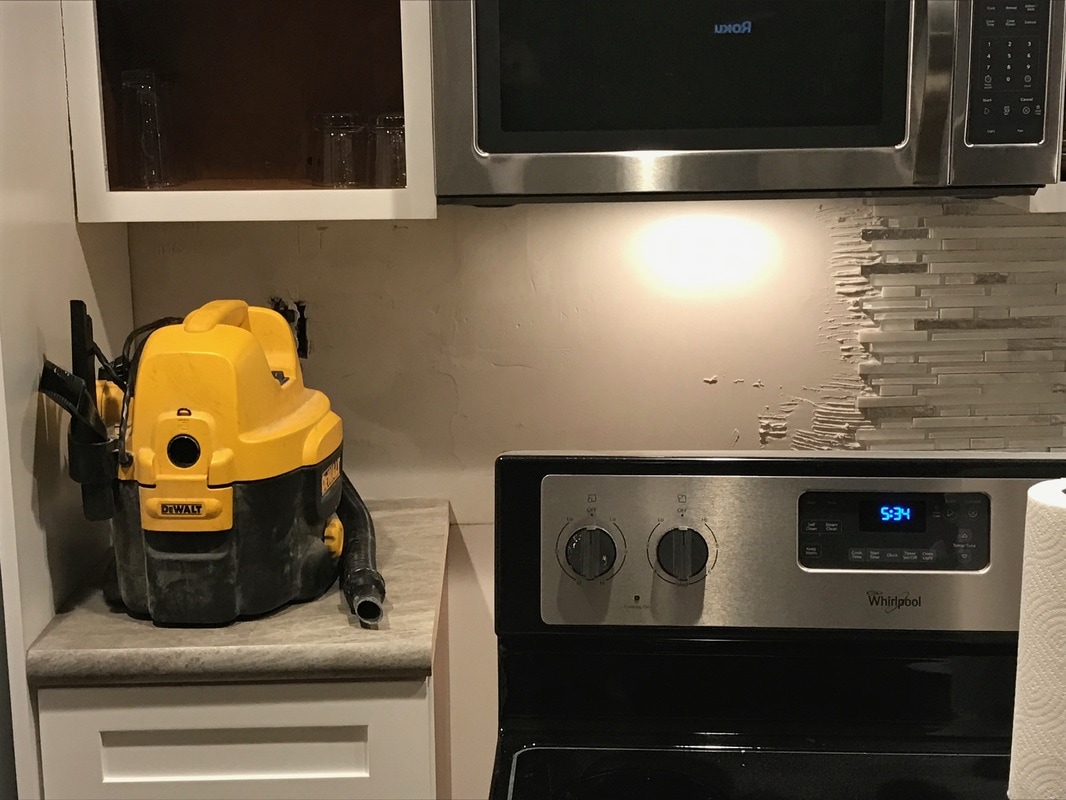 The installation took about two hours, and was more frustrating than originally anticipated (surprise, surprise). The tiles kept slipping down, the cement kept pushing up into the seams, nothing was straight, etc. To say the least, I needed a few glasses of wine to get me through the project.  And what kind of project would this be if it was complete? Nope, even three months after installation, we still need to grout the joints ;) Coming soon, I hope... 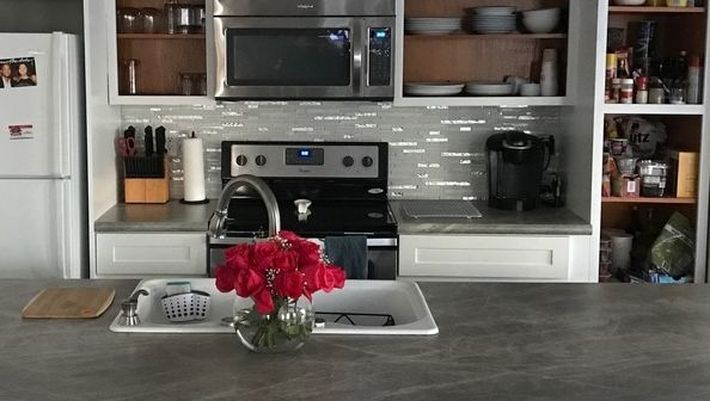 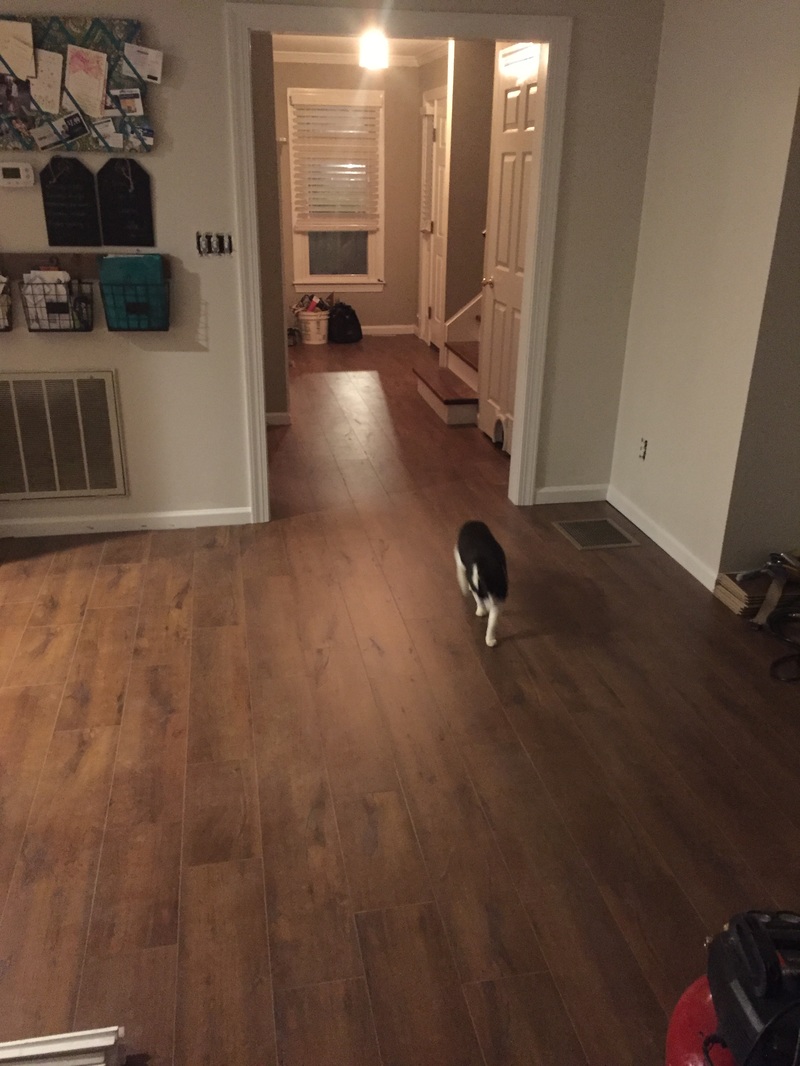 My floors were finally installed this week. I used a local company, Styron Flooring, who have done a fabulous job! They are awesome and my floors look great! Having my floors professionally installed was probably the best decision I have made regarding my house so far. Brian and I tried (and failed) installing the floors last year, but my subfloor was so uneven that the floors bounced whenever you walked on it. We tried leveling, but obviously we failed. Now, the floors are stable (having poured about 50 gallons of leveling cement on them), and I know they will hold up in the long run. The guys were even able to install them so that there was no transition strip in ANY of the doorways (except in the bathroom). It looks flawless and I am SO HAPPY!!! 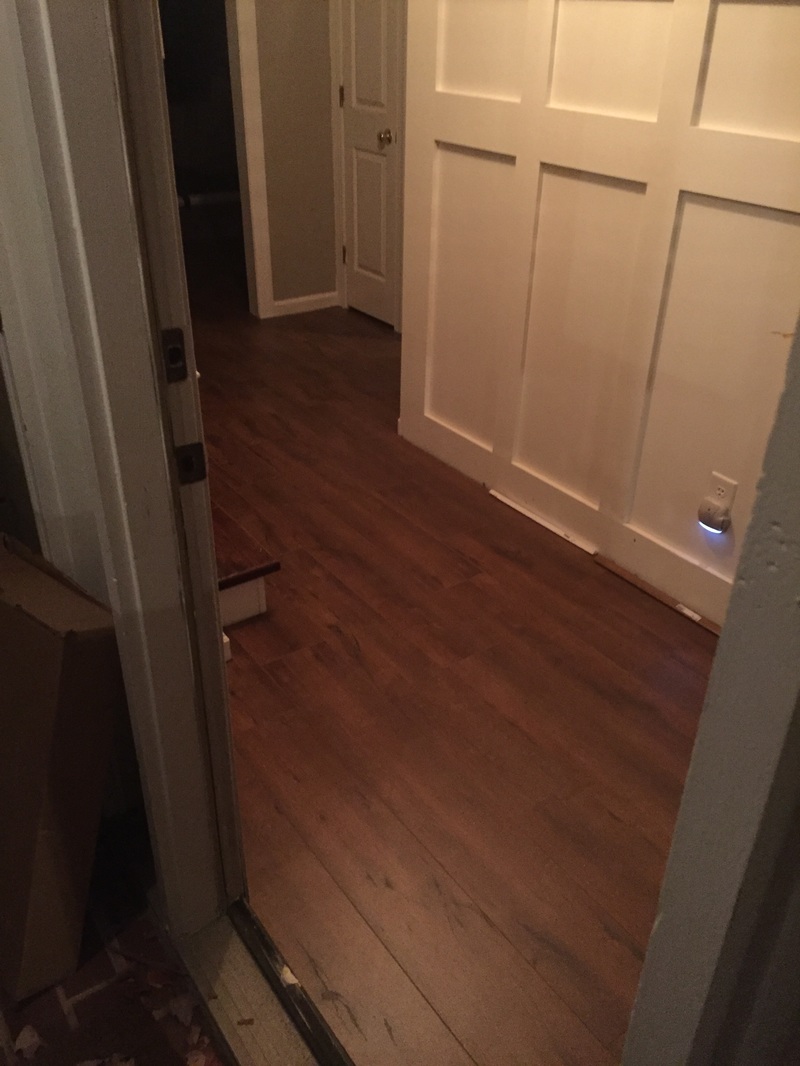 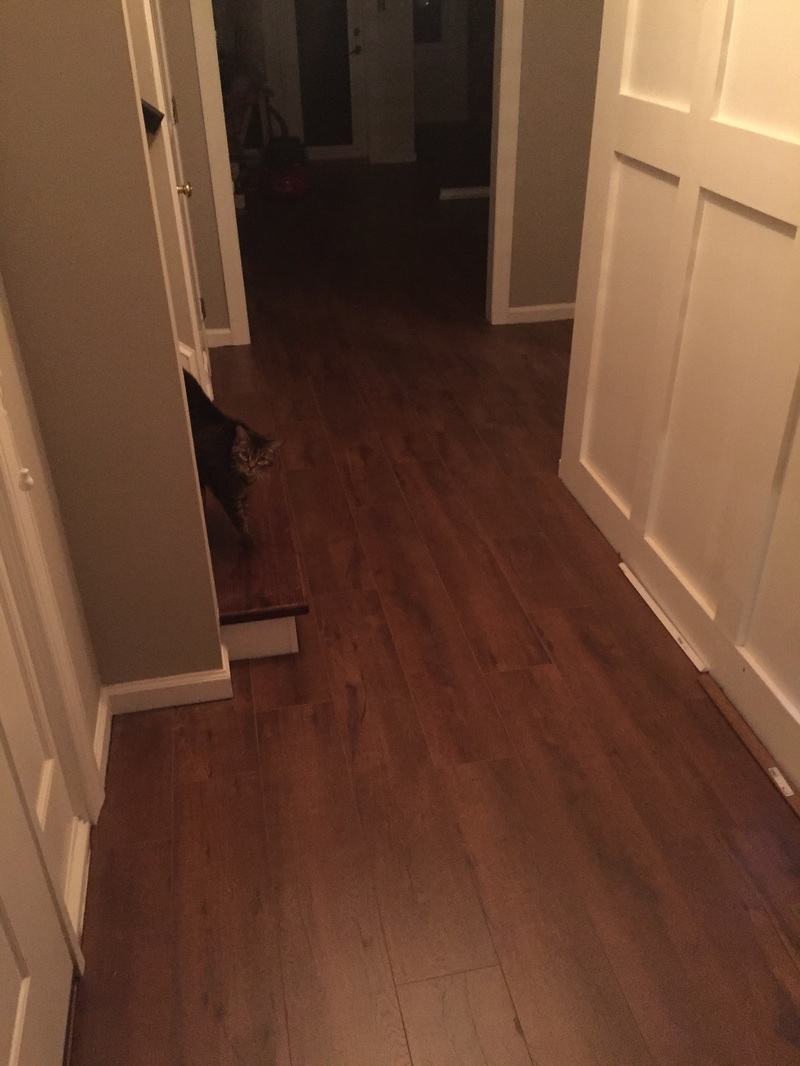 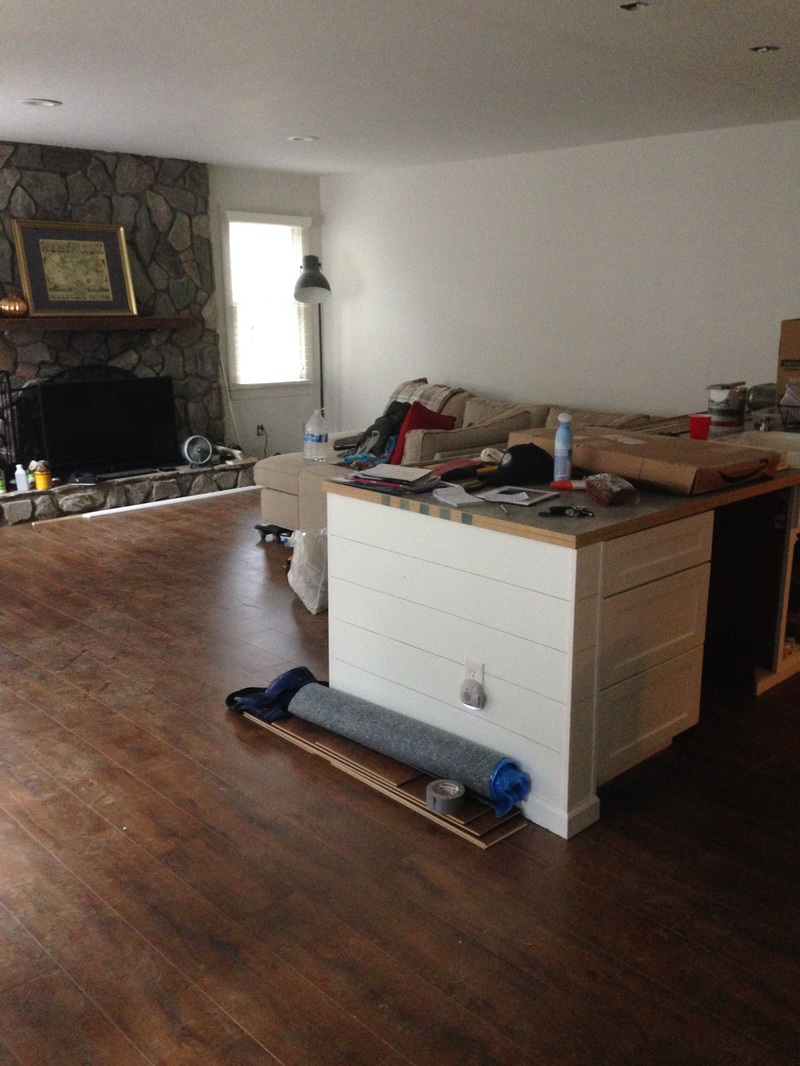  Look at the back bedroom - all of that leveling cement!!!! No wonder my floor was so bouncy! 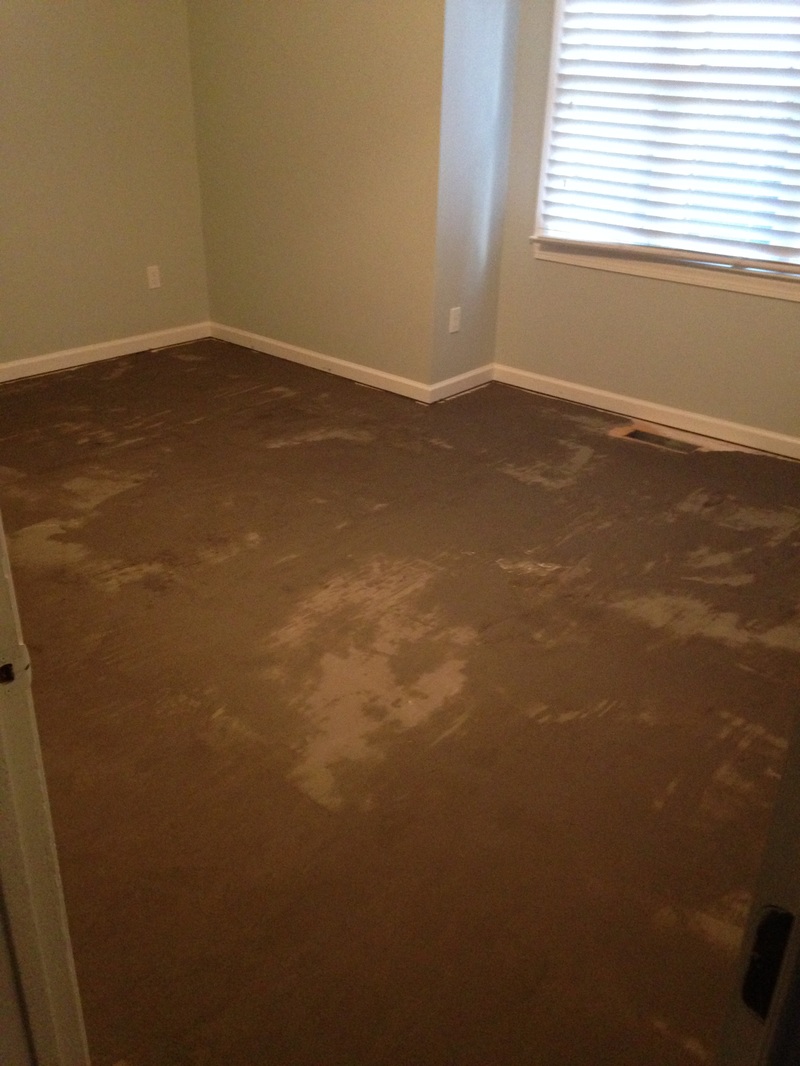 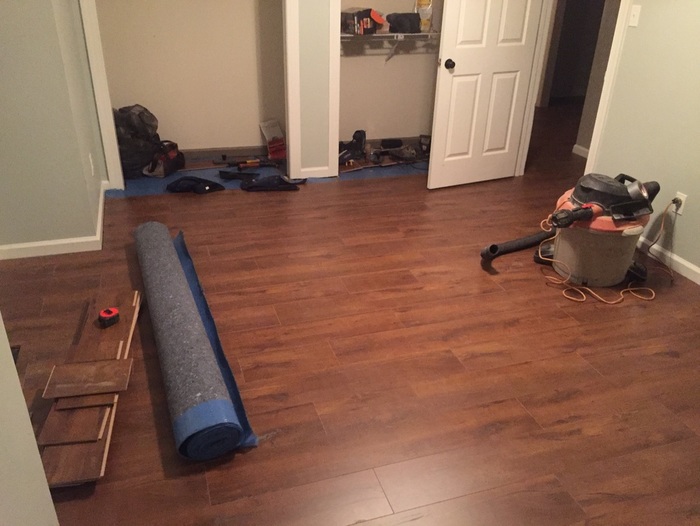   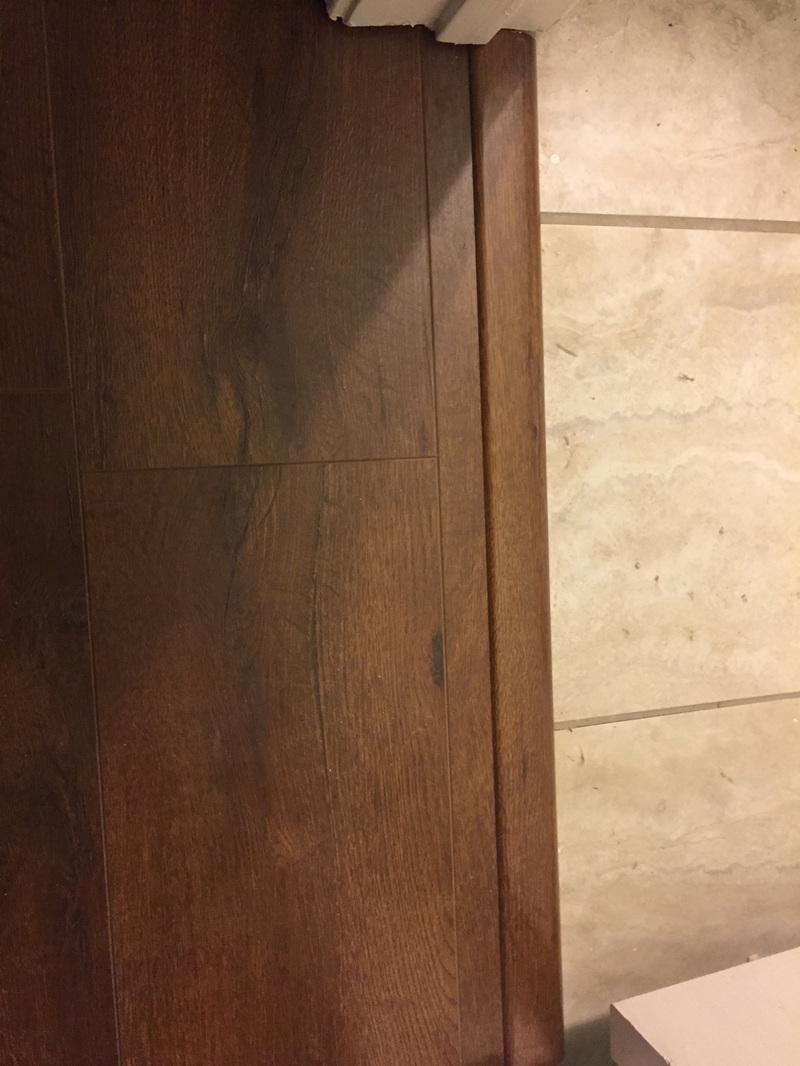 I suppose I am getting a little ahead of myself. The installers still need to add toe moulding, finish the back bedroom closets, and I need to clean (and clean, and clean). Regardless, I'm in love. THANK YOU SO MUCH to Styron Flooring. You guys are awesome!!!!!!!!
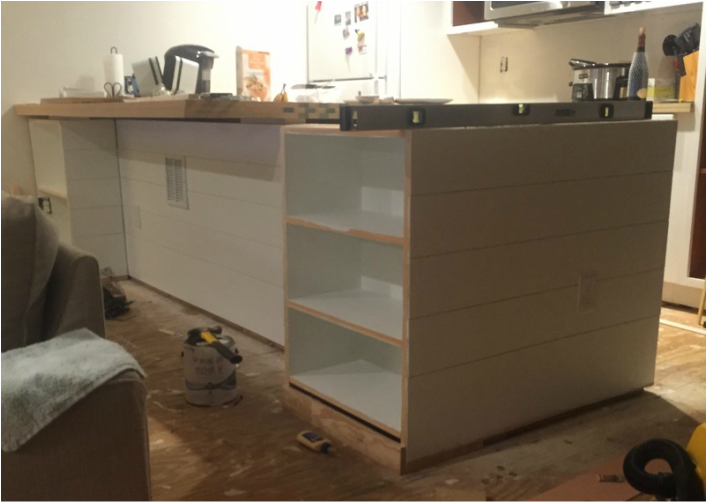
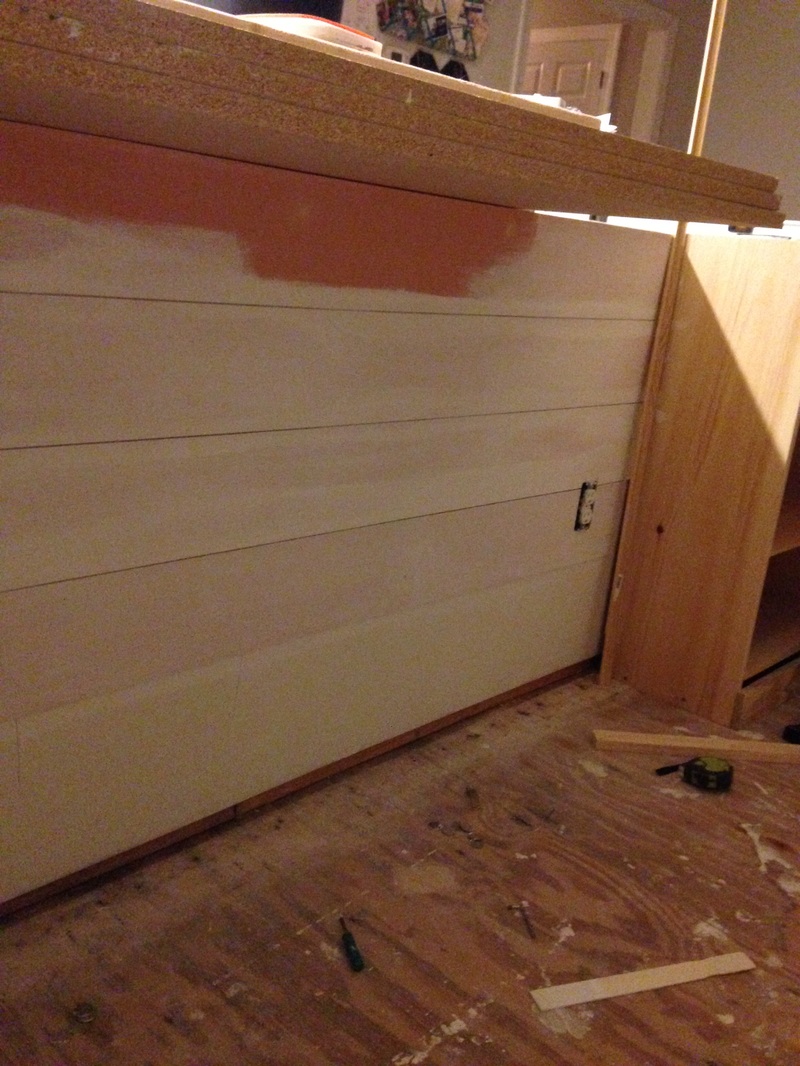
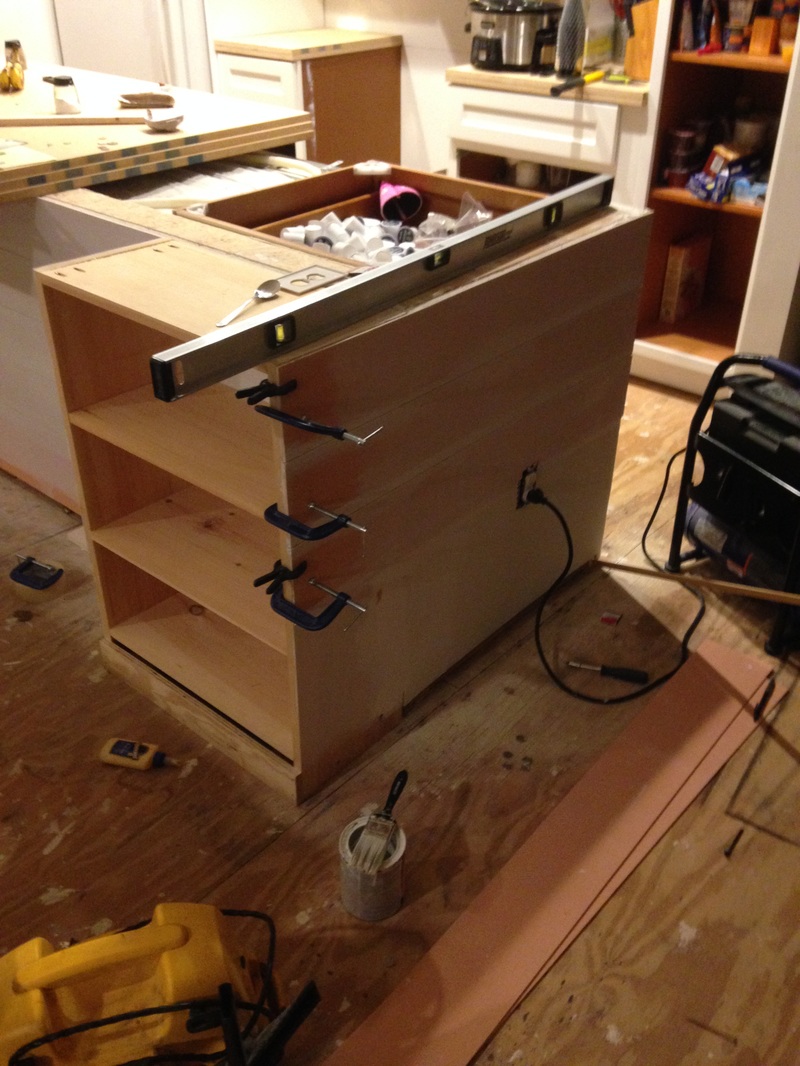
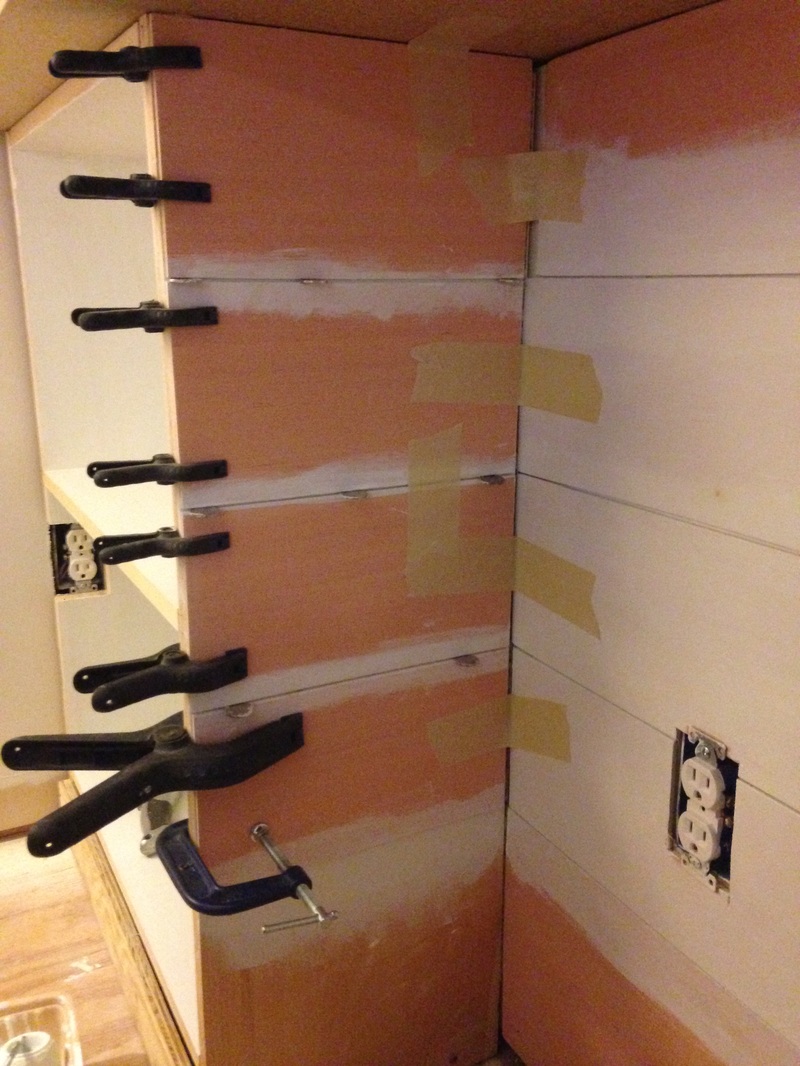
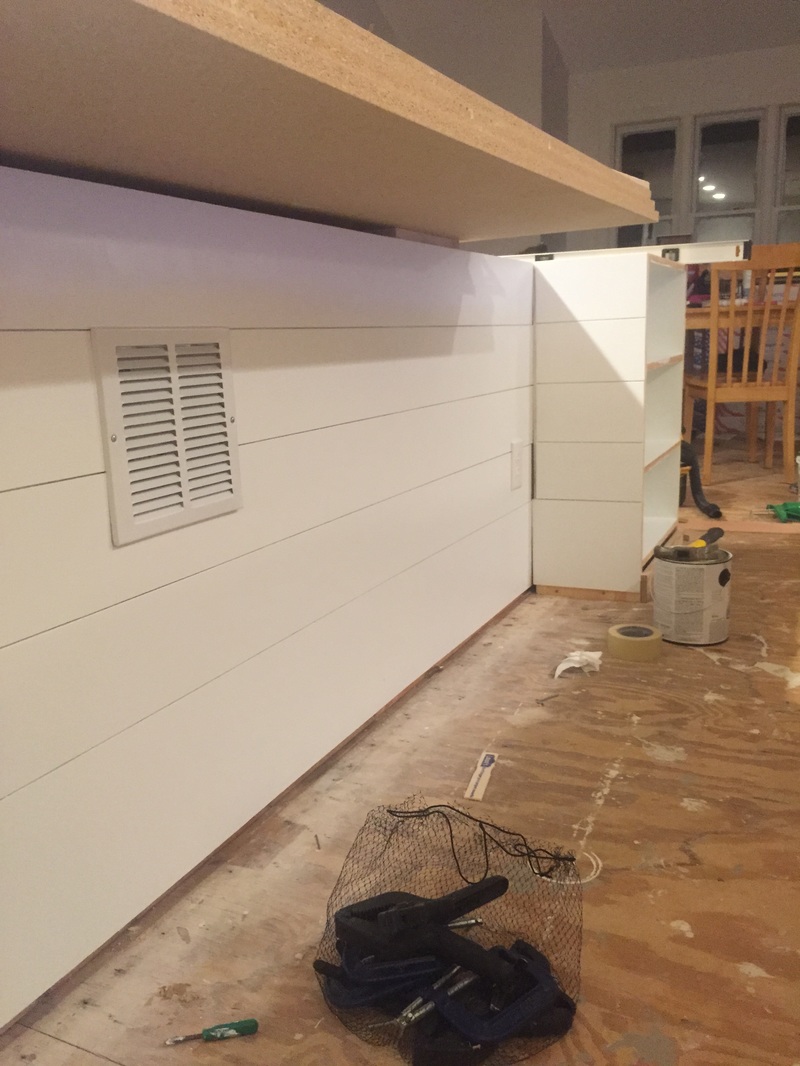
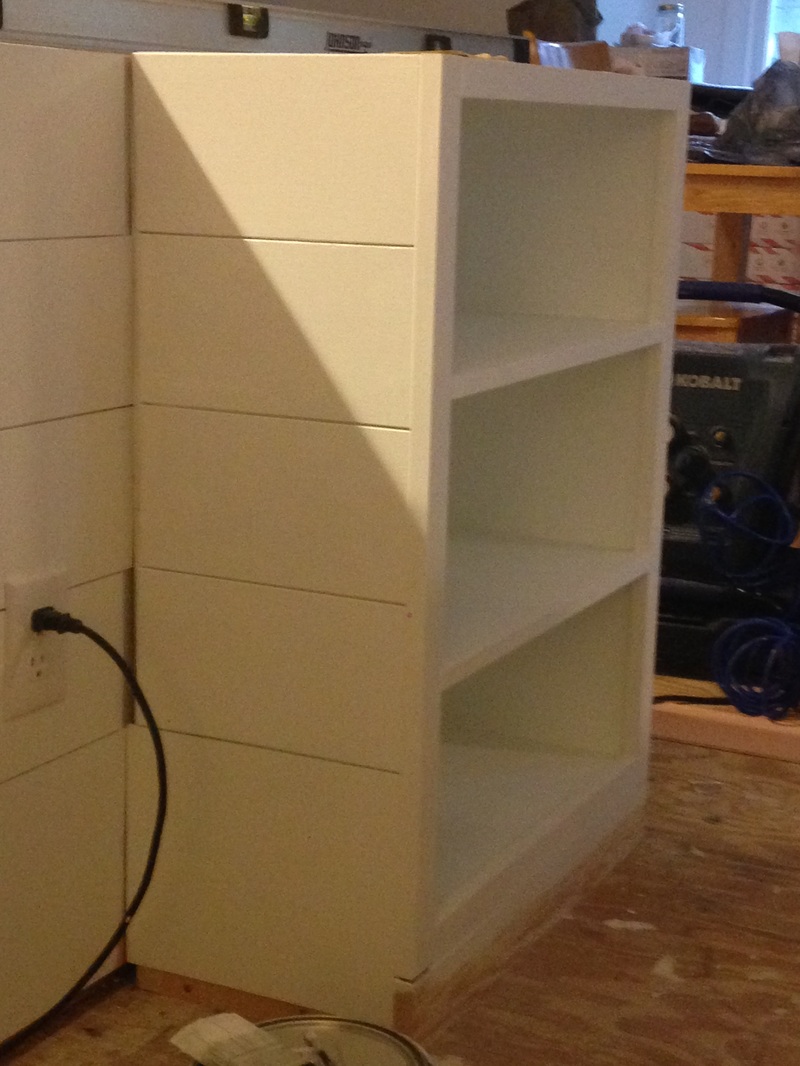
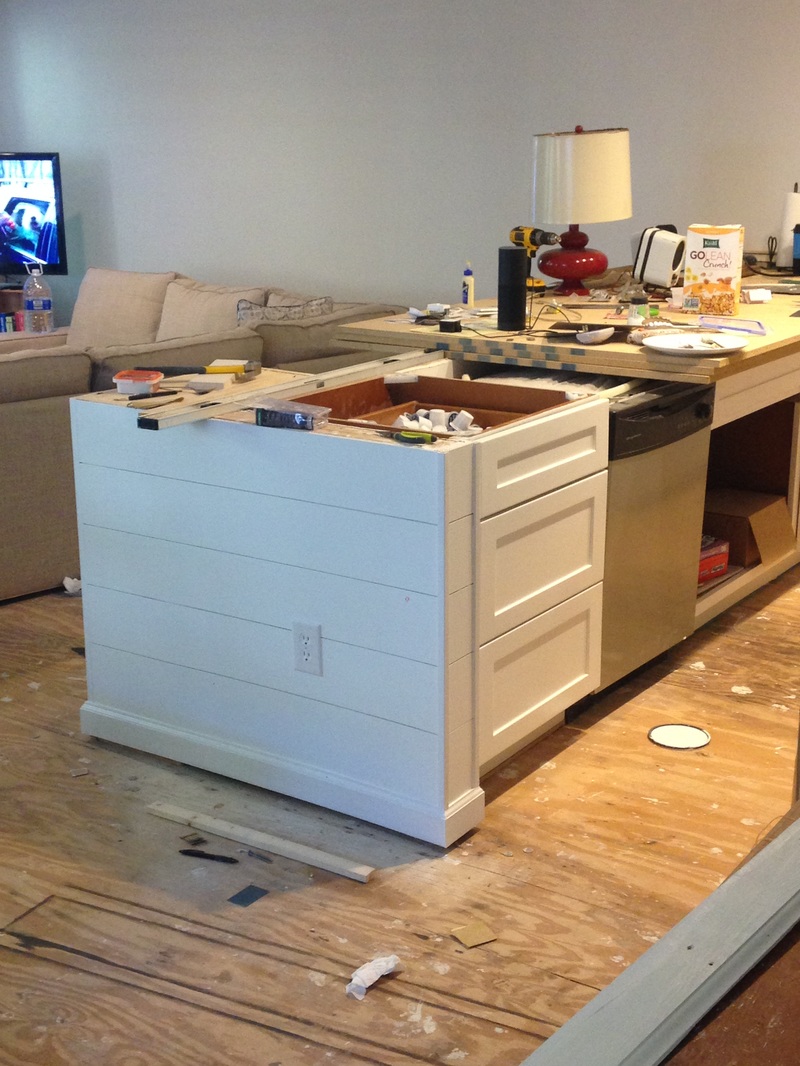
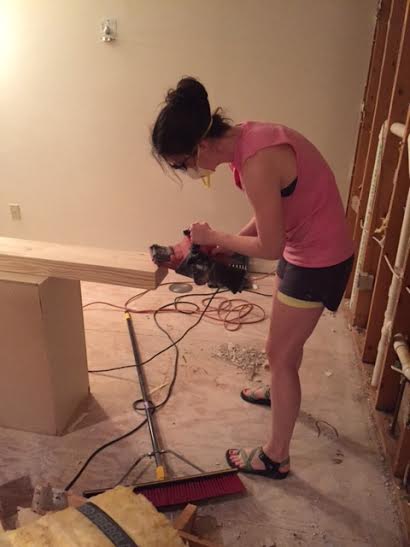
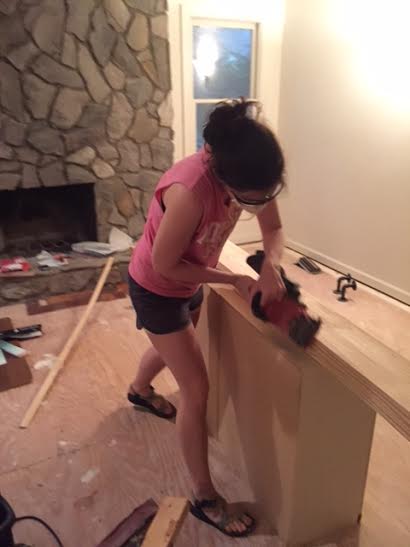
The floors are going to be installed in a few weeks, and to prep for them, we have to make sure the trim work is ready to go. This has forced me into project mode, which I actually really like :). So, the current project is finishing the kitchen peninsula. Here's a quick reminder of what we started with: 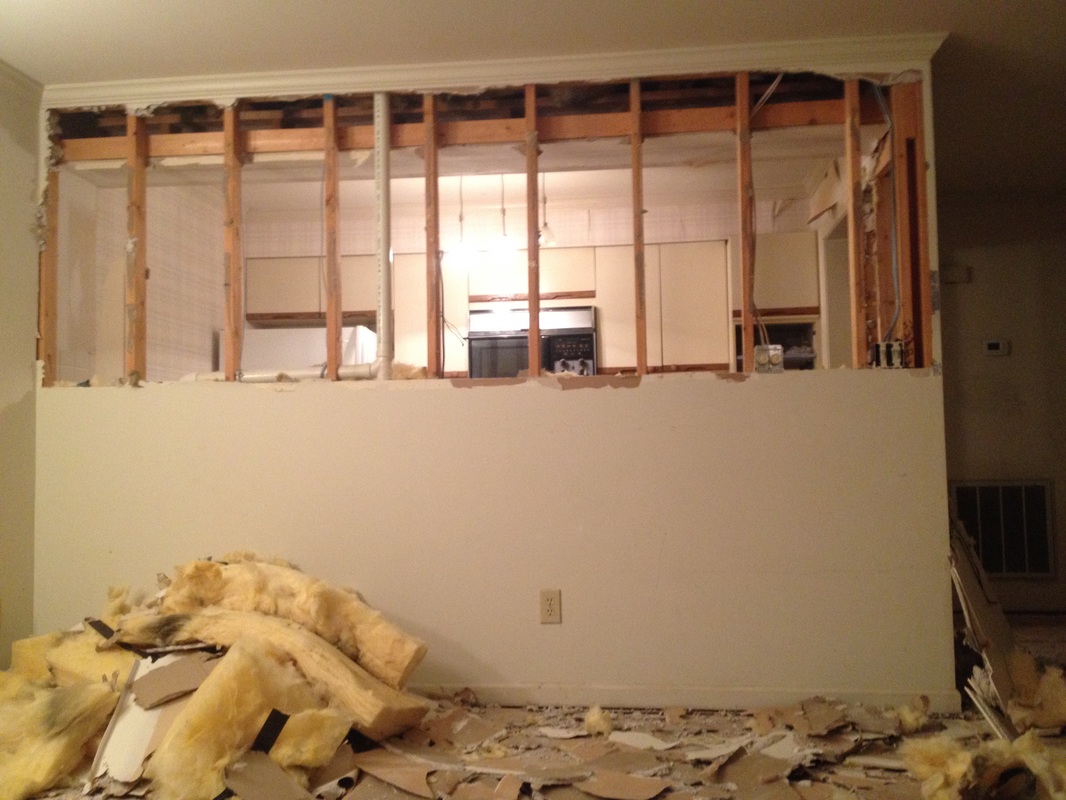 Then this: 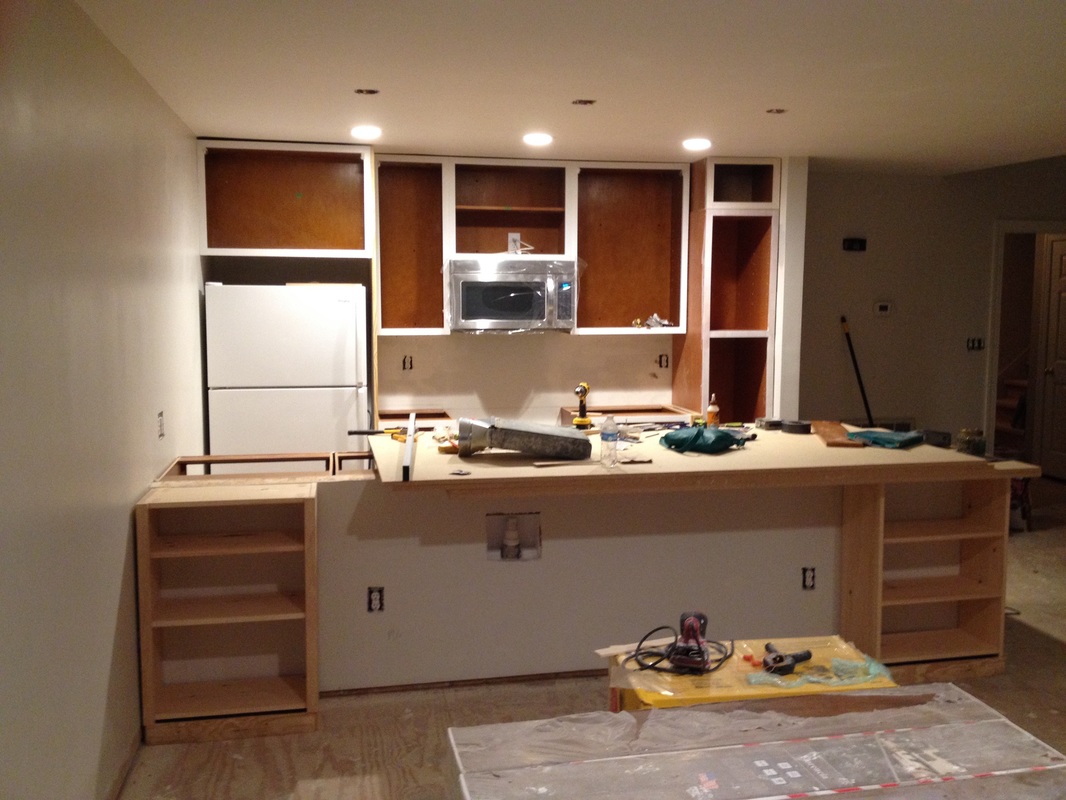 That is probably the cleanest the kitchen has ever looked! Dreams! Well, you should notice there is no base moulding and the bookshelves kind of stick out like a sore thumb. I decided the only way I could really blend them in was to add some DIY shiplap. I'll let you all google the how-to and just show you my pictures of the process. 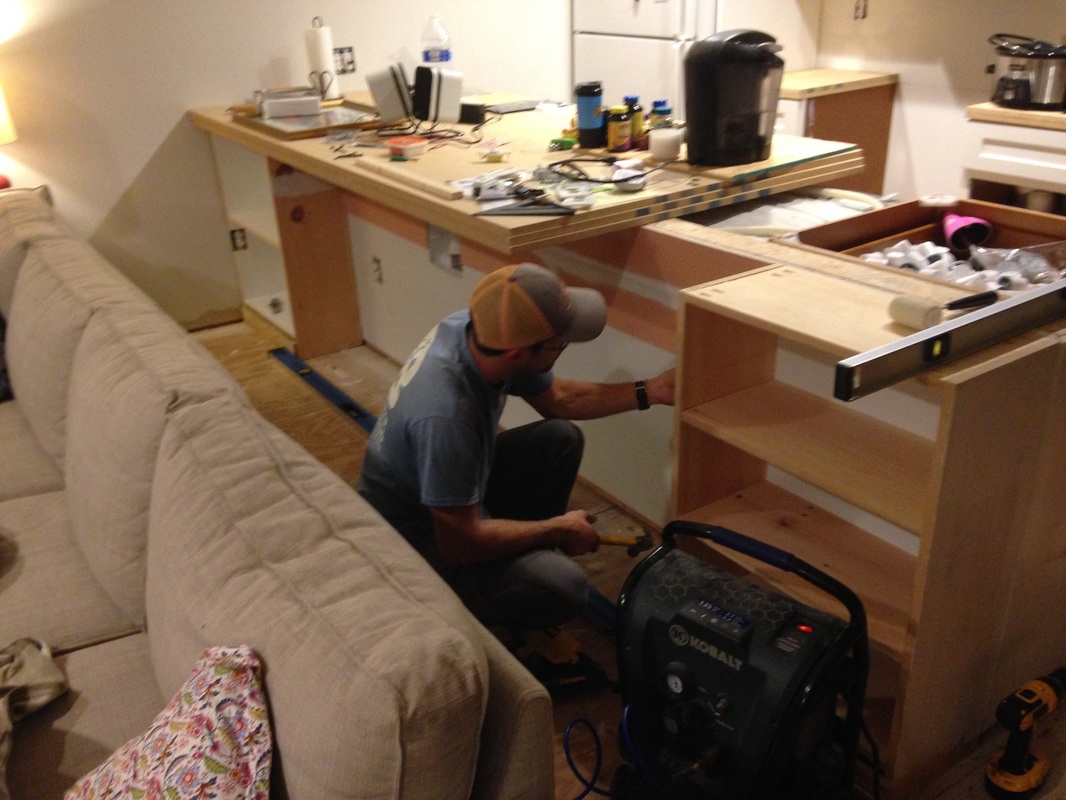
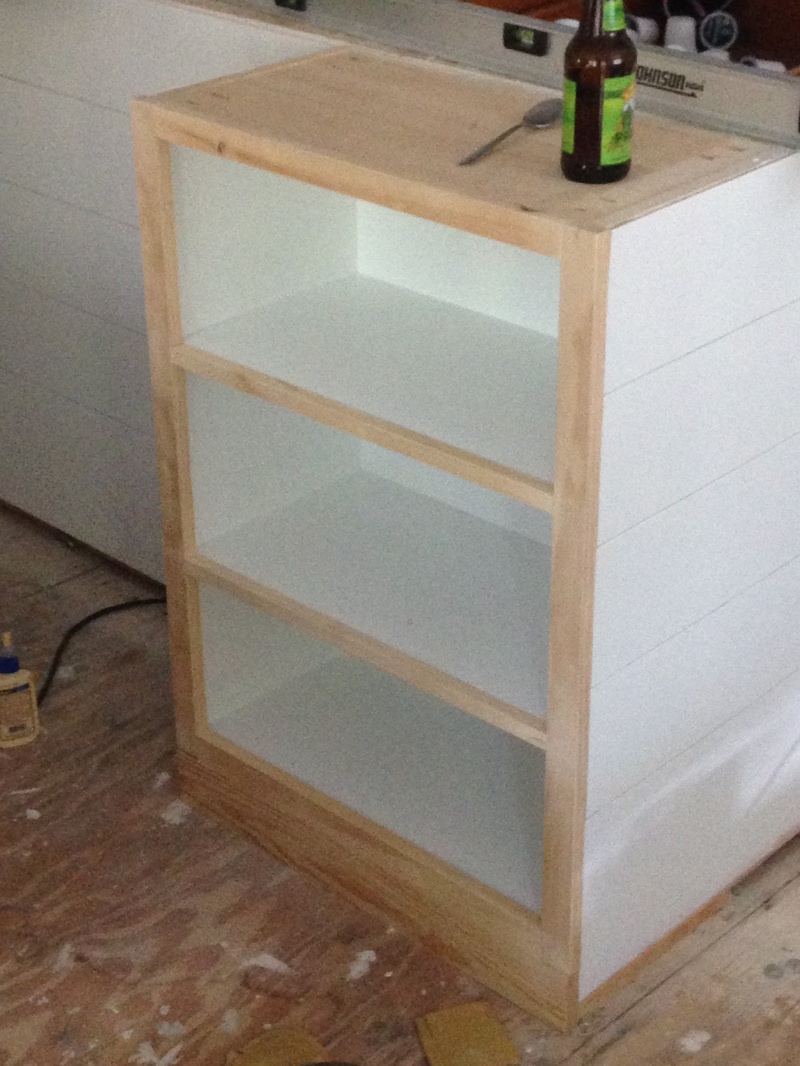
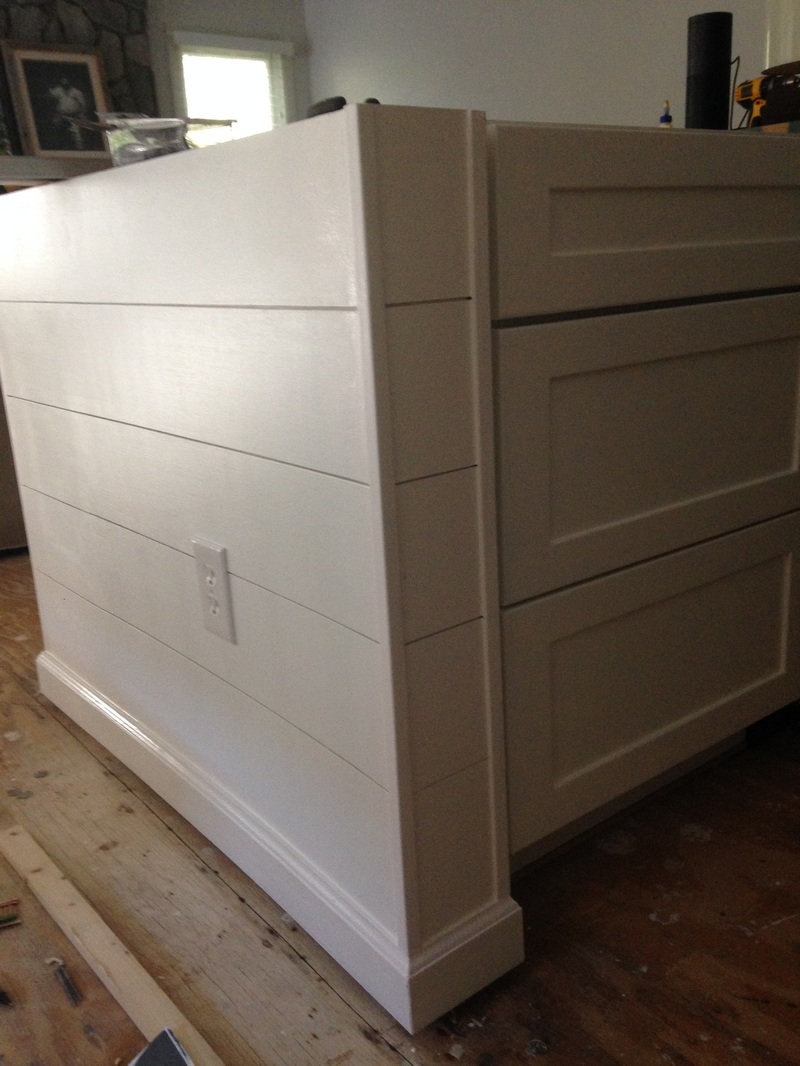
And now with moulding, trim, and paint!  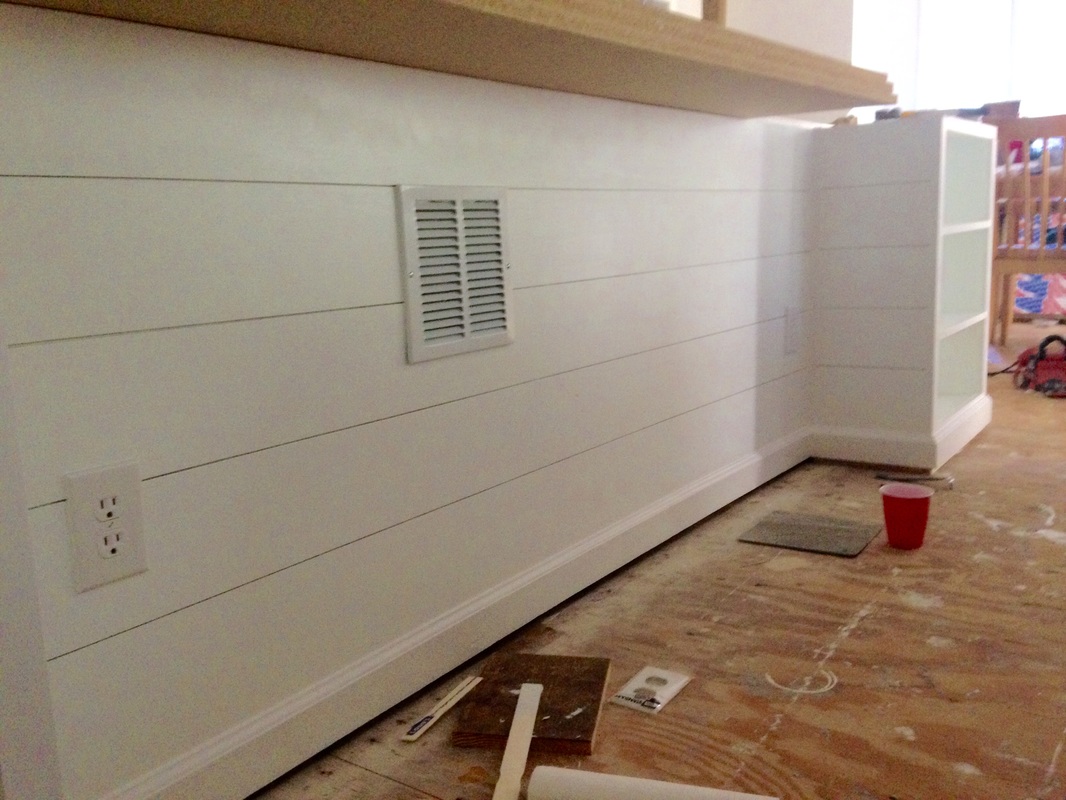 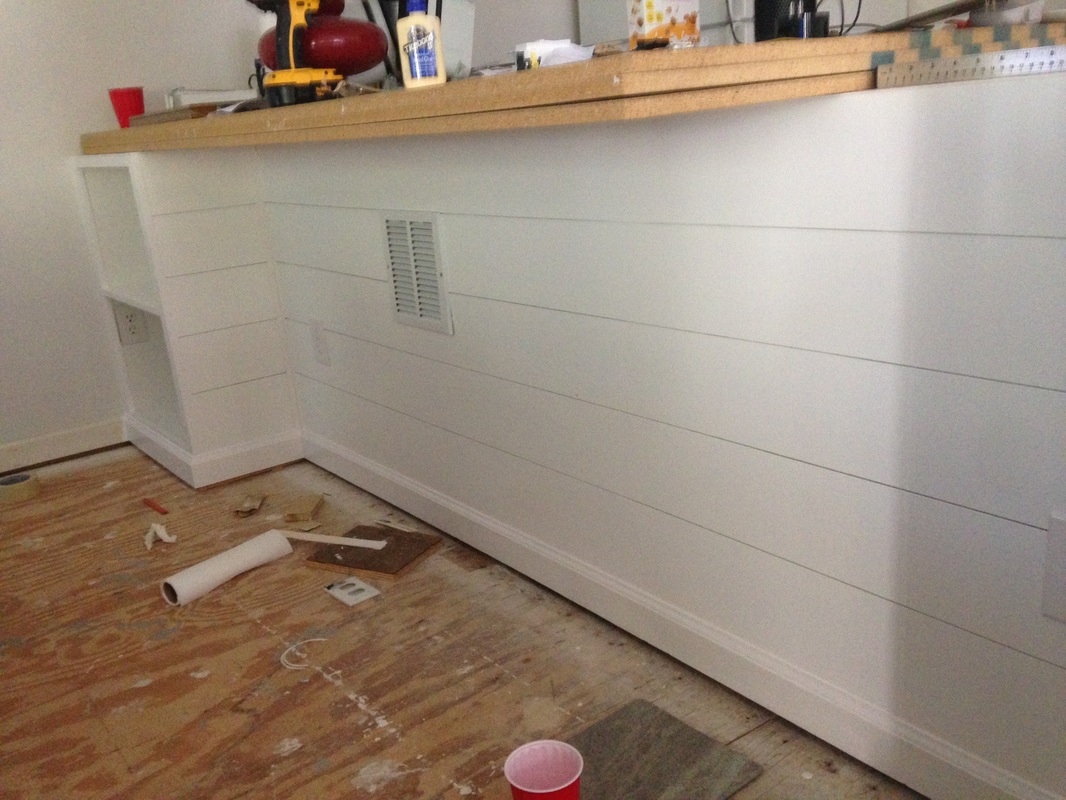
Now all I need is a countertop and I'll be all set!
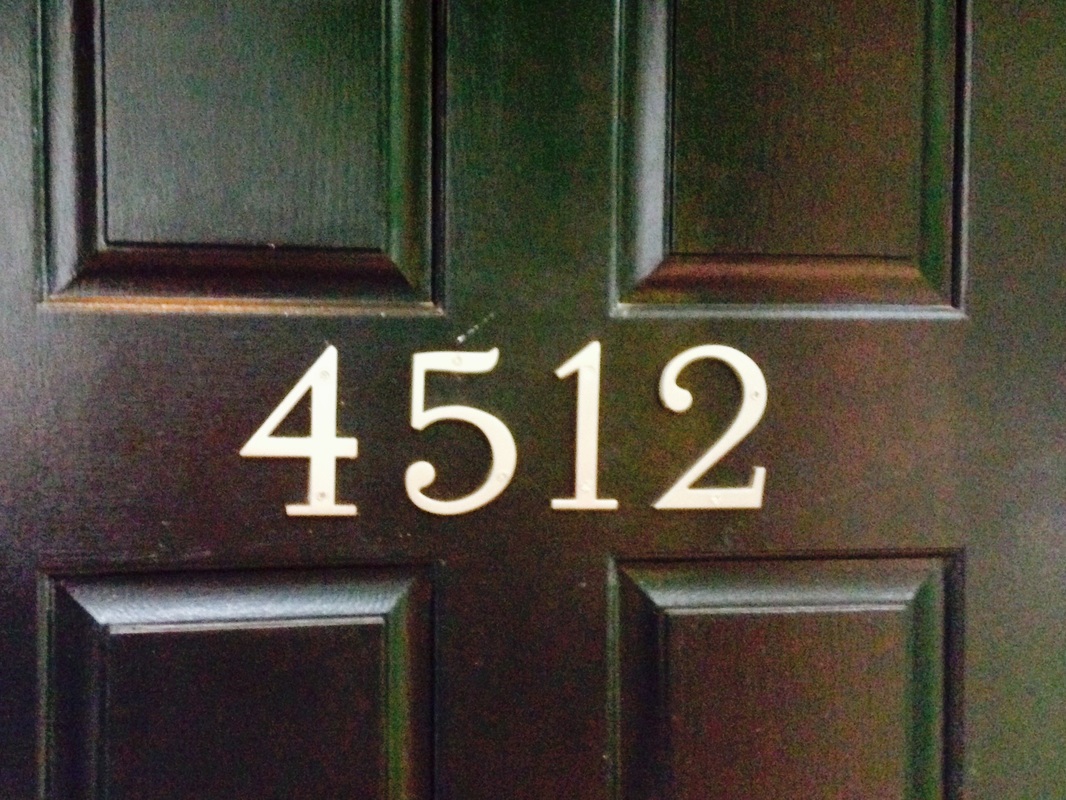
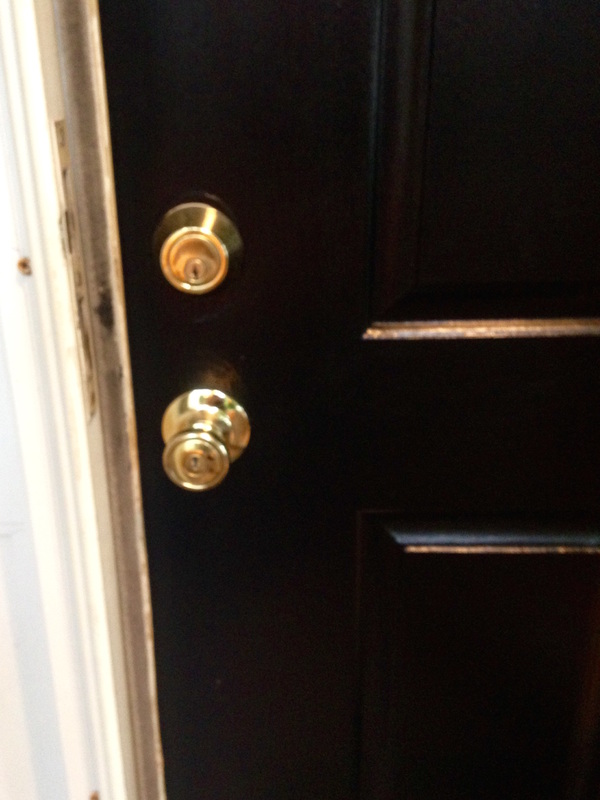
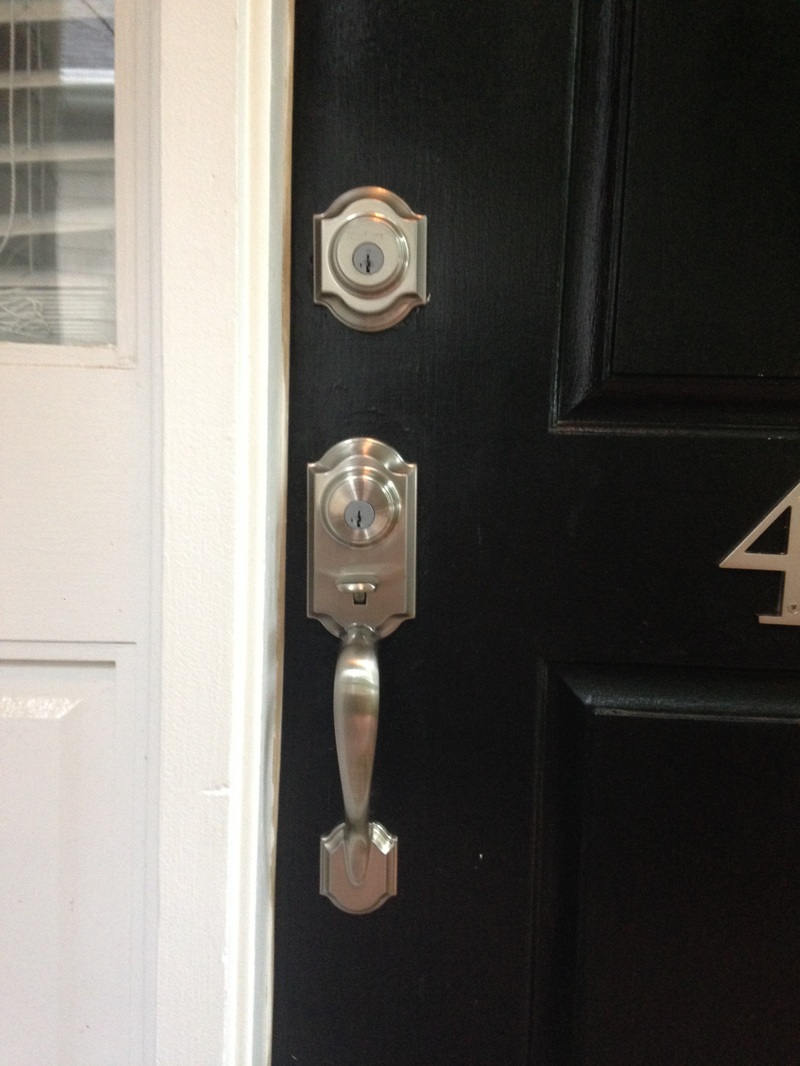
So this has been a long time coming, but I've finally taken pictures of my stairs. I have to say I am SO HAPPY with the way they came out. A few things real quick and then I'll get to the pictures: The Stain: I used Mixwax prestain for all of the stairs because they are pine. Next, I applied one coat of Minwax Honey, let that dry for a few hours, and then applied a mixed stain of Minwax Special Walnut and Minwax Dark Walnut. I tried my best to match it to my laminate floors, but I'm not sure I made it a perfect match. Oh well - they look great anyways! I applied three coats of Minwax polyurethane to finish them off. How to Attach: I used Liquid Nails on the stringers and the plywood risers, and then predrilled (with a countersinking bit) two holes per side and attached the wood with 2.5 screws. I then bought and stained plugs that fit the holes and hammered them into place. For the curved stairs, I just applied a TON of liquid nails, used sandbags for extra weight, and then used a nail gun to securely attach them.  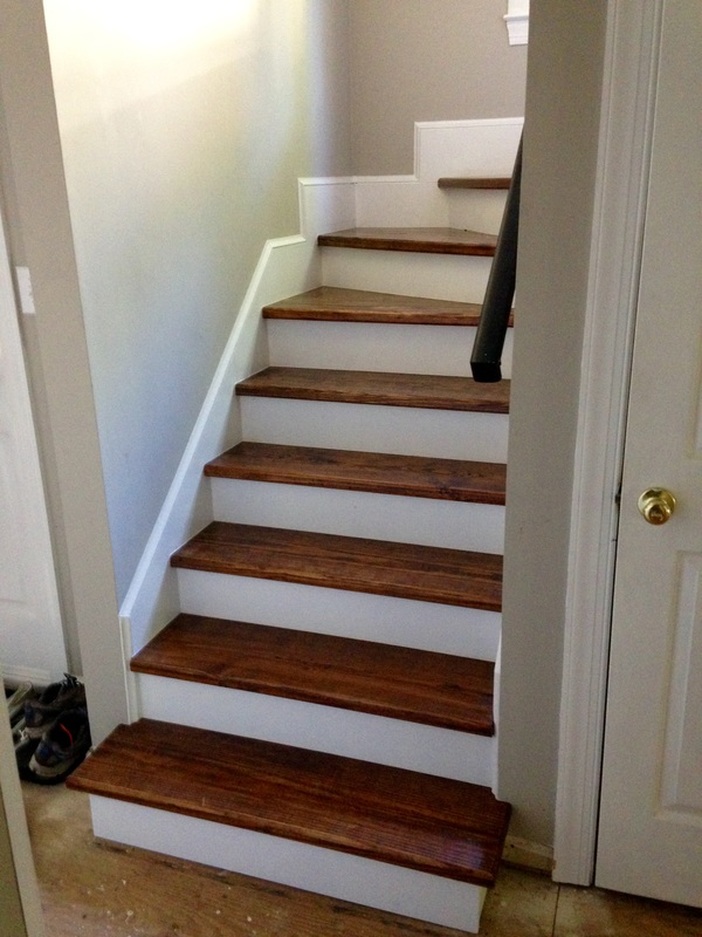 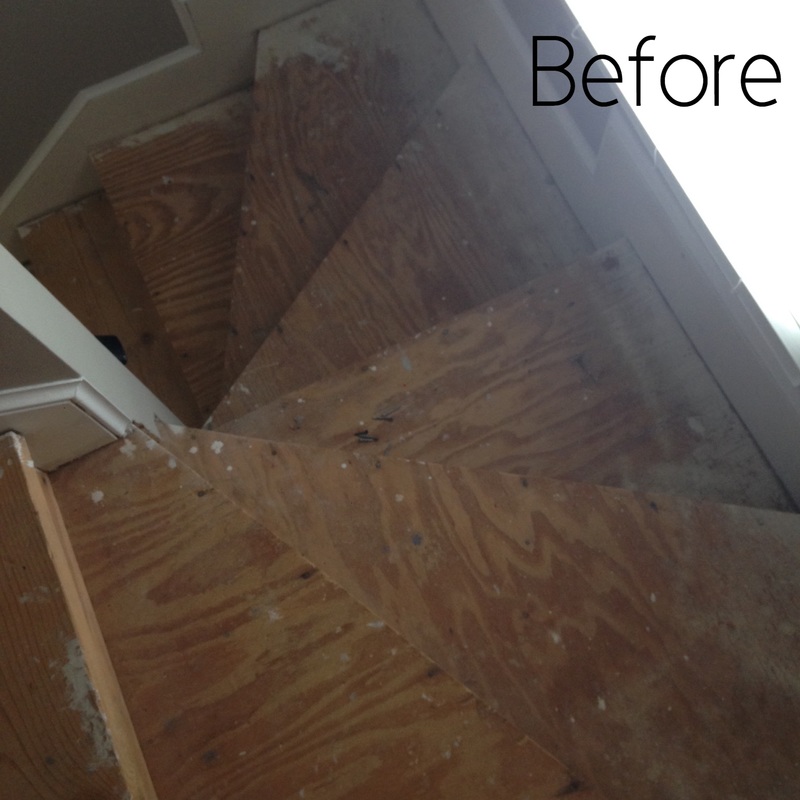 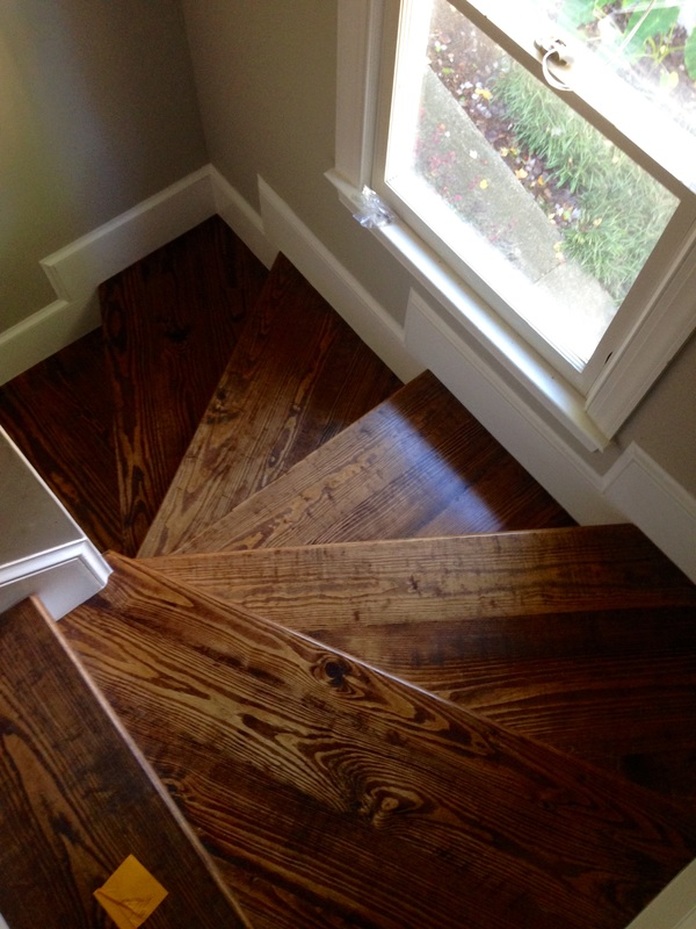 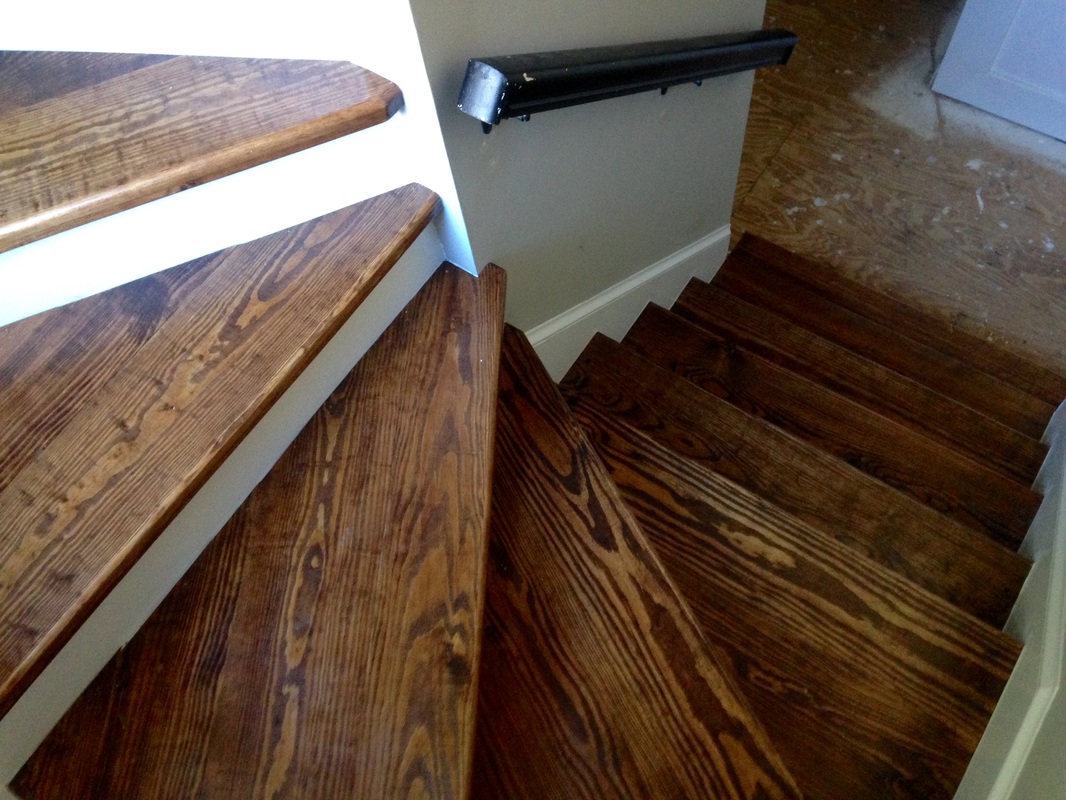 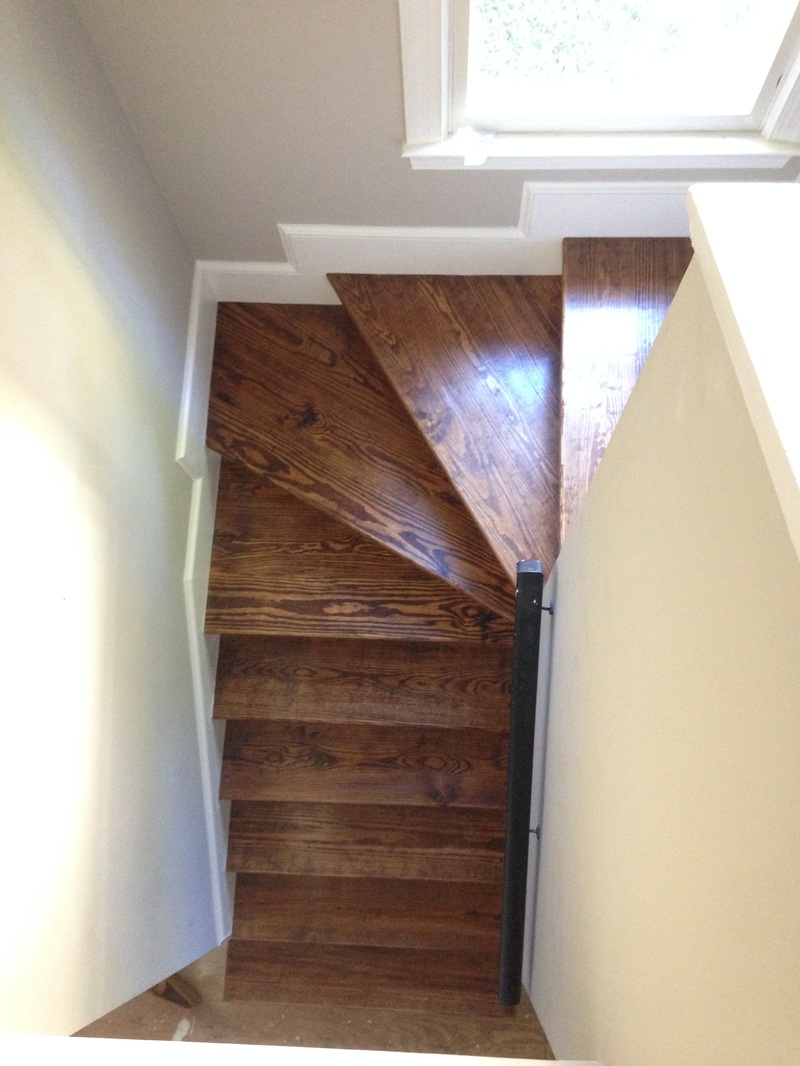 Update 1: Curved stairs. I left the last post explaining how I am creating the curved - or as I was corrected the other day, angled - stairs. Now, since these treads are only 0.75" thick, I needed to double up the fronts to make them appear as thick as the other boards. It was pretty simple. I just ripped a 1.5" wide piece of 0.75" thick wood, glued, clamped, and finished nailed it to the angled tread. I then sanded and routered the edges to make them appear just like the other treads. 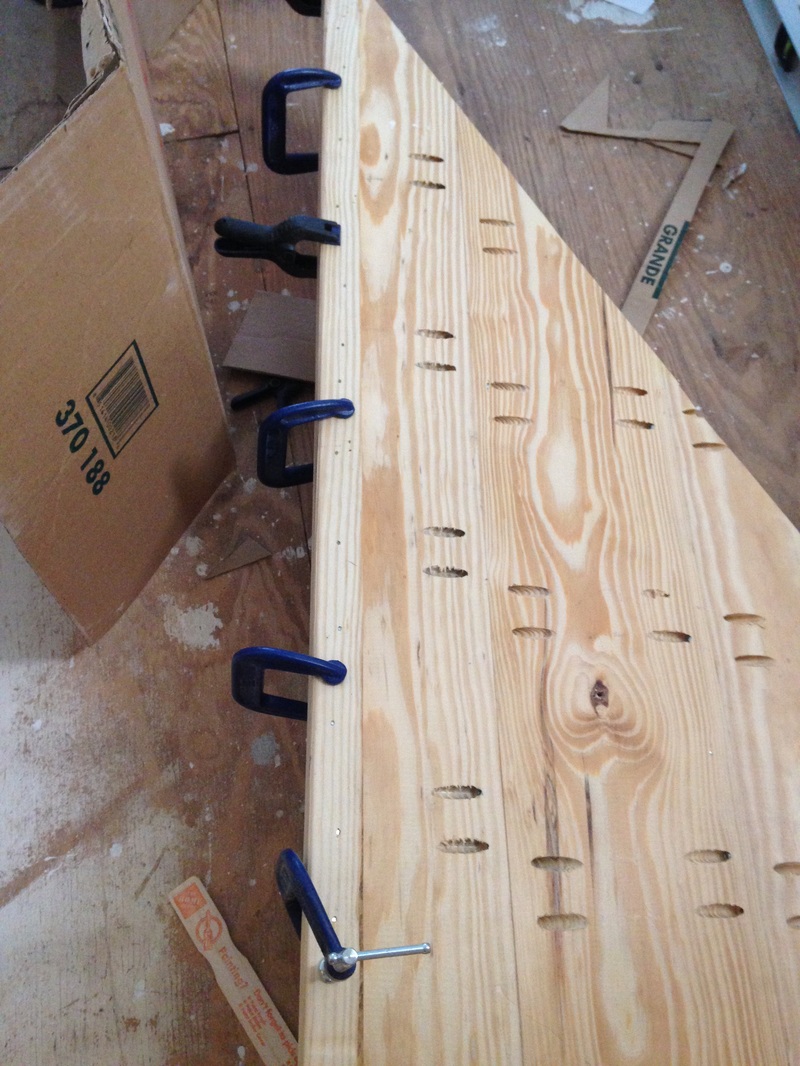 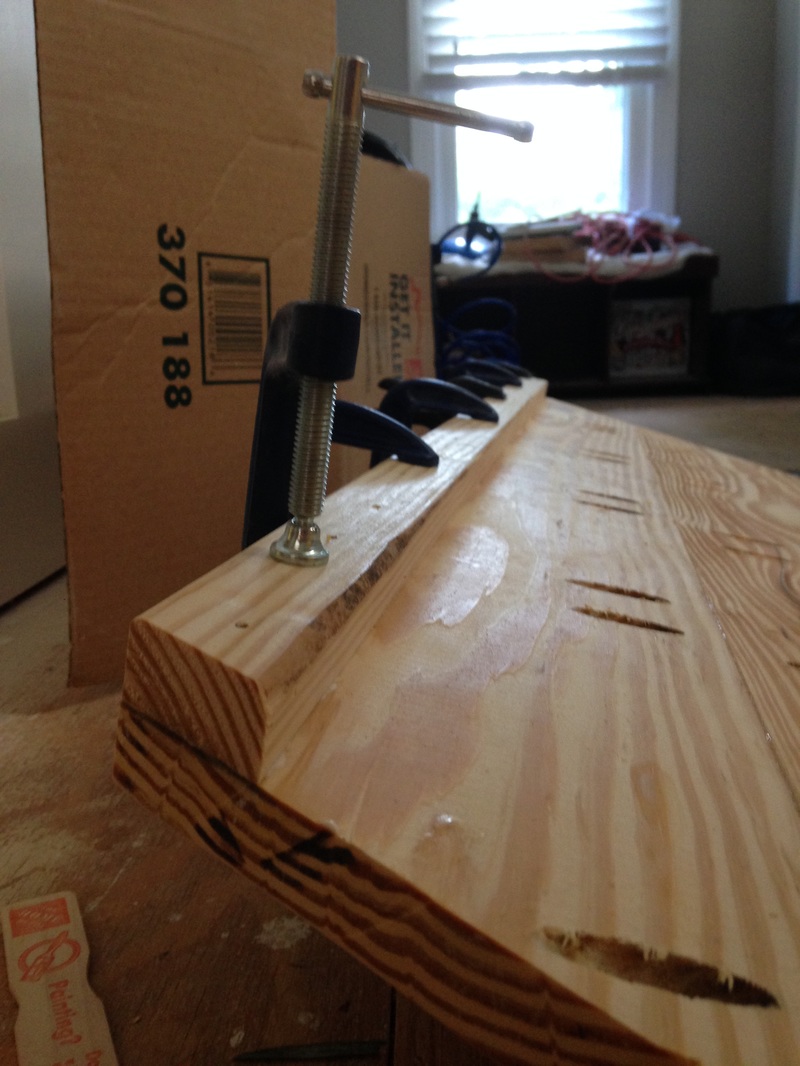 Below, you can see how skinny the angled boards are compared to the straight treads.  Gluing and clamping the new bottom lips on. 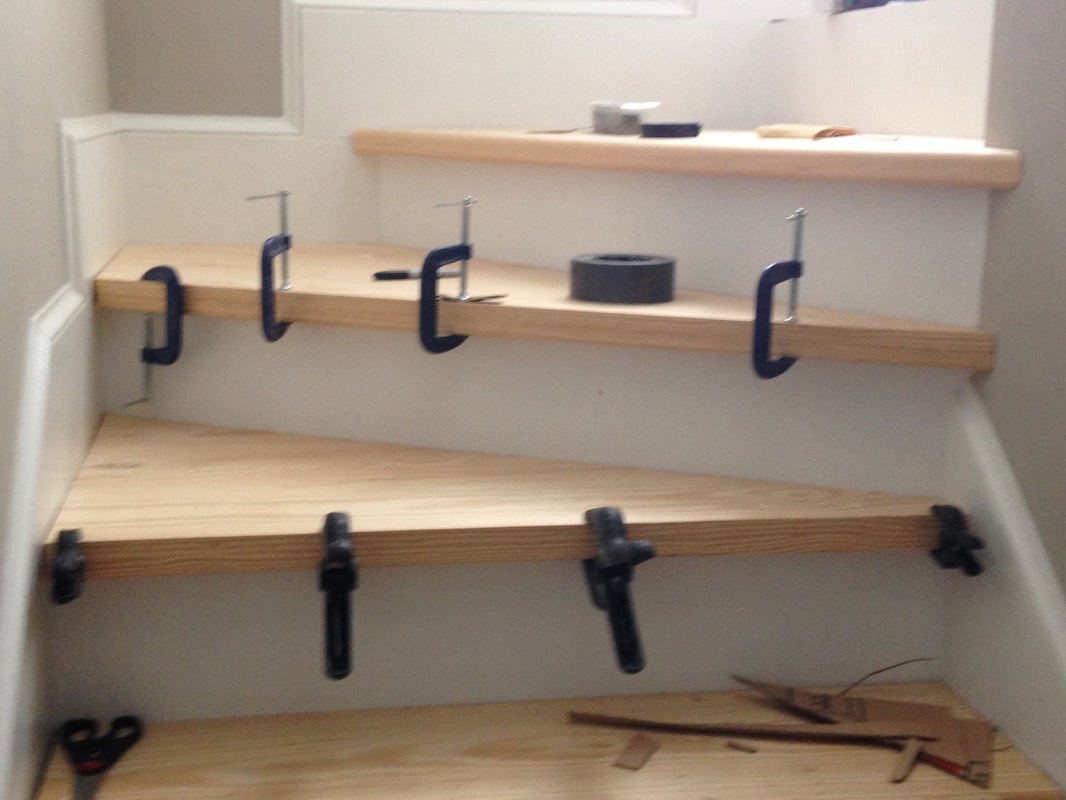 Can you even tell which ones are the 1.5" thick treads and which ones are the "pretend" 1.5" thick treads? :) 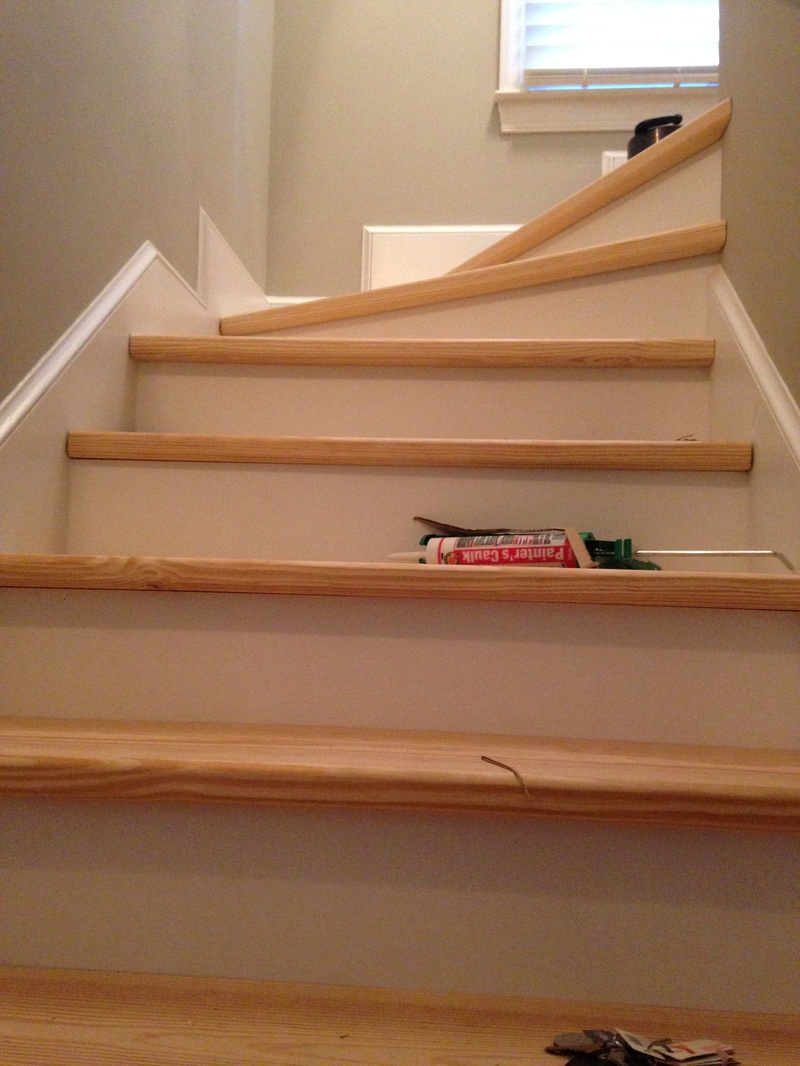 After staring at my beautiful work for a long time, one thing started to bother me. The third angled tread kind of.... stuck out... a bit along the wall. See below. 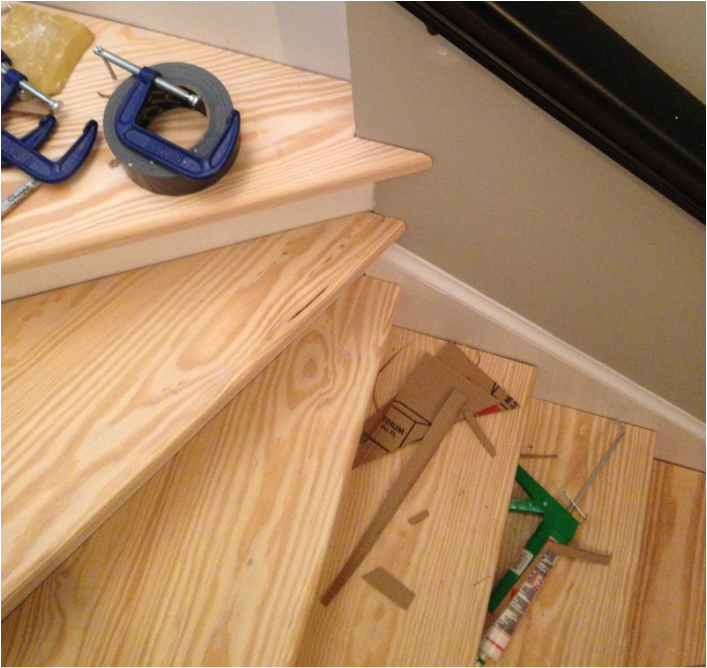 I decided to lop of about a half-inch of the end, router it a bit, and then place it back. I'm much happier with this look than the previous, but it makes me want to adjust the tread right below it as well to give those stairs a more cohesive look. 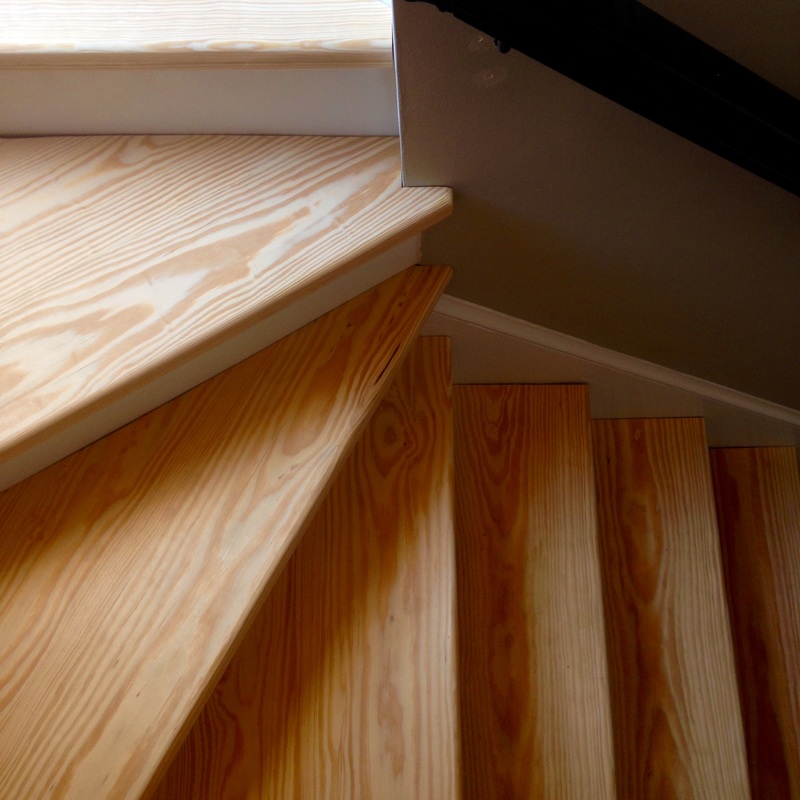 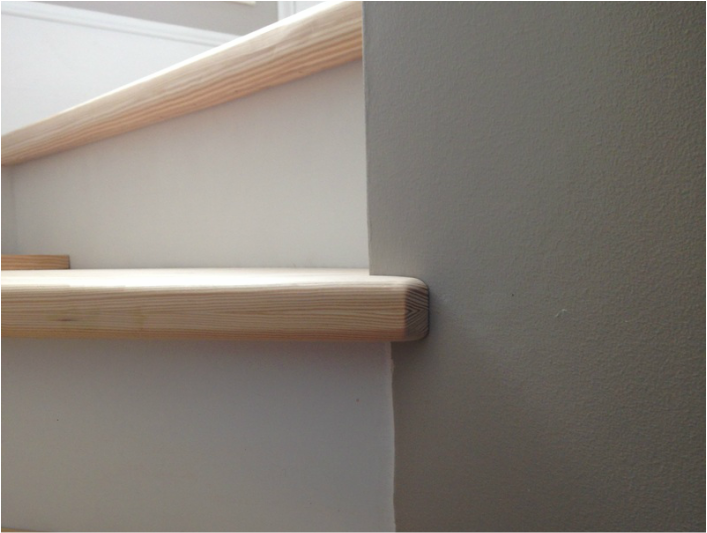 Update 2: Semi-Reveal. These posts have been a little long winded, so I figured I'd recap what the stairs used to look like compared to what they look like now. 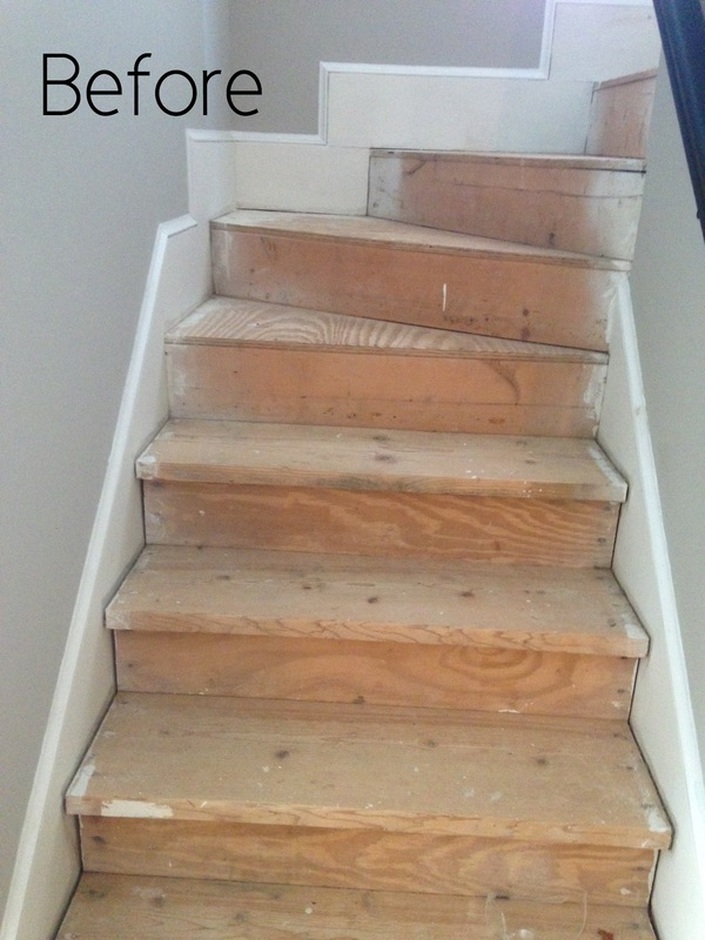 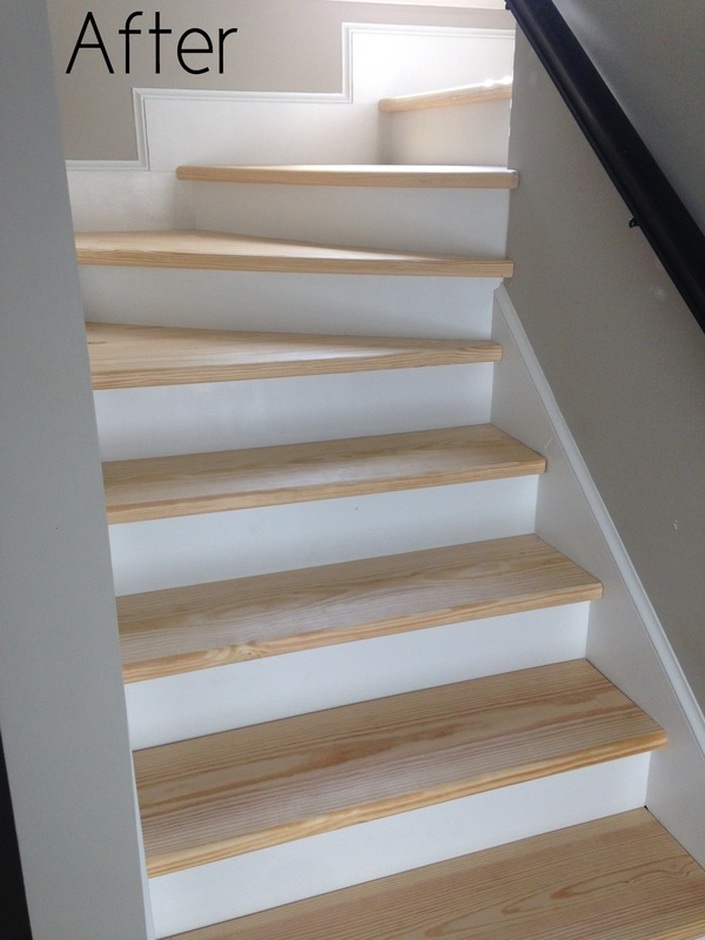 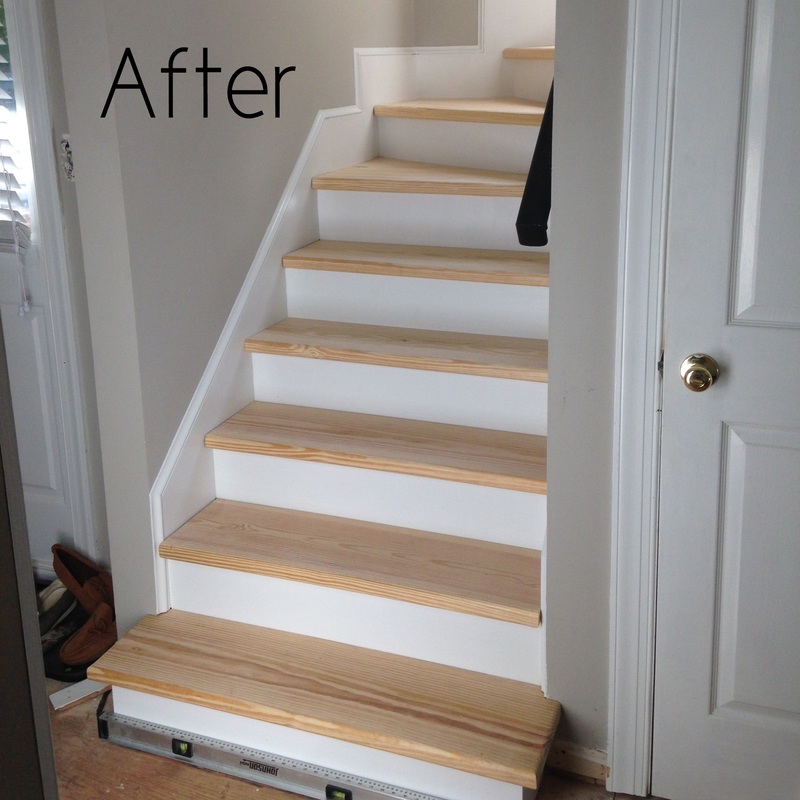  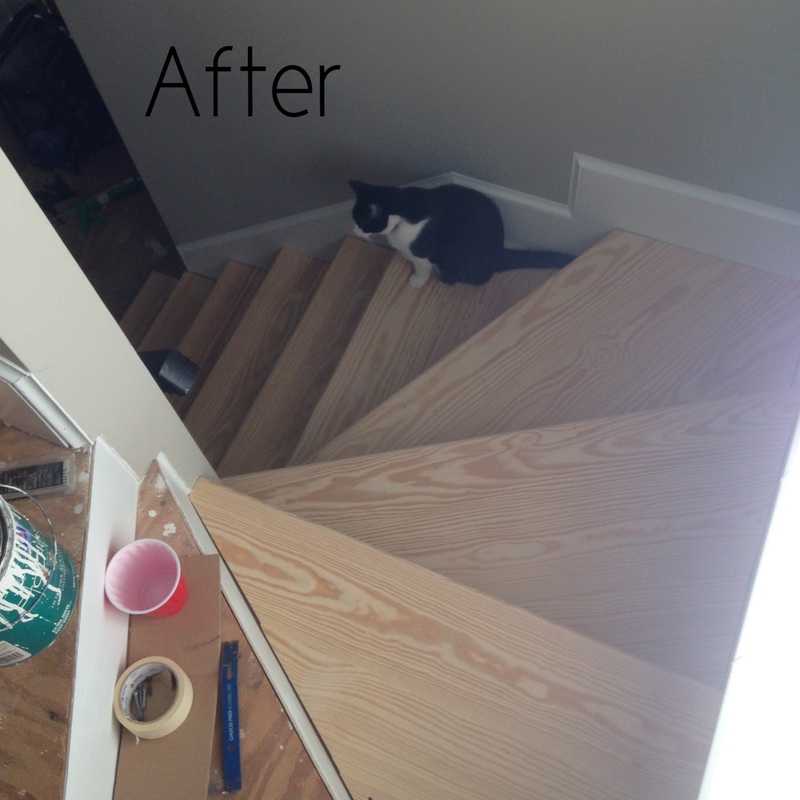 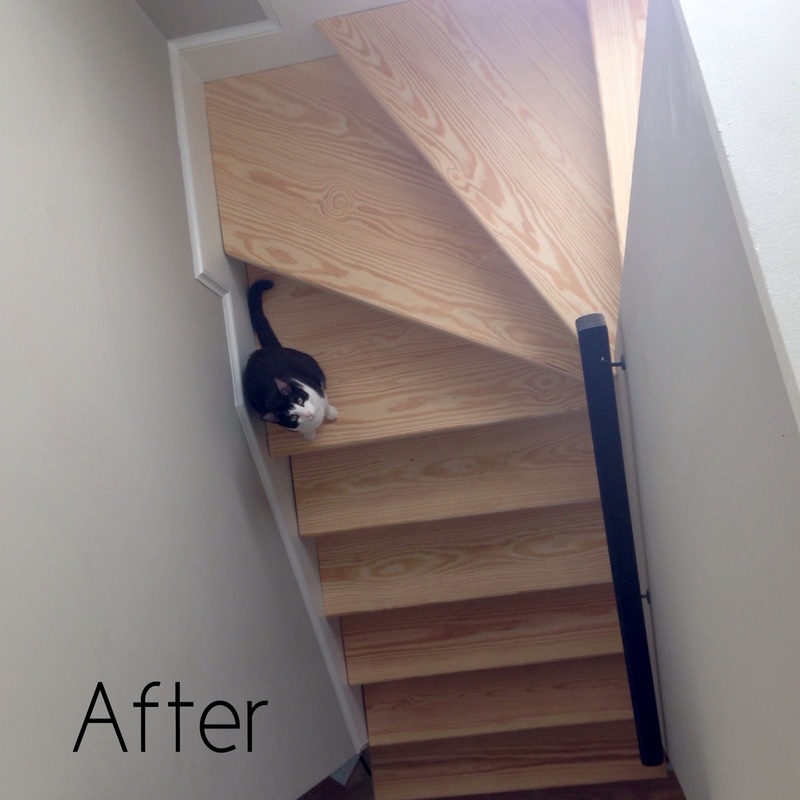  My front door looked terrible. There are no if's, and's, or but's about it. There was a gap at the bottom because the door sweep had fallen off (it was stapled to the bottom of the door), the handle was brass and ugly, I'm pretty sure it had been kicked-in previously, the peep hole was painted over, and the threshold was cracked - it was bad. So I wandered over to Lowe's to get a quote for a new door (and apparently sidelights) and I just about fell off my seat when they told me - $1200!!!!! WHHHAAATT???? I decided that I'll go ahead and fix it as best as I can myself. I started by changing out the locks and handle with a Kwikset entry door set, which can be found here. I decided to go with a satin nickel finish (even though I will have oil rubbed bronze in the rest of the house) simply because I wanted the hardware on my black door to pop.
 I took some sand paper and rubbed the paint off of my peep hole. Although sand paper probably isn't best to use on finished metal, I am OK with the brass finish lightening up to look more like the satin nickel hardware. 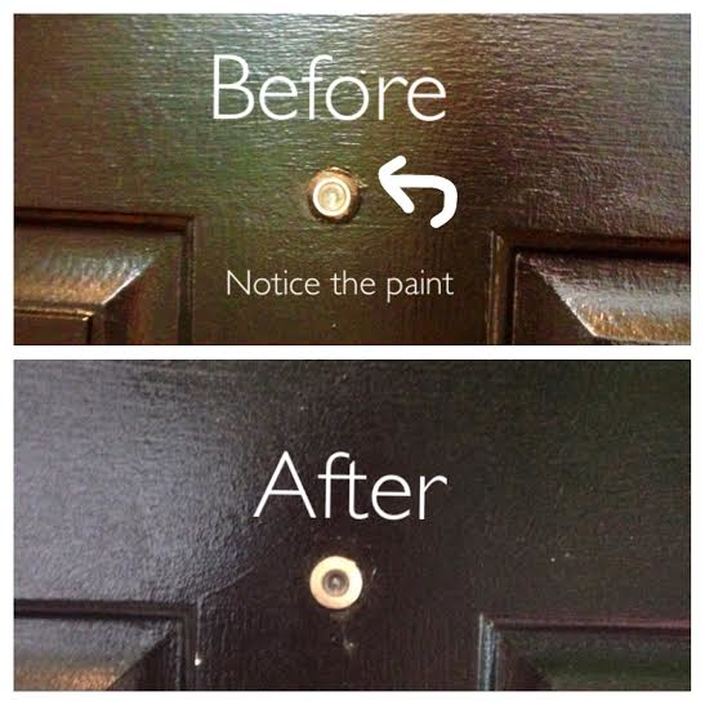 I am probably most excited about the new door sweep, which required the door to be taken off the hinges and screwed onto the bottom of the door. It closed the 1/2" gap between the threshold and the door bottom, which will make the house more energy efficient and help keep the bugs out! 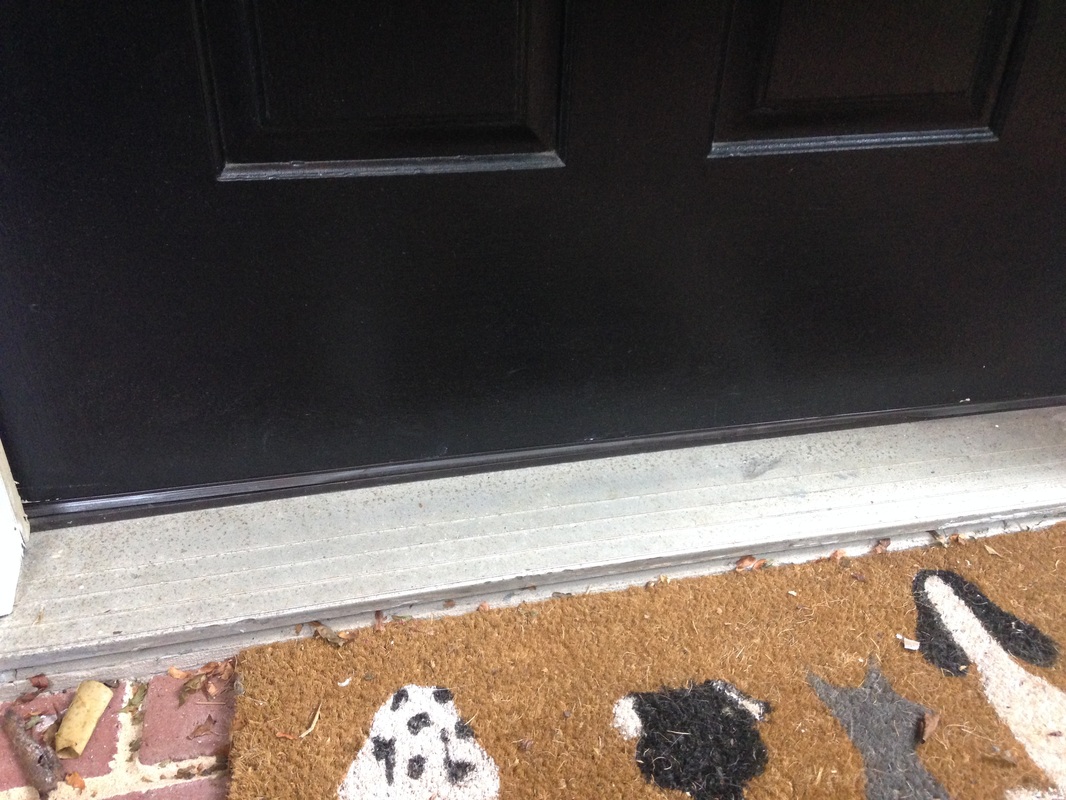 Unfortunately, I am unable to replace the cracked threshold without removing the entire unit (sidelights and all). This is just above and beyond my DIY capabilities, so it will be something I will have to live with. 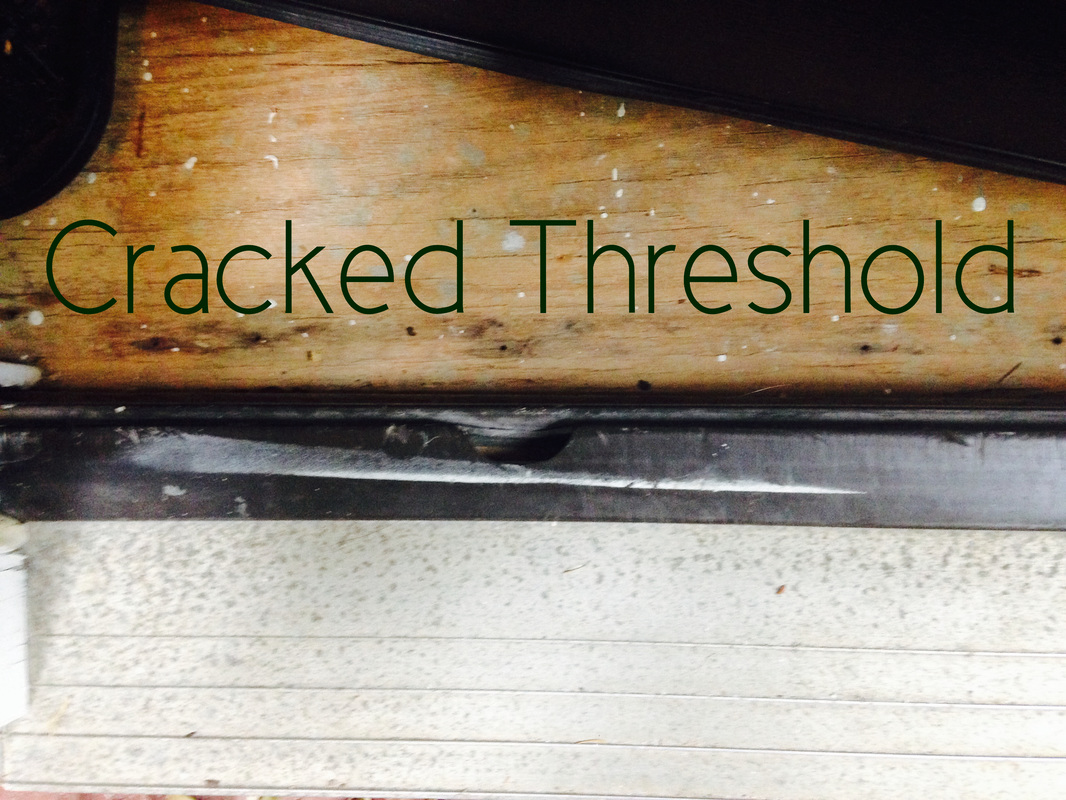 The cat box for my kitties is in the basement, and I've been looking for a cat door (for easier access) since I moved in. I initially bought one from Lowe's, however it had a swinging door on it and I was afraid Boots would be too scared of it and not use it. Then, I searched Ebay and found the most amazing cat door ever: The Kitty Pass. 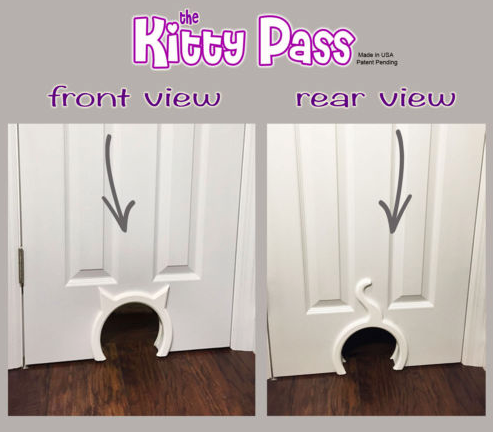 How frickin' cute!!! It came today and I immediately installed it on the basement door. So far, so good! 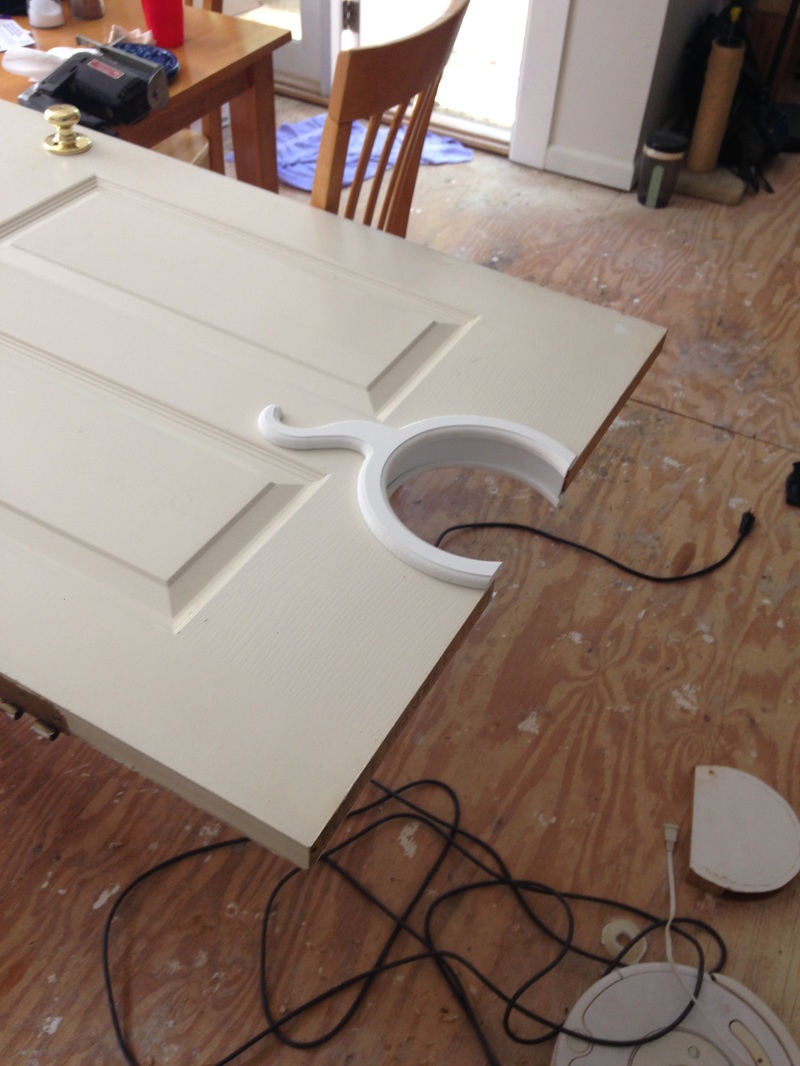  Even Mr. Boots is loving it! 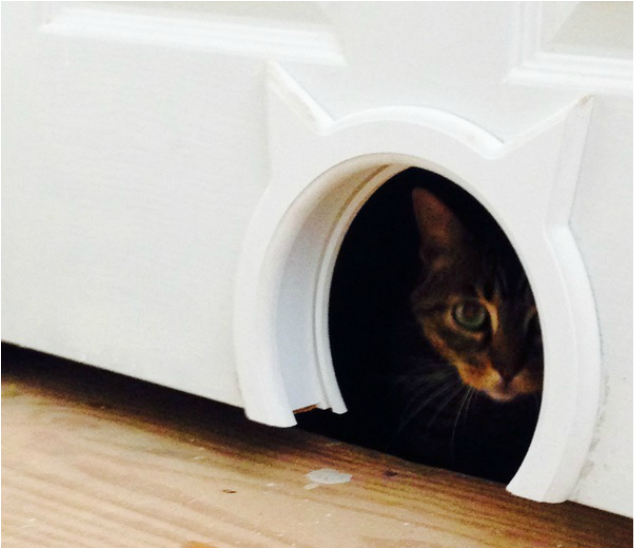 There's a fat man on my mantle, and for the time being, I'm OK with it - because it means I actually have a mantle! 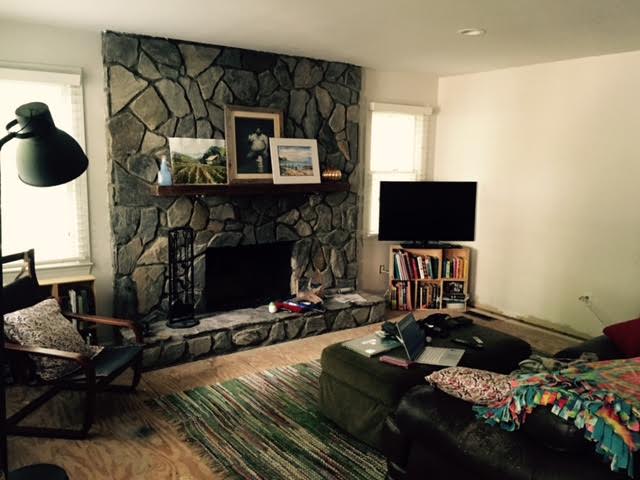 One of my first projects in this house was building my own mantle. I haven't written about it, but I've had the mantle for about a year now (yikes) and it has been sitting in my basement collecting dust... until this weekend! Before we begin, let me recap how (and why) I built my own mantle. 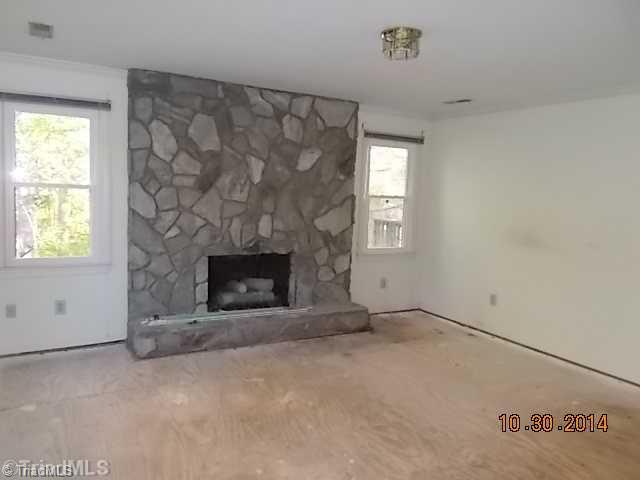 I had a major dilemma with two of my fireplaces (master bedroom and the living room). They are stone, obviously, and when they were installed, the owner never thought to have a couple pieces of the stone protrude out for a mantle to sit on. Or maybe they just never thought, "Hey! It would be a good idea to split this GIANT PIECE OF STONE up with a mantle so that it's not just a GIANT PIECE OF STONE! Let me make sure in my design I incorporate some flat pieces for my mantle to attach to!" Yeah, that never happened. The stone is uneven, thick, and very few places are actually flat enough to attach any sort of anchor. So what to do? Make my own! I really wanted a wooden, rustic, reclaimed look for my mantle without the price of reclaimed barn wood. To get around this, I bought a piece of 2" x 8" x 12' piece of new lumber, cut it into two 6 foot sections, glued and drilled the two pieces together, and sanded the edges down so they were flat (which was a LOT of sanding. A table saw would have made this much easier). What I got was an approximately 3" x 7" x 6' mantle! Brian and I then beat the mantle with nuts, screws, hammers, saw blades... basically anything that was sharp and could cause destruction... and stained it for our finished product. It's awesome (and cheap!!!). The question then became, "How do I attach this to the fireplace?" Great question, which is why I then turned to my trusty friend, Pinterest. I was first inspired by the picture below, and actually went as far as making the attachments, spray painting them black, and attempting to attach them to the fireplace (with the advise from the guys at the Depot). The problem arose when we tried drilling through the stone to attach masonry anchors. Brian and I tried a hammer drill, then we tried a different hammer drill. We drilled about a quarter inch into the stone in about 20 minutes. Simply stated, it wasn't working so we abandoned the project for a year. 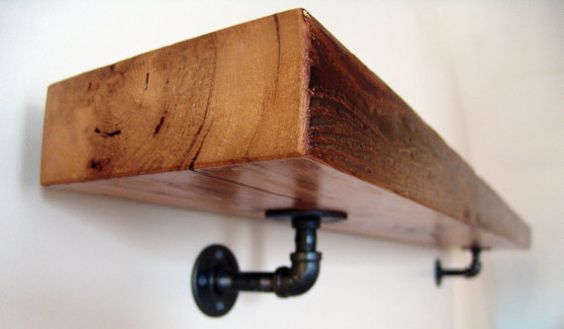 This weekend, for whatever reason, we were inspired again to attempt what seemed to be our futile project. Brian did some more research of hammer drills, and he stumbled across this YouTube video about the differences between a hammer drill and a rotary hammer. Needless to say, we decided to make a trip to the Depot and rent a rotary hammer and attempt the project again. It was like drilling through butter. Yeeessssssss!!!! I also ended up changing my design with the attachments. I decided to go with a simpler design which would allow me to change the mantle easily in the future if I should ever choose. My inspiration picture is below. Basically, the wood just sits on the plumbing nipple instead of being attached to a flange. 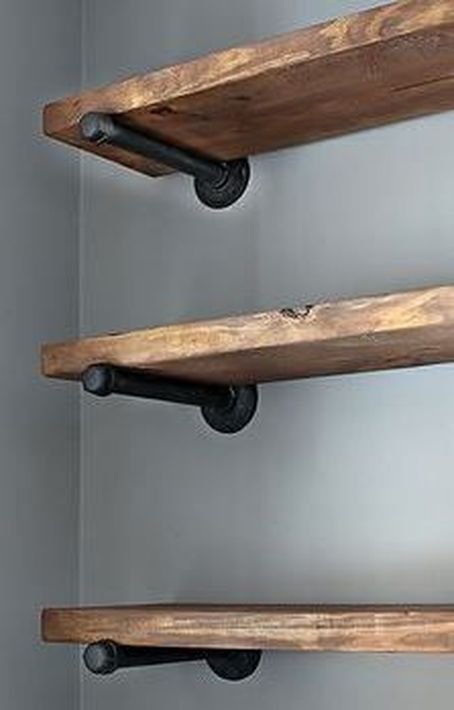 With a few more trips back to the store to stock up on more things we needed, we were finally able to securely attach both flanges and hang our mantle. Although I think it might be a little high (we were hoping to put the TV on top of it - not anymore) this is a real wood-burning fireplace and I'd rather err on the side of caution and not worry about my mantle catching on fire. 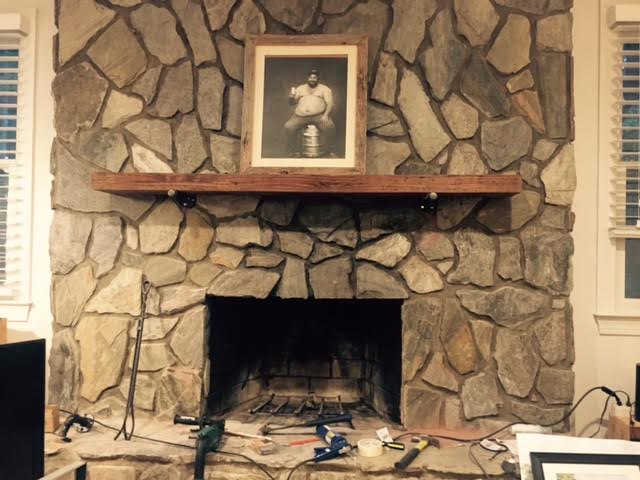 |

about meHi! I'm Lauren! I'm a twenty-something teacher and homeowner in North Carolina. I love math, decorating, and getting down and dirty learning new things about home renovation and repair. Categories
All
Archives
December 2018
|
 RSS Feed
