|
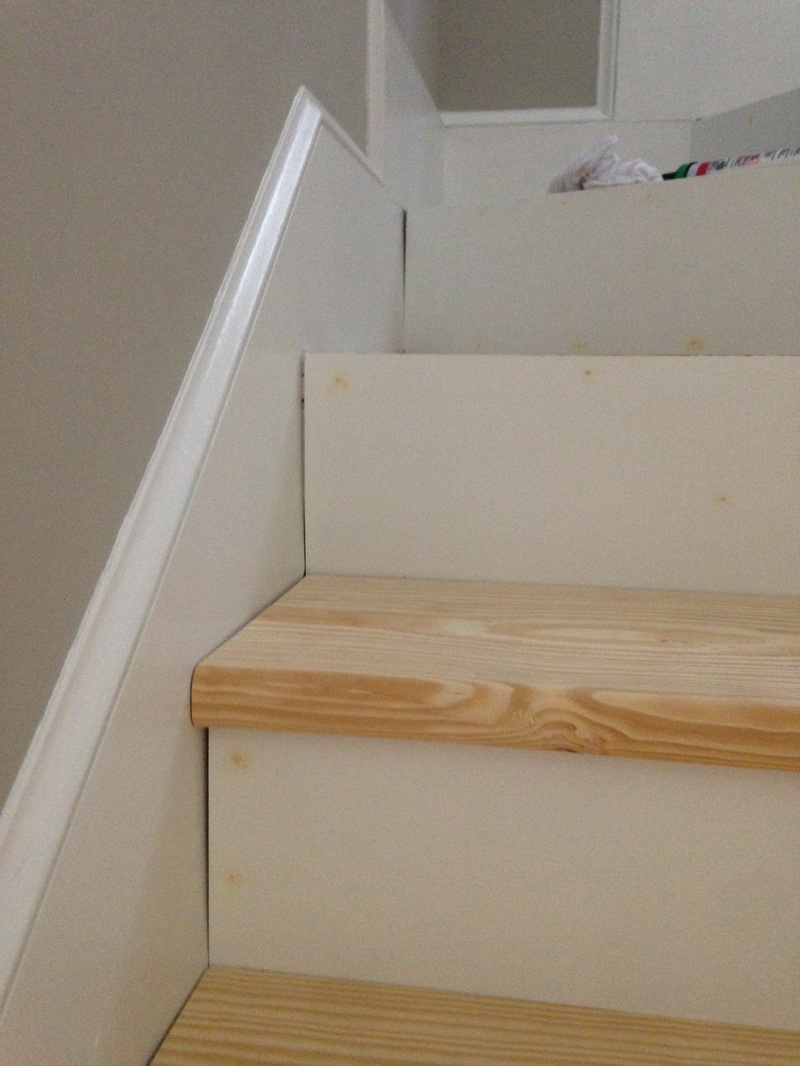
Update 1: Curved stairs. I left the last post explaining how I am creating the curved - or as I was corrected the other day, angled - stairs. Now, since these treads are only 0.75" thick, I needed to double up the fronts to make them appear as thick as the other boards. It was pretty simple. I just ripped a 1.5" wide piece of 0.75" thick wood, glued, clamped, and finished nailed it to the angled tread. I then sanded and routered the edges to make them appear just like the other treads. 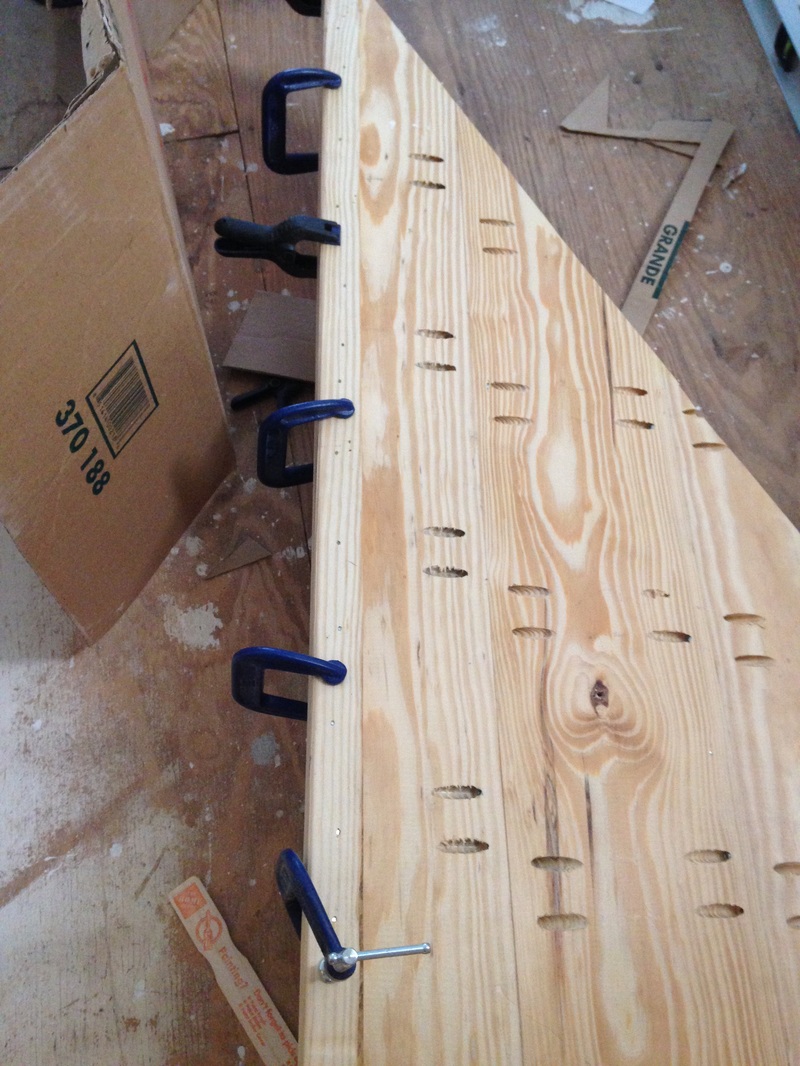 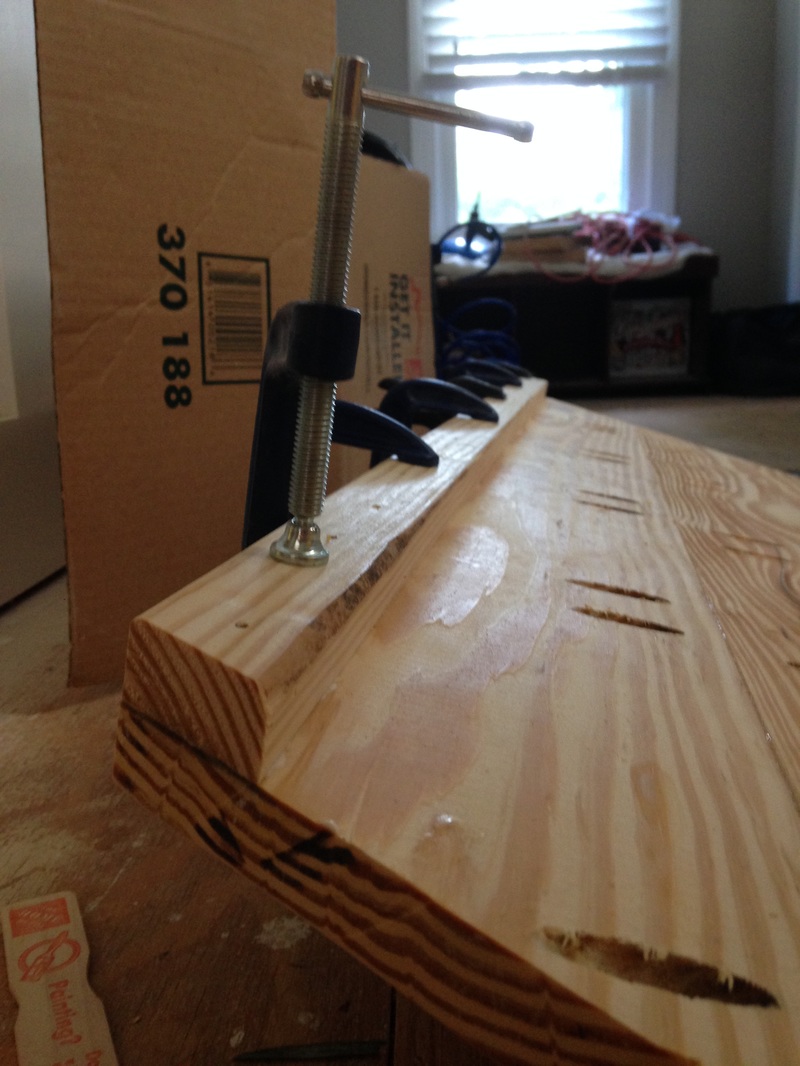 Below, you can see how skinny the angled boards are compared to the straight treads.  Gluing and clamping the new bottom lips on. 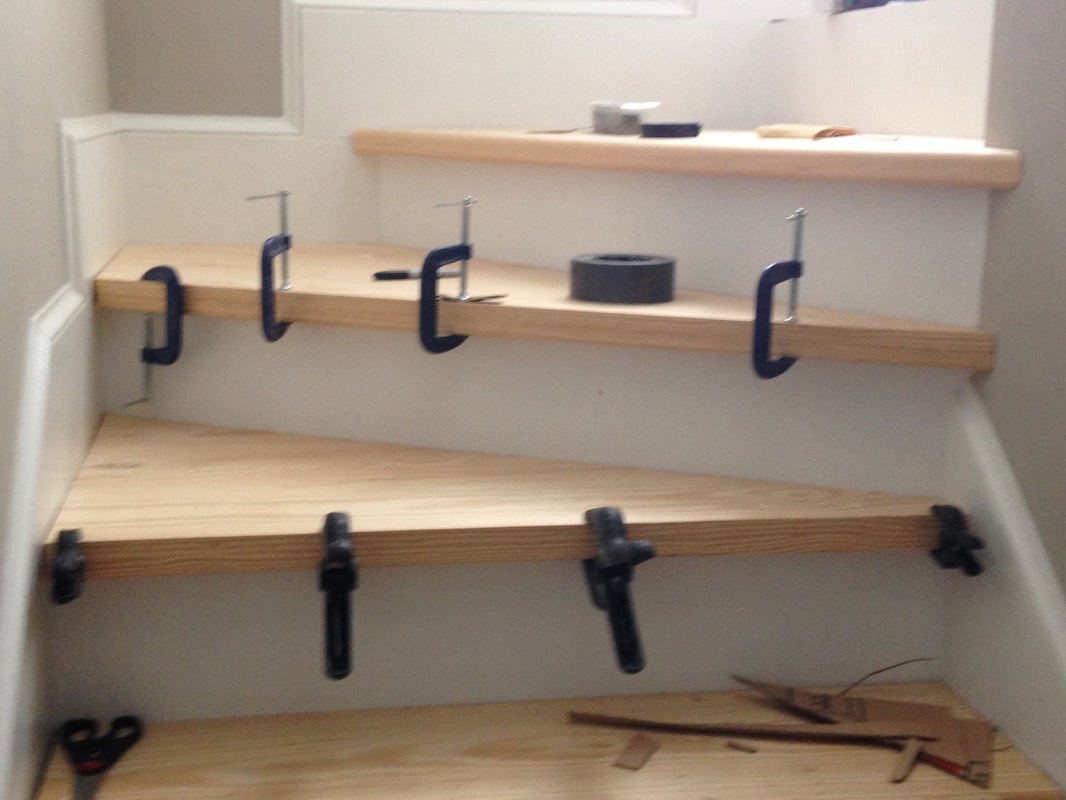 Can you even tell which ones are the 1.5" thick treads and which ones are the "pretend" 1.5" thick treads? :) 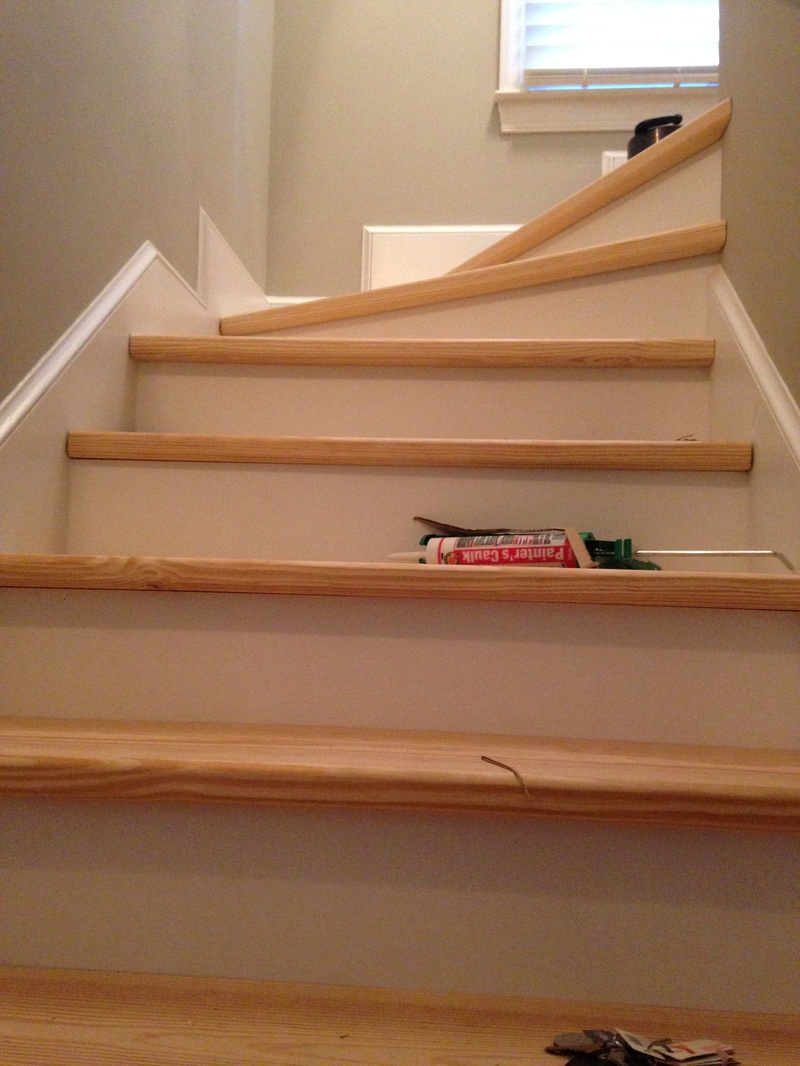 After staring at my beautiful work for a long time, one thing started to bother me. The third angled tread kind of.... stuck out... a bit along the wall. See below. 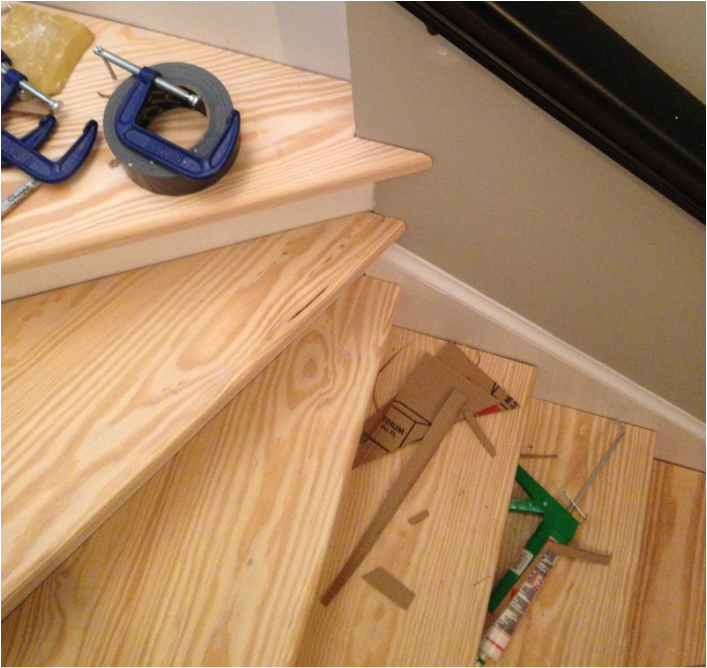 I decided to lop of about a half-inch of the end, router it a bit, and then place it back. I'm much happier with this look than the previous, but it makes me want to adjust the tread right below it as well to give those stairs a more cohesive look. 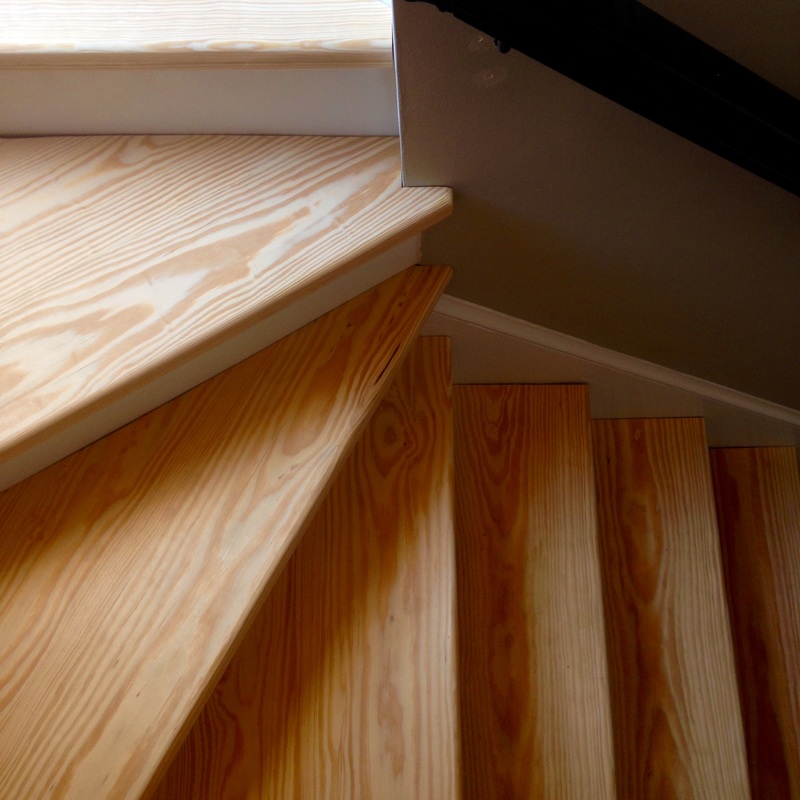 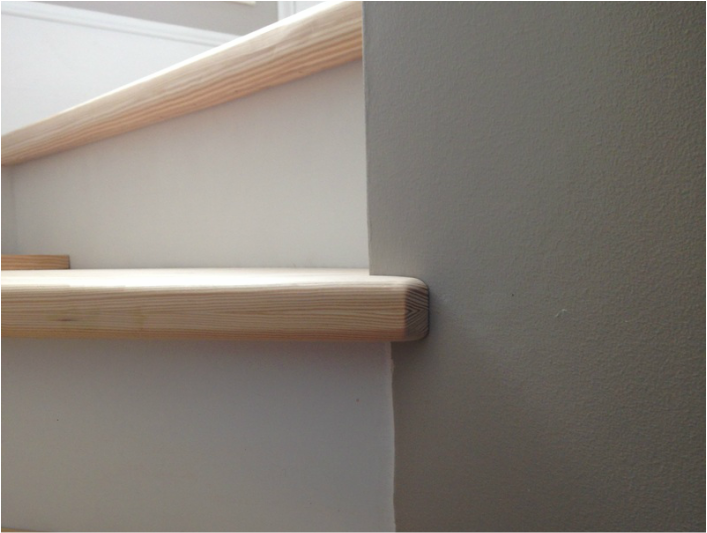 Update 2: Semi-Reveal. These posts have been a little long winded, so I figured I'd recap what the stairs used to look like compared to what they look like now. 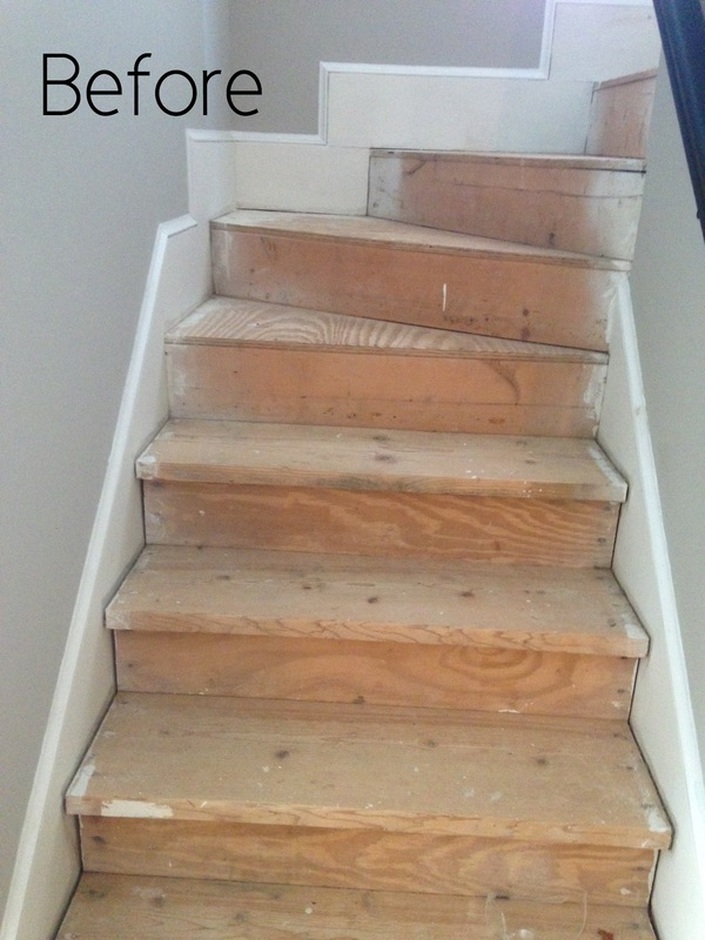 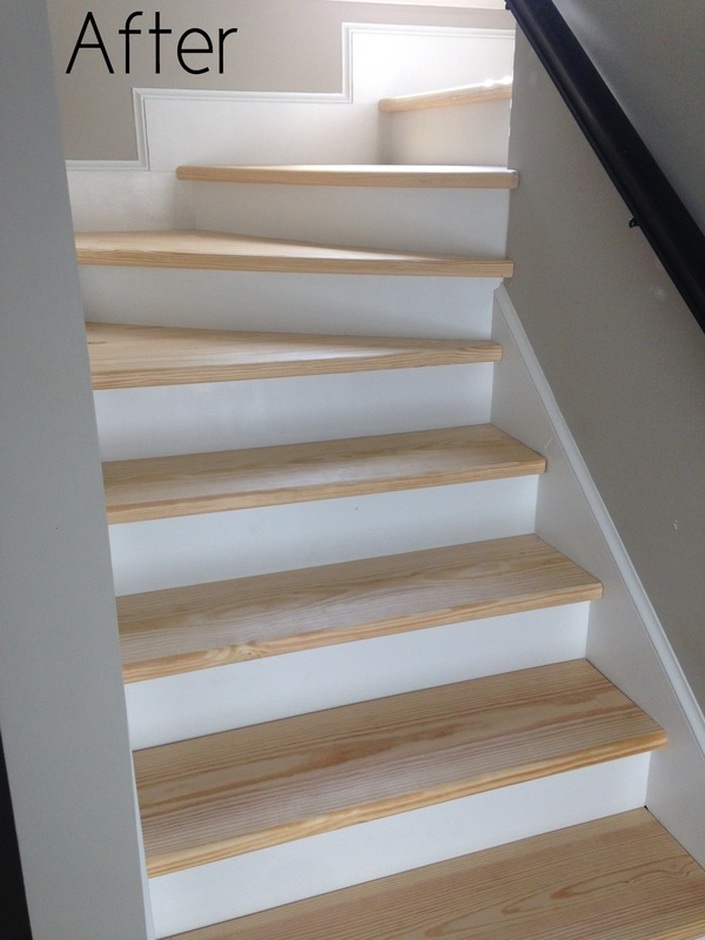 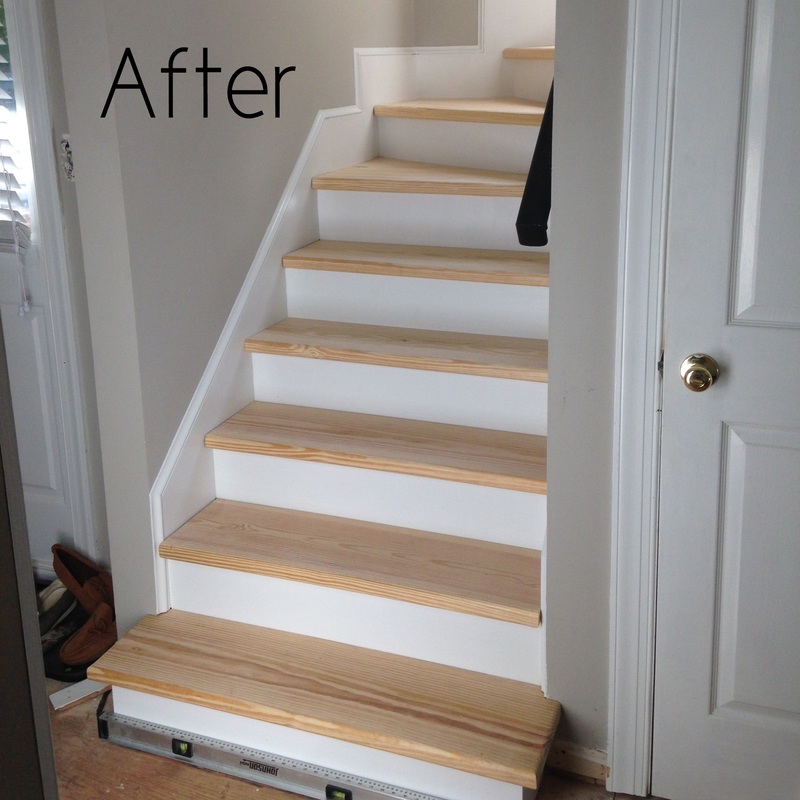 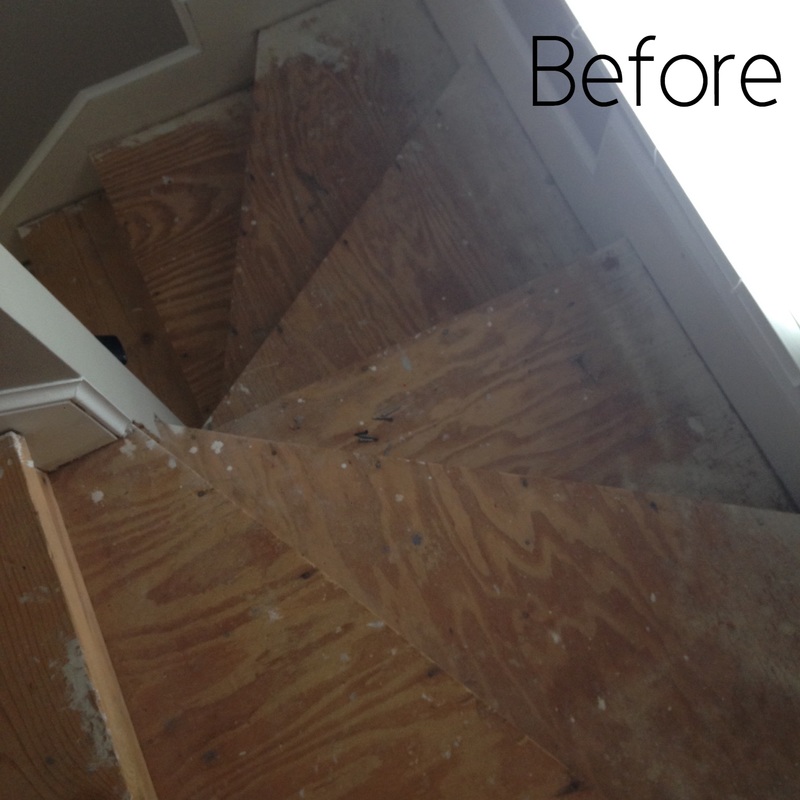 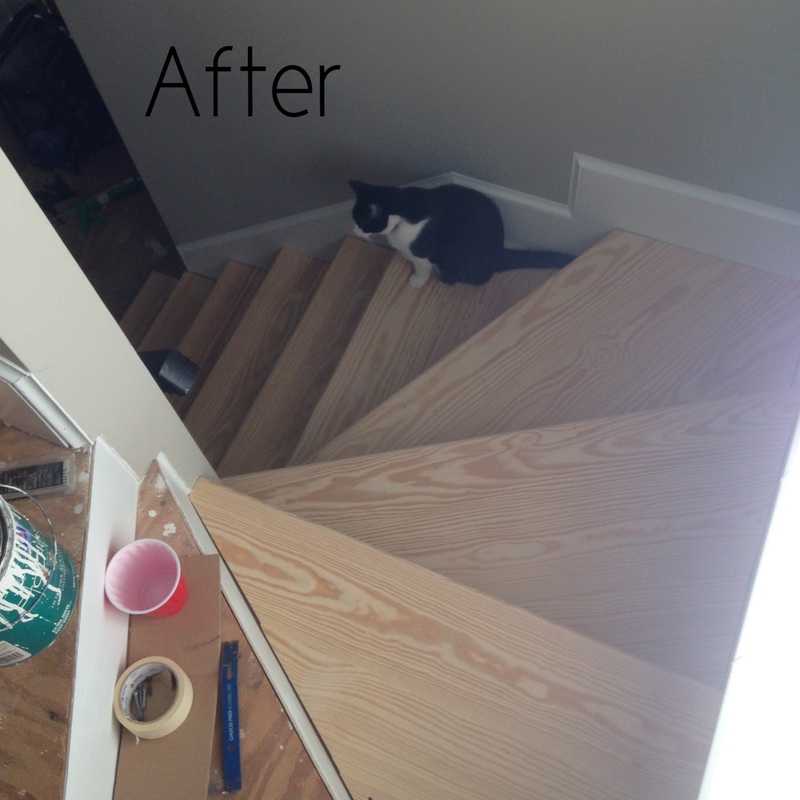 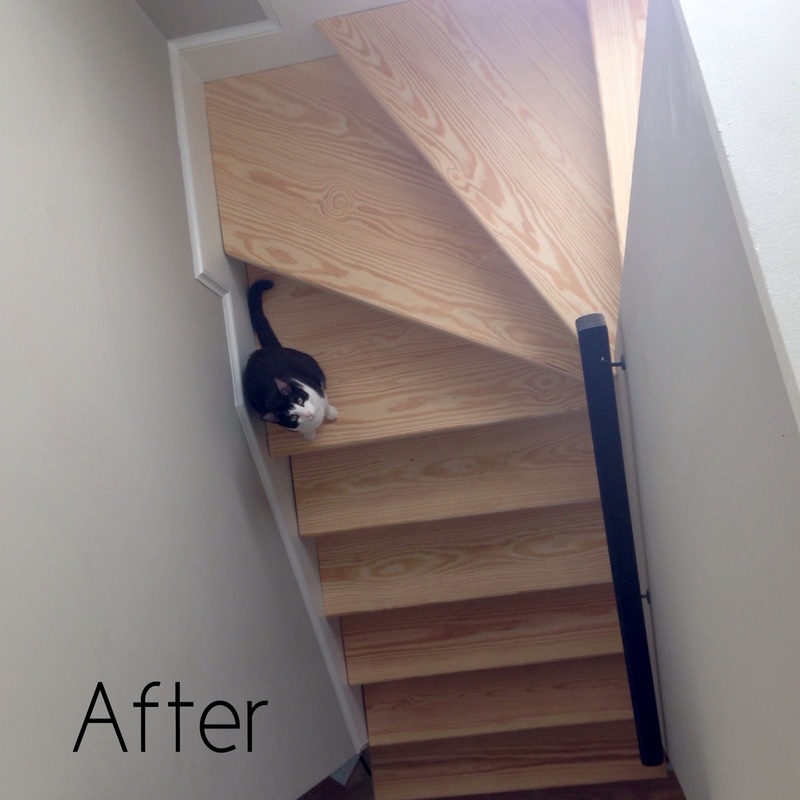
2 Comments
Update 1: Risers. For the treads that were being completely replaced, the risers were also replaced. I used 3/4" sanded plywood, painted them white, and heavy-duty glue and nailed them onto the stringers. They look great! For the risers that go around the curved stairs, I used 1/4" luan. I was initially thinking I would use 1/2" plywood, but am glad I went with the luan. I had a lot of scrap around in my basement that worked great (and kept the costs down). Again, I painted them white and glued and nailed them onto the existing plywood risers.
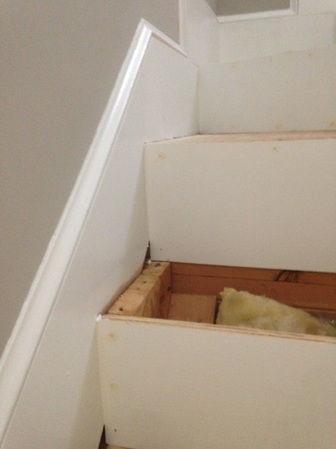
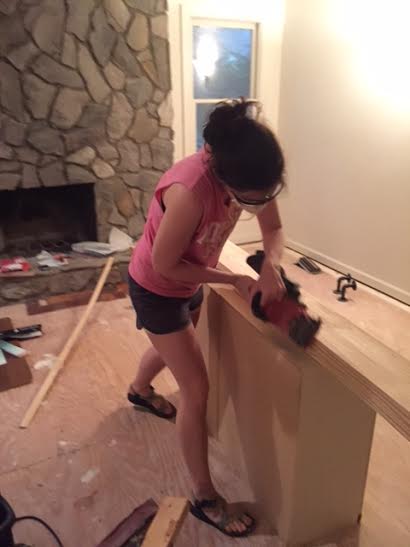
I filled in the nail holes with wood filler and caulked the edges to give the risers that "finished" look. I slapped on one more coat of paint and the risers are finished! 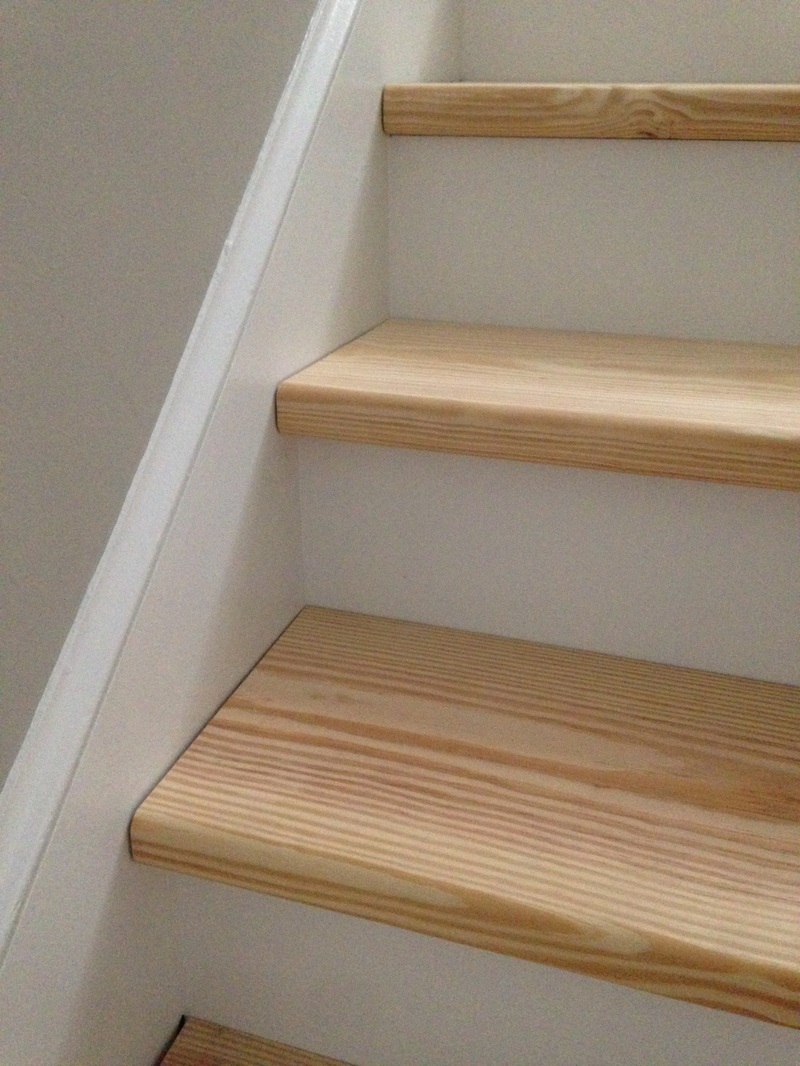 Update 2: The Curved Stairs (Part 1). These are definitely the most stressful (and expensive) part of the stair replacement process. It took me a while to figure out how I wanted to approach this project, but the first thing I did was create a template. Yes, I made it out of dusty old cardboard moving boxes. It was fun. The template isn't perfect, but I dealt with the imperfections later by scribing the wood to the riser. 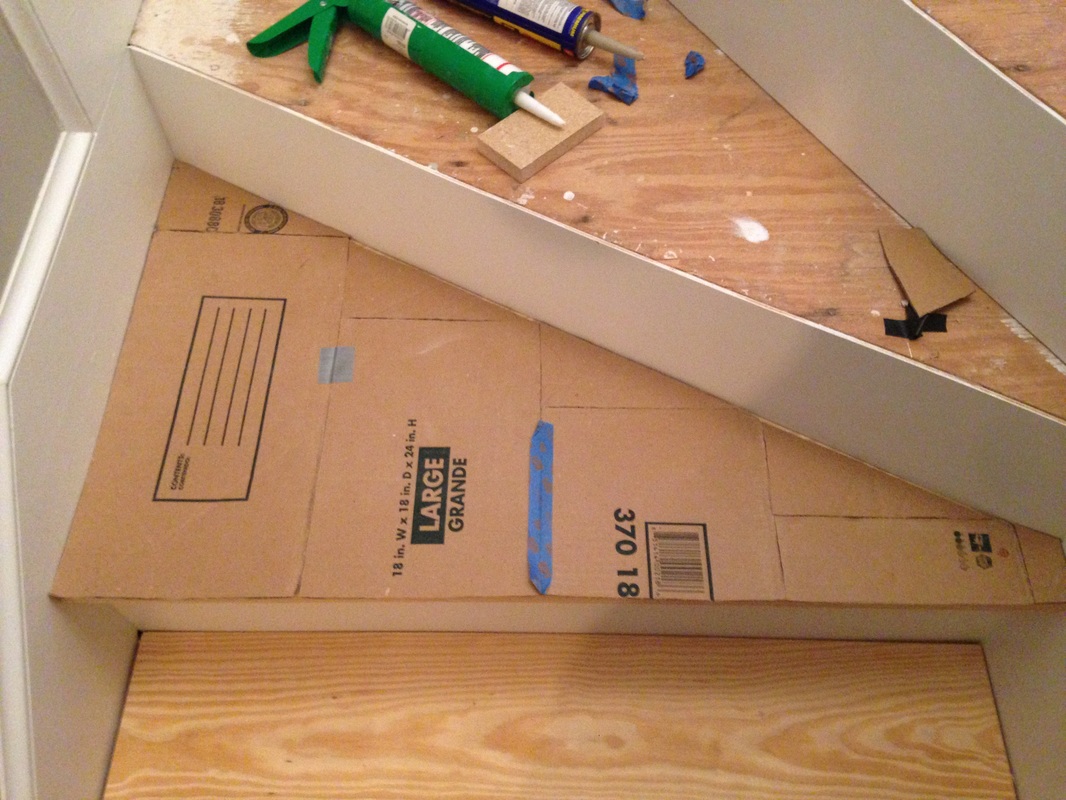 Next, I hit my first dilemma. I should stress that I am not replacing the plywood treads that are there currently - I am simply placing wood on top of the plywood base. According to my dad, stairs should rise 7.5", but could go as high as 8.25" (but really not any more - even 8.25" is high). Currently, from tread to tread, I have an approximate 7.5" rise. Since I am not replacing the existing plywood, by placing a piece of wood on top will increase the rise. Hmmm... what to do. I knew immediately that I could not use the 1.5" thick wood I have been using for the rest of the stairs - it would make the rise too big. Instead, I used basic 1"x8" (really 0.75"x7.25") pine lumber. This increased the rise to just under 8", which is within the allowed amount! Yay! Then, I cut the pieces down to create a makeshift triangular tread, like so: 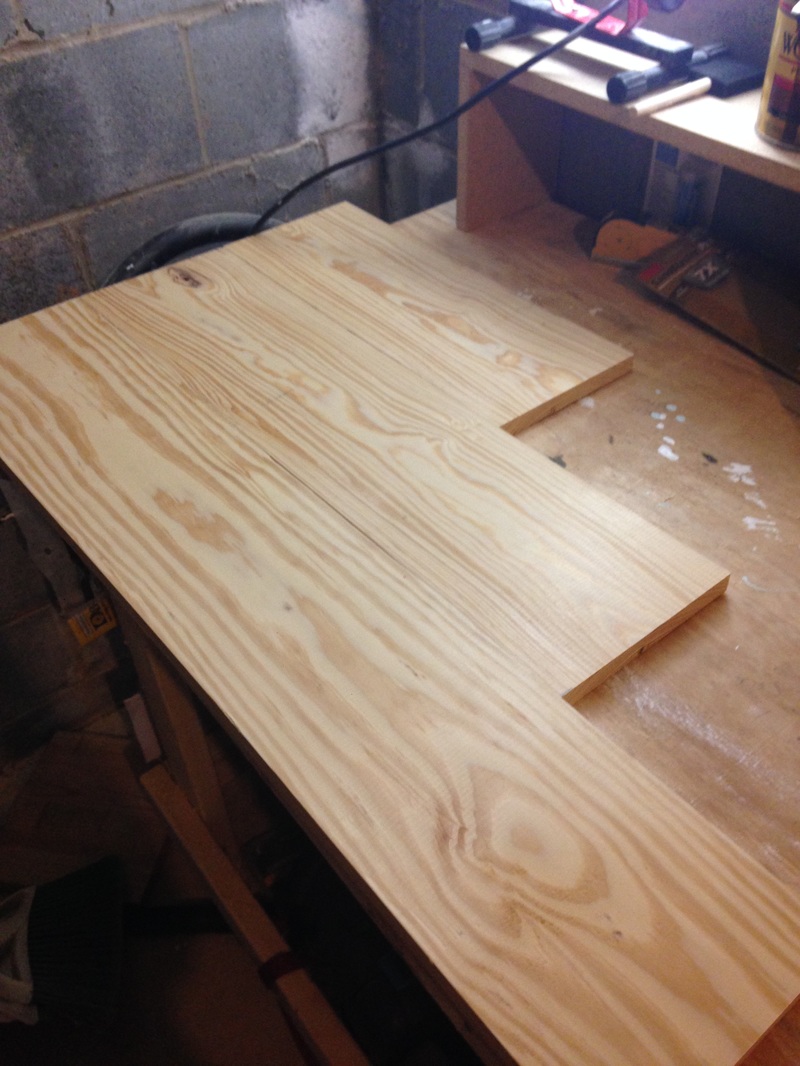 Next, I broke out my handy Kreg Jig and cut pocket holes in the back to attach the boards together (with wood glue as well). I then sanded the seams and filled in any small cracks and holes with wood filler. 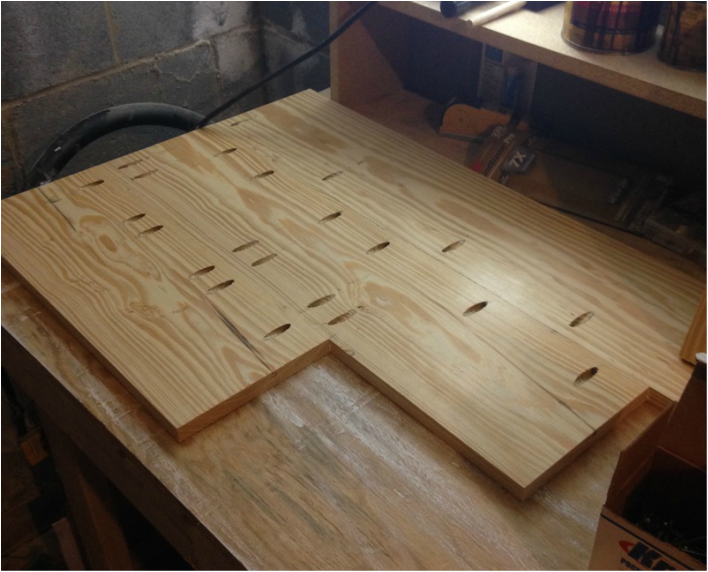 I then used my template again to trace the lines onto the wood. I tried my best to rip one straight line on my table saw. 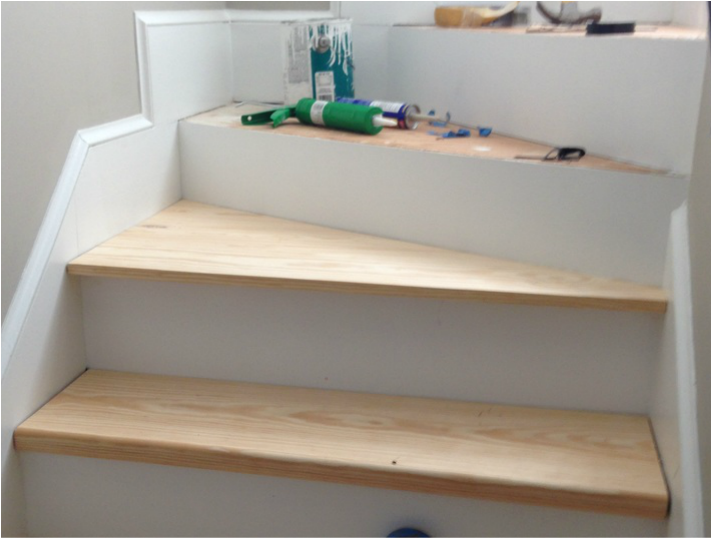 The cut wasn't perfect, so I went ahead and scribed the wood to the riser, and cut it again. 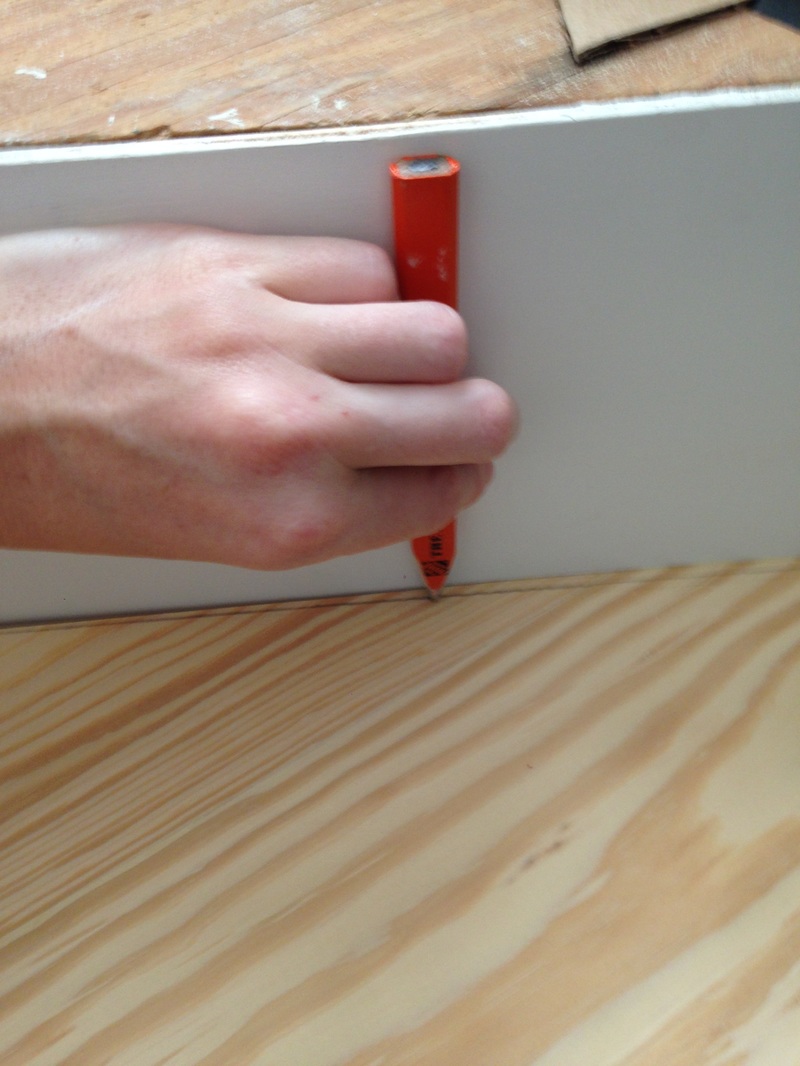 It didn't end up being perfect, but as I've learned through this process... caulk solves lots of problems! 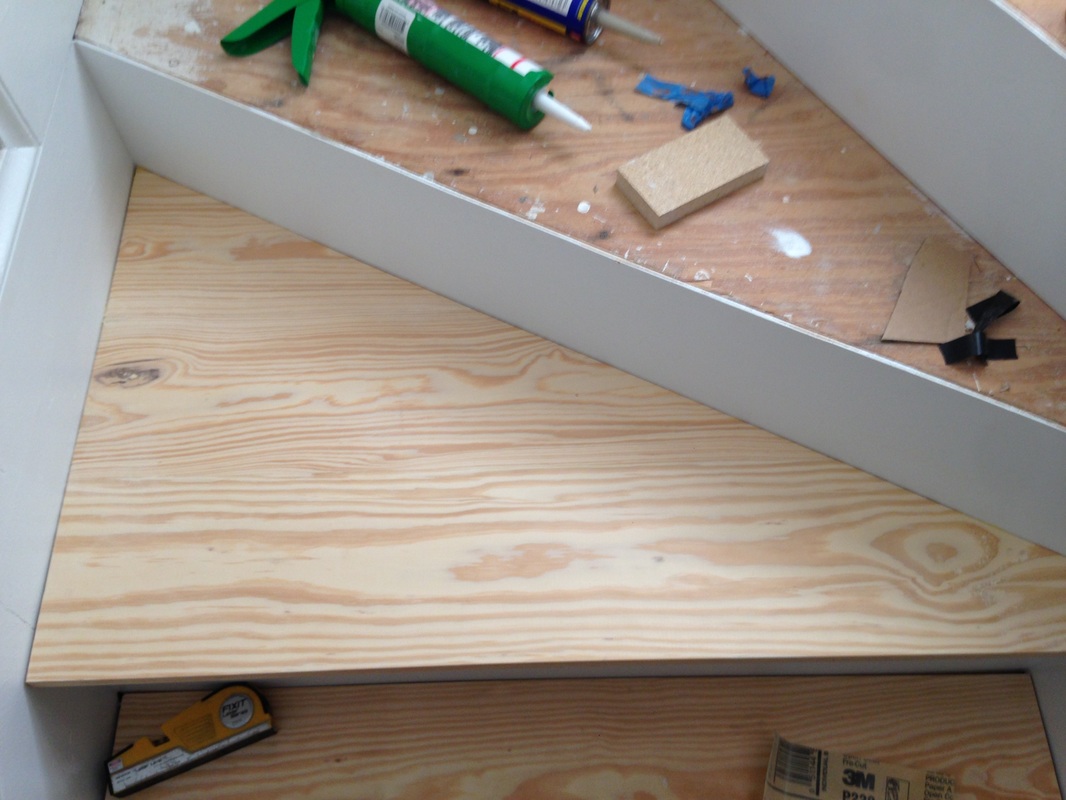 The last part of the process is making the front appear to be 1.5" thick, like the rest of my treads. There was a simple solution - create a "lip" on the front of the tread with another piece of 0.75" thick wood. It would give the tread the illusion of being 1.5" thick, even though it really isn't. Brilliant! I haven't done this yet, but in future posts!
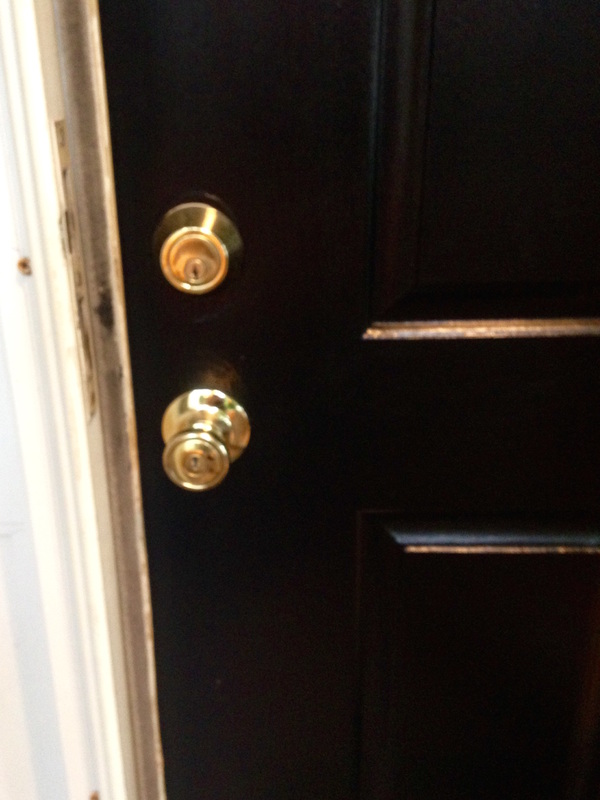
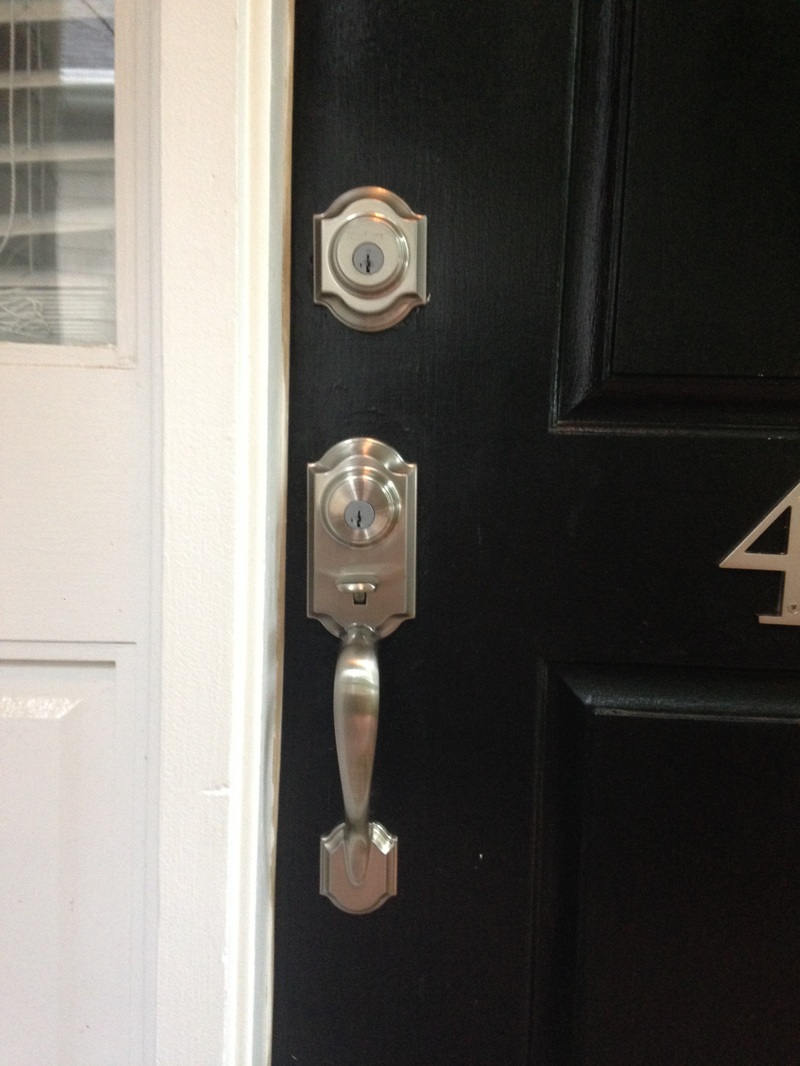
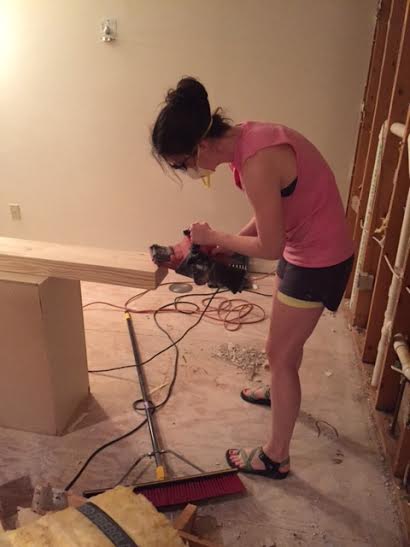
If you haven't heard by now, I sent my flooring back to the manufacturer to be tested for formaldehyde. No, I did not get it from Lumber Liquidators, but another flooring store in town (which has been nothing but awesome through this process). Until I get word that the laminate is good-to-go (the manufacturer has been dodging my flooring store's calls and emails for the past month), I can't work on my poor floor. In the meantime, I have decided to tackle my stairs. 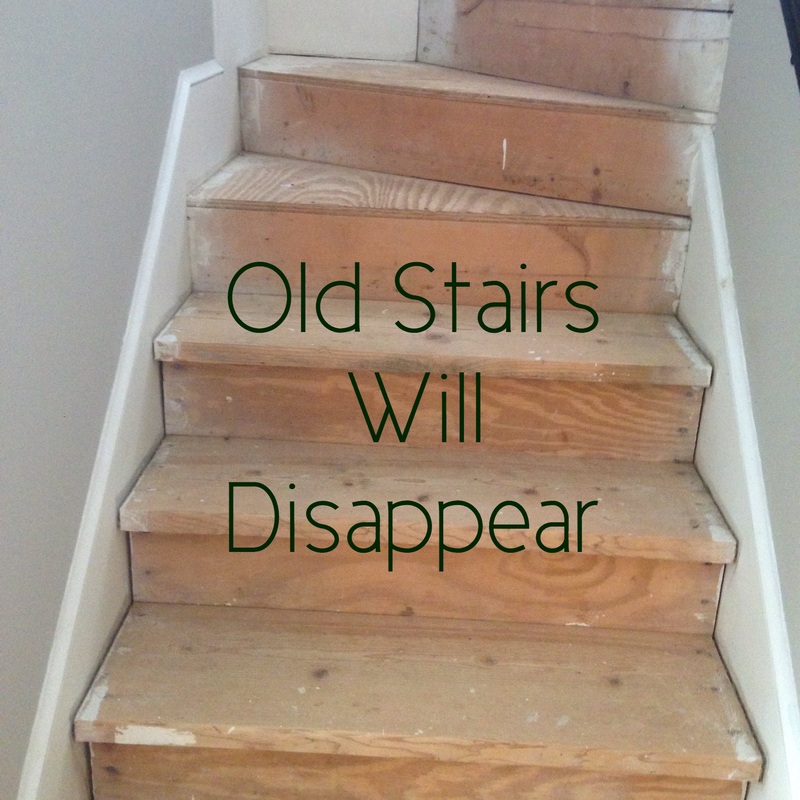 I've been wanting to start the project for a while, but honestly have been a bit intimidated by the idea. The other day, however, I was bored and had the urge to tear shit up, so I started hammering at my stairs. FYI - stairs are a bitch, but soon they will be my bitch. 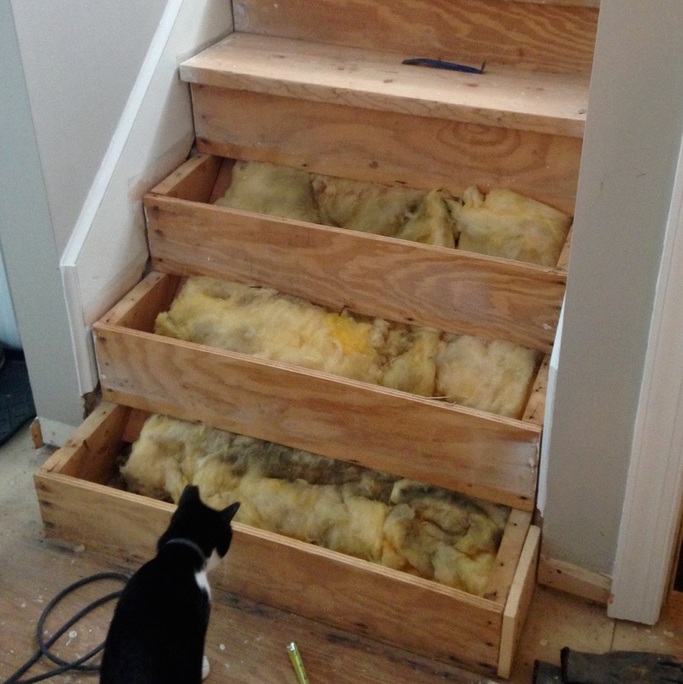 I've learned that there have been a lot of strange building techniques that went into my house (and by strange I mean wrong), including the stairs. Quick lesson - the things that your stairs sit on are called stringers. You're supposed to have three (one going down the middle and one next to each wall), however you can clearly see I'm missing my middle stringer. Fabulous. I'm not worrying too much about it because, honestly, if my old stairs worked fine without it, then so should the new stairs. I'm going simple on the stairs for now, which I know will get complicated soon enough with the curved stairs in the middle. I'm replacing what is there with the exact same thing - 2"X10" pine, and new plywood risers. Simple. The pine you can buy at any big box store. I bought 2"X12"X12' pine, had the guys at Lowe's cut it into three 48" pieces, sanded them down, ripped and cut them to size. 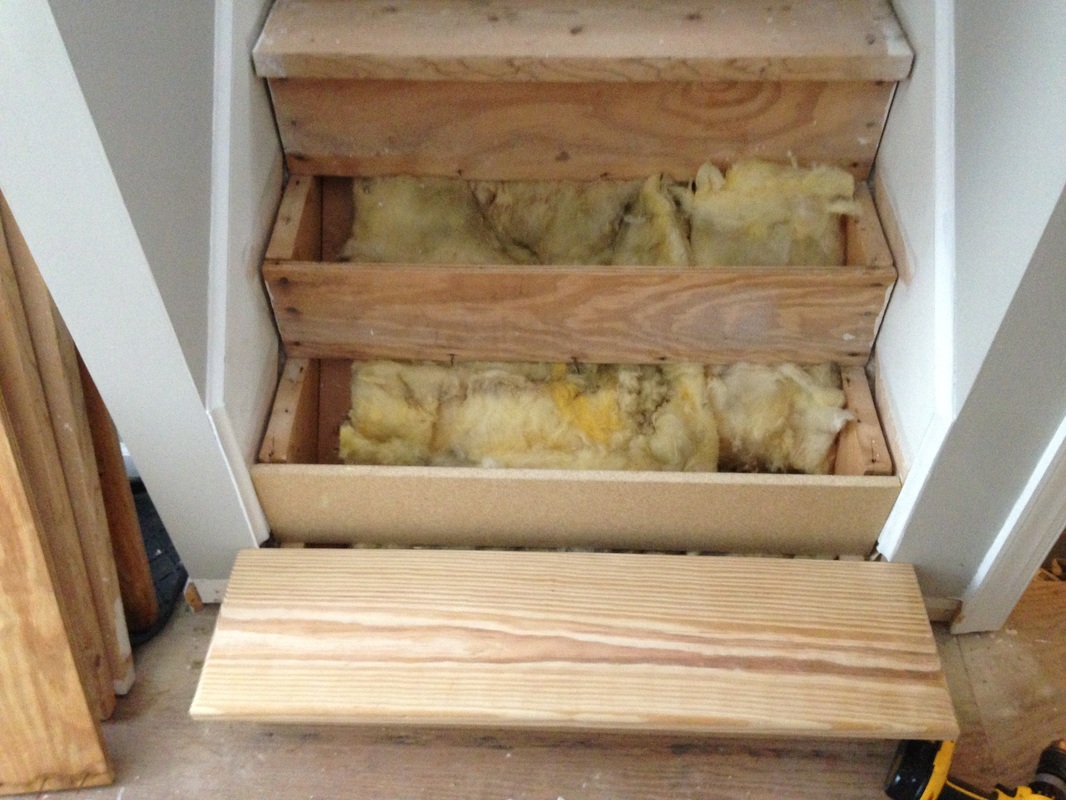 Mmmmm.... look how pretty! I won't go into huge detail now, but I also decided to router the edges for a semi-beveled look (both on the top and bottom of the tread). I think it gives it a more professional look for something that is oh so cheap. 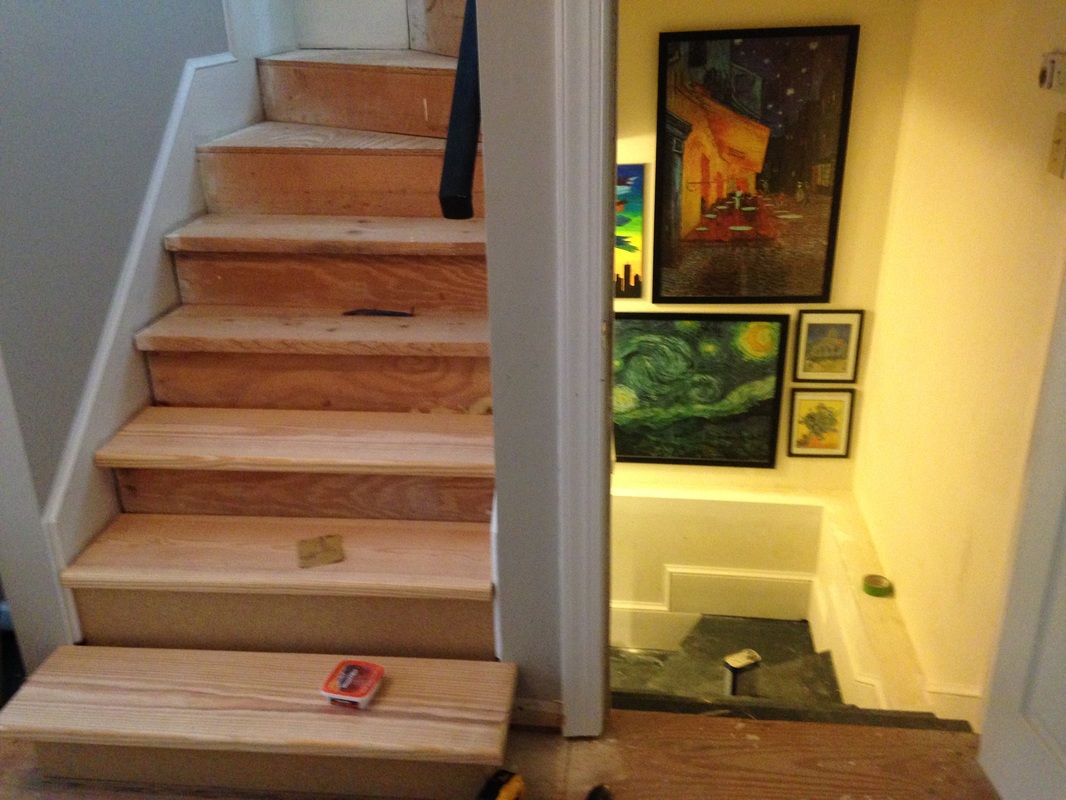  My front door looked terrible. There are no if's, and's, or but's about it. There was a gap at the bottom because the door sweep had fallen off (it was stapled to the bottom of the door), the handle was brass and ugly, I'm pretty sure it had been kicked-in previously, the peep hole was painted over, and the threshold was cracked - it was bad. So I wandered over to Lowe's to get a quote for a new door (and apparently sidelights) and I just about fell off my seat when they told me - $1200!!!!! WHHHAAATT???? I decided that I'll go ahead and fix it as best as I can myself. I started by changing out the locks and handle with a Kwikset entry door set, which can be found here. I decided to go with a satin nickel finish (even though I will have oil rubbed bronze in the rest of the house) simply because I wanted the hardware on my black door to pop.
 I took some sand paper and rubbed the paint off of my peep hole. Although sand paper probably isn't best to use on finished metal, I am OK with the brass finish lightening up to look more like the satin nickel hardware. 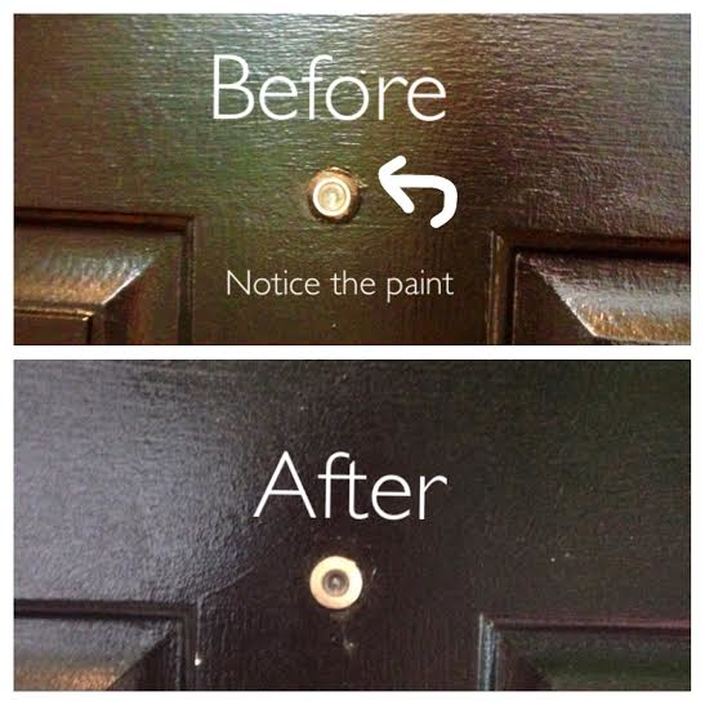 I am probably most excited about the new door sweep, which required the door to be taken off the hinges and screwed onto the bottom of the door. It closed the 1/2" gap between the threshold and the door bottom, which will make the house more energy efficient and help keep the bugs out! 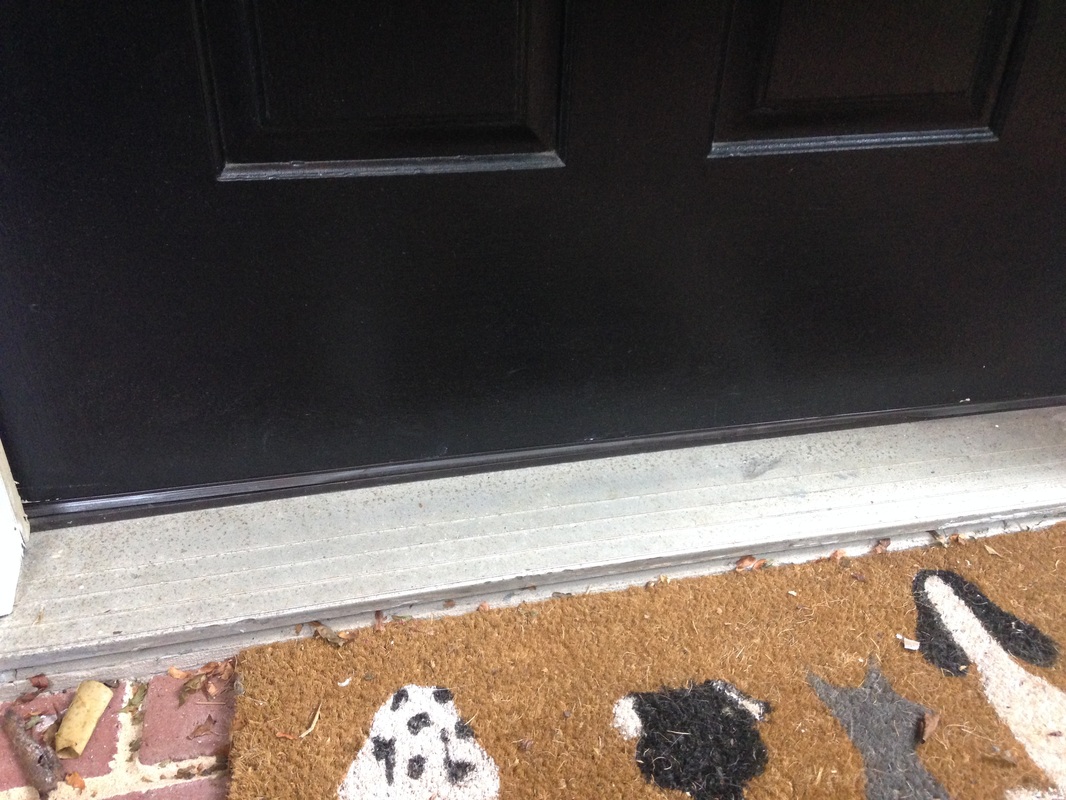 Unfortunately, I am unable to replace the cracked threshold without removing the entire unit (sidelights and all). This is just above and beyond my DIY capabilities, so it will be something I will have to live with. 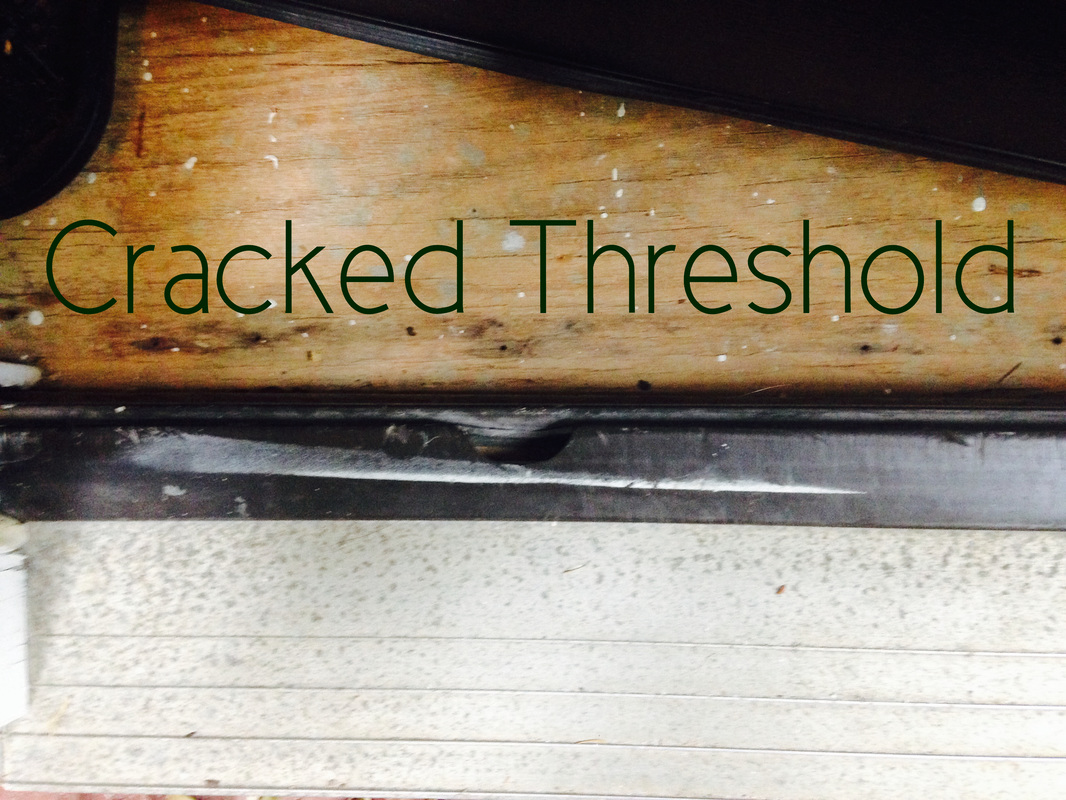 The cat box for my kitties is in the basement, and I've been looking for a cat door (for easier access) since I moved in. I initially bought one from Lowe's, however it had a swinging door on it and I was afraid Boots would be too scared of it and not use it. Then, I searched Ebay and found the most amazing cat door ever: The Kitty Pass. 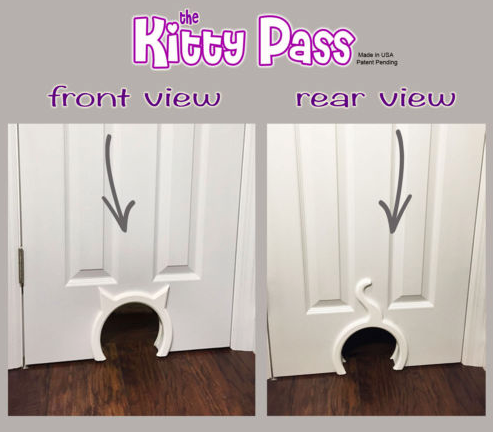 How frickin' cute!!! It came today and I immediately installed it on the basement door. So far, so good! 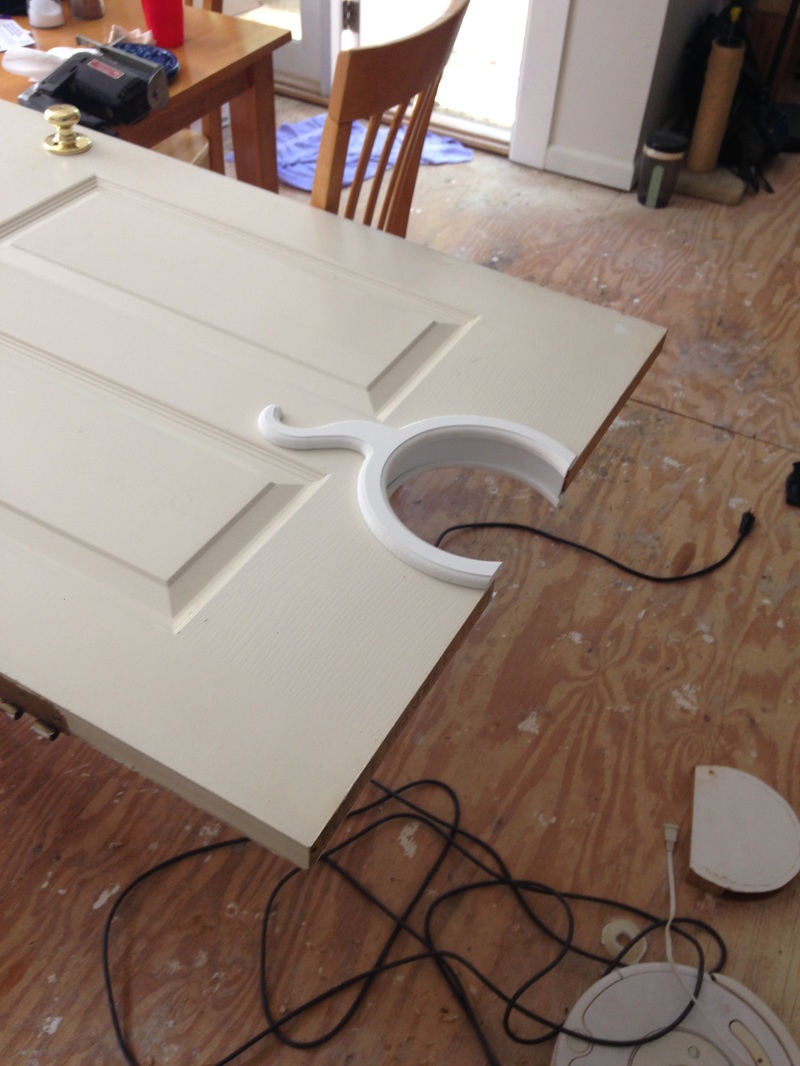  Even Mr. Boots is loving it! 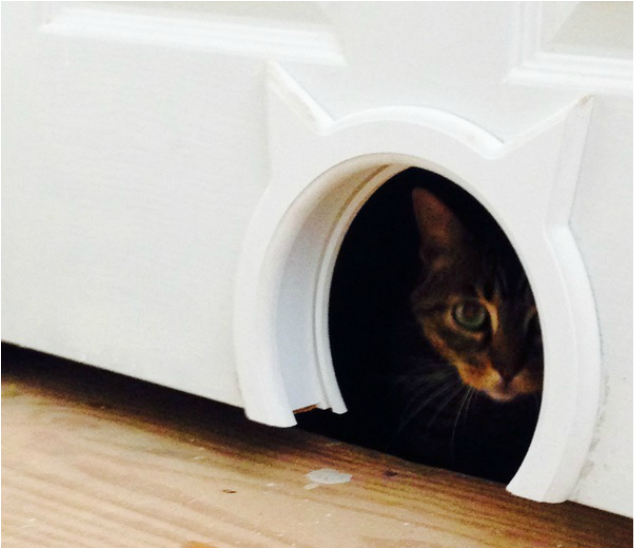 There's a fat man on my mantle, and for the time being, I'm OK with it - because it means I actually have a mantle! 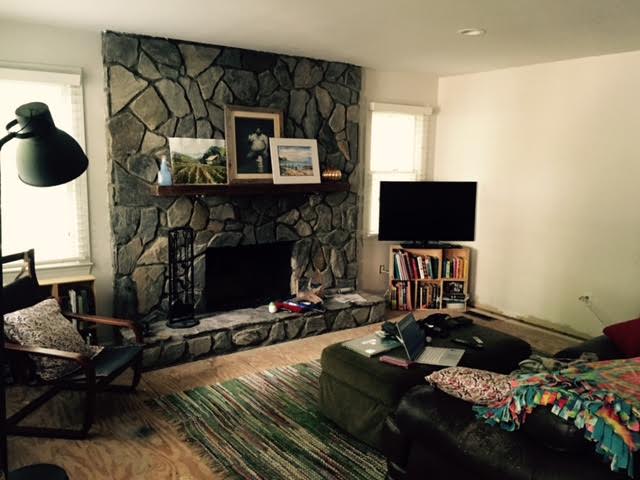 One of my first projects in this house was building my own mantle. I haven't written about it, but I've had the mantle for about a year now (yikes) and it has been sitting in my basement collecting dust... until this weekend! Before we begin, let me recap how (and why) I built my own mantle. 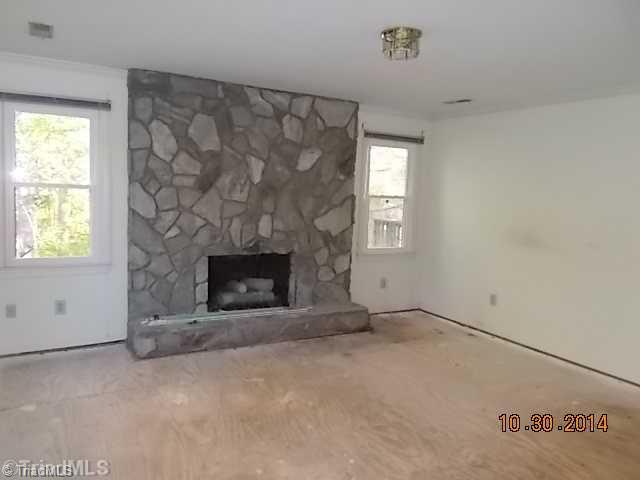 I had a major dilemma with two of my fireplaces (master bedroom and the living room). They are stone, obviously, and when they were installed, the owner never thought to have a couple pieces of the stone protrude out for a mantle to sit on. Or maybe they just never thought, "Hey! It would be a good idea to split this GIANT PIECE OF STONE up with a mantle so that it's not just a GIANT PIECE OF STONE! Let me make sure in my design I incorporate some flat pieces for my mantle to attach to!" Yeah, that never happened. The stone is uneven, thick, and very few places are actually flat enough to attach any sort of anchor. So what to do? Make my own! I really wanted a wooden, rustic, reclaimed look for my mantle without the price of reclaimed barn wood. To get around this, I bought a piece of 2" x 8" x 12' piece of new lumber, cut it into two 6 foot sections, glued and drilled the two pieces together, and sanded the edges down so they were flat (which was a LOT of sanding. A table saw would have made this much easier). What I got was an approximately 3" x 7" x 6' mantle! Brian and I then beat the mantle with nuts, screws, hammers, saw blades... basically anything that was sharp and could cause destruction... and stained it for our finished product. It's awesome (and cheap!!!). The question then became, "How do I attach this to the fireplace?" Great question, which is why I then turned to my trusty friend, Pinterest. I was first inspired by the picture below, and actually went as far as making the attachments, spray painting them black, and attempting to attach them to the fireplace (with the advise from the guys at the Depot). The problem arose when we tried drilling through the stone to attach masonry anchors. Brian and I tried a hammer drill, then we tried a different hammer drill. We drilled about a quarter inch into the stone in about 20 minutes. Simply stated, it wasn't working so we abandoned the project for a year. 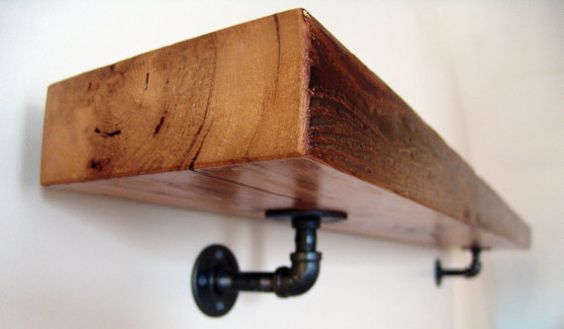 This weekend, for whatever reason, we were inspired again to attempt what seemed to be our futile project. Brian did some more research of hammer drills, and he stumbled across this YouTube video about the differences between a hammer drill and a rotary hammer. Needless to say, we decided to make a trip to the Depot and rent a rotary hammer and attempt the project again. It was like drilling through butter. Yeeessssssss!!!! I also ended up changing my design with the attachments. I decided to go with a simpler design which would allow me to change the mantle easily in the future if I should ever choose. My inspiration picture is below. Basically, the wood just sits on the plumbing nipple instead of being attached to a flange. 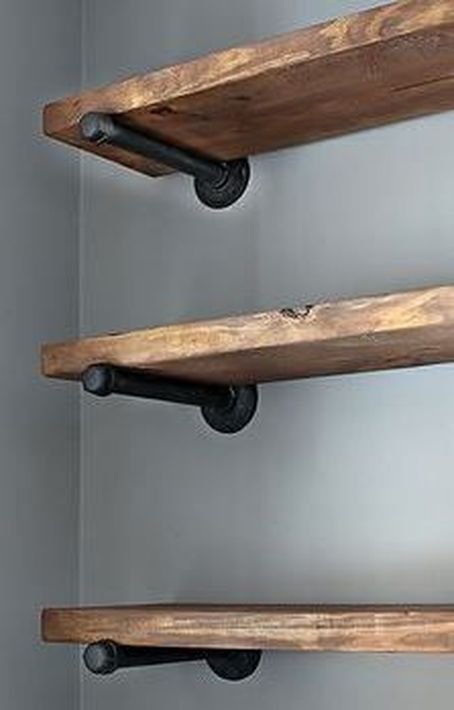 With a few more trips back to the store to stock up on more things we needed, we were finally able to securely attach both flanges and hang our mantle. Although I think it might be a little high (we were hoping to put the TV on top of it - not anymore) this is a real wood-burning fireplace and I'd rather err on the side of caution and not worry about my mantle catching on fire. 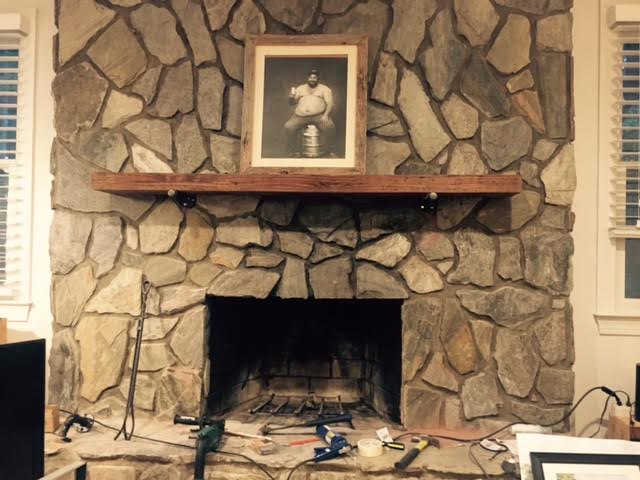 The deck has needed a power washing since I bought the house, however it was never a real priority. Even now, it doesn't top my to-do list, but since I am planning on actually moving in soon (eek!) I thought it would be nice to have it cleaned up. So today, Brian cut down a rotten tree next to my house (no pictures though), while I took care of the deck. Take a look at the before. Yikes.  ... and during.... 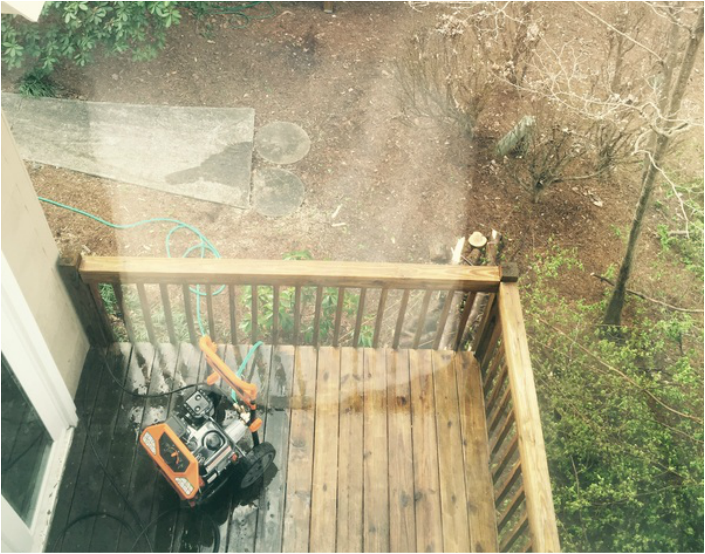 ahhh... and after. How relaxing! My deck looks brand new! 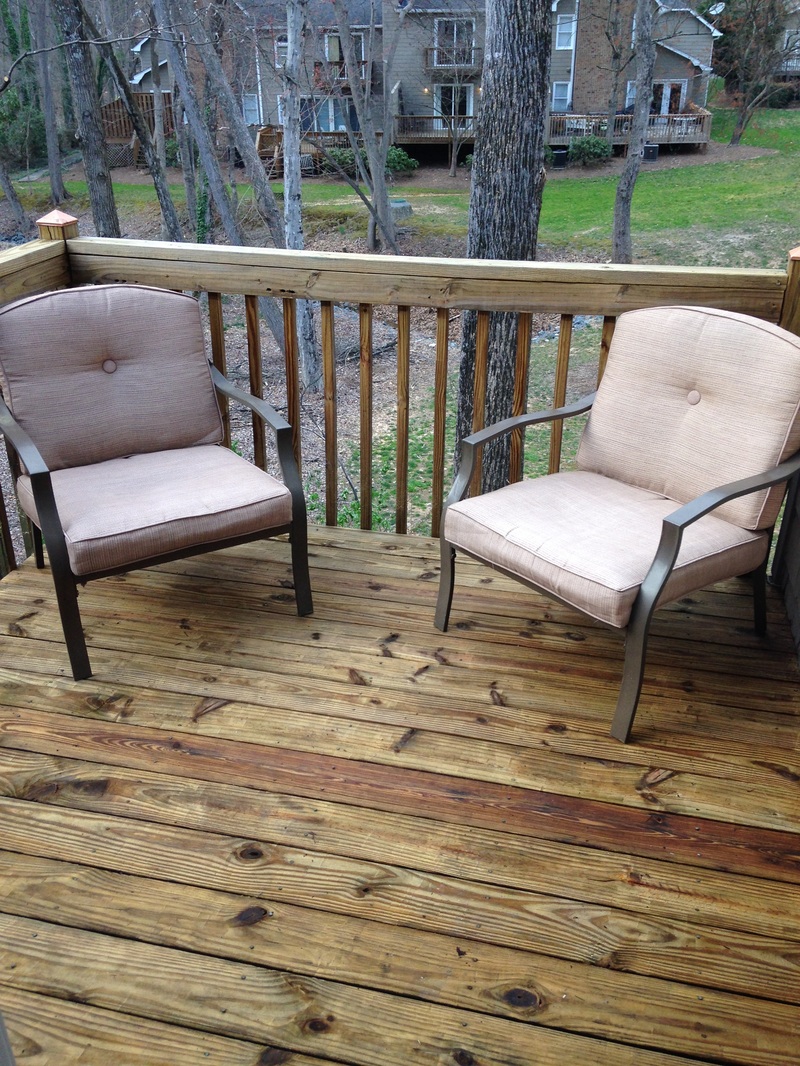 Great news! The master bathroom is getting a floor! Right now there is a big rush to get the entire upstairs as ready as possible for carpet to be installed, which includes any flooring that will be adjacent to the carpet. Although the master bath is nowhere near being ready, we had to push forward with the floor anyways. This summer, I bought a lot of extra LVT (luxury vinyl tile) from Lowe's, which is what I installed in both guest baths. I loved the stuff so much, I figured I could also install it in the master bath as well. However, after long nights of scouring Pinterest, I wasn't so sure the LVT was the way to go. Master baths should be elegant and luxurious, and if I was going to invest some money, the master bath is probably a good place to put it. Yet, with the current rush on the carpet, we had very little time to think about the master bath's floor, pick out tile, put down concrete board, and grout - on top of everything else we have to get done before the carpet installation. So, Brian and I made the executive decision on Friday night to cut each LVT (originally 12" x 24") into 4" x 12" and run a herringbone pattern in the bathroom (to give it that elegance I was looking for). Without further ado, here is the initial dry-fit of the tile: 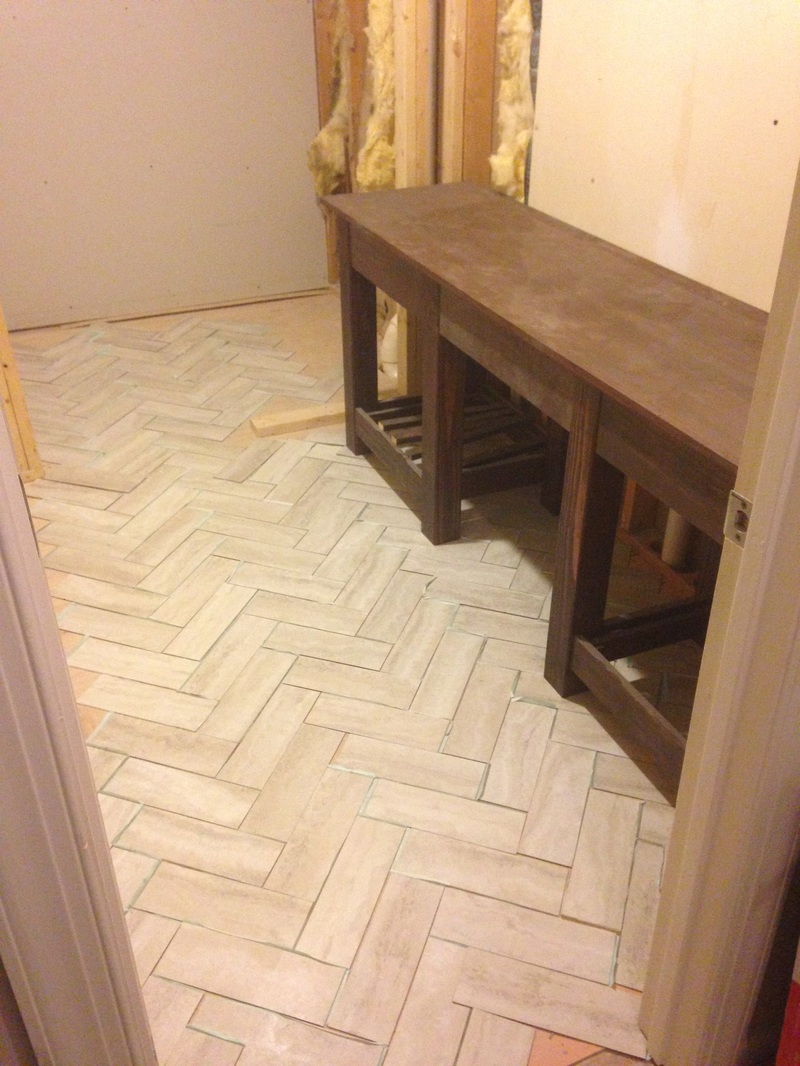 What was supposed to be a relatively short weekend project turned into the longest project I've tackled on my own so far. Cutting the tile alone took nearly 4 hours. I dry-fit them, did some more research, and then decided to run the herringbone longways (to make it look more like a pathway to the closet area). Below are two pictures of this week's progress (which also took hours and hours). 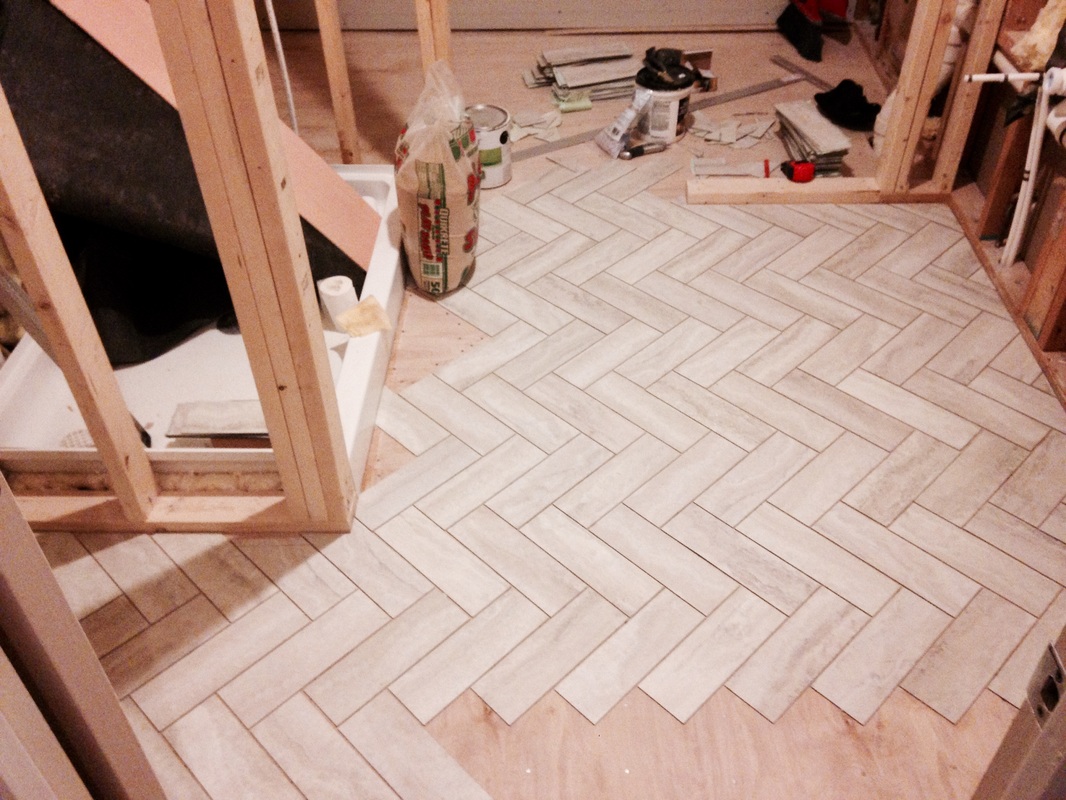 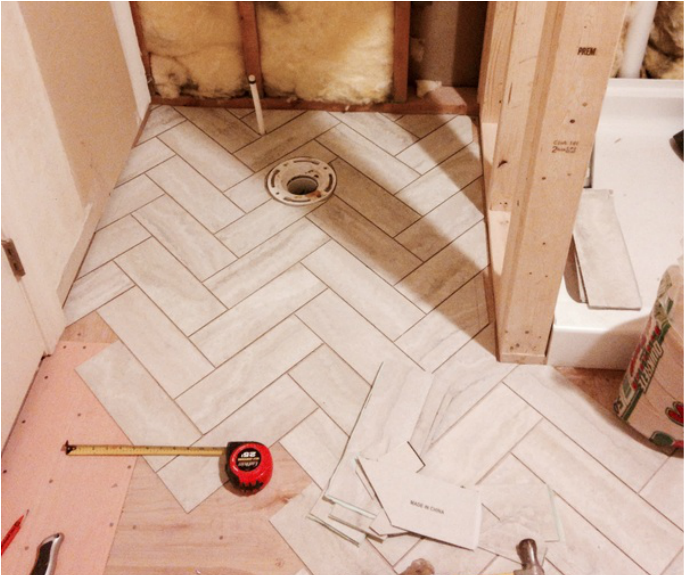 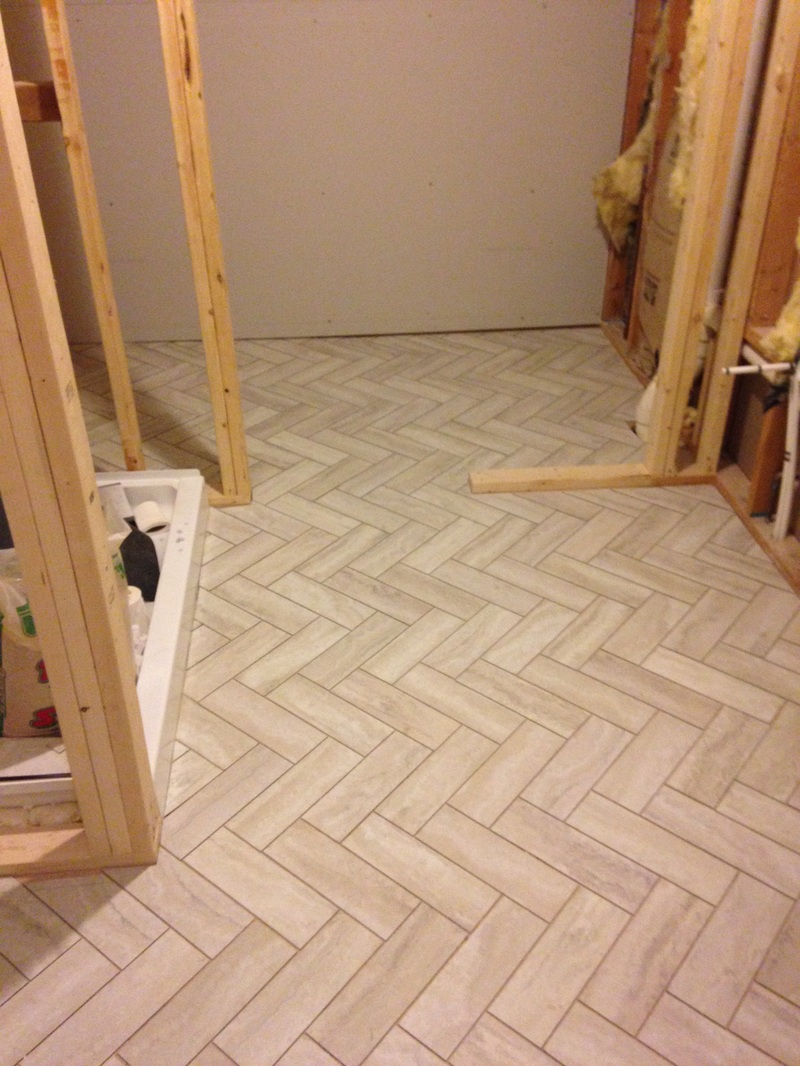 Last tile laid! Now I just need to grout!
Brian and I are working really hard to finish the upstairs (painting, bathrooms, etc) so that the carpet can be installed by March 1. This may be a long shot, but here's hoping. So some weekend updates - while I now know why it is so important to wear a mask when spray painting (I suddenly feel like an 80 year old man with emphysema), I am happy to report that we have almost completed two major projects (that could and should have been completed a long, long time ago). First, we finished oil priming the master bedroom and tested out our handy new Homeright Finishing Spray Painter with our first coat of latex paint. Brian says he has found a new love (and that we should have been spraying the walls since the beginning). While I agree with him, I also think I'm going to take my mom's advice and buy some heavy duty masks for the next round. Pictures to come. Next, we are in the process of finishing up the second guest bathroom. I wanted to add some pizazz to this bathroom that the one of the first floor lacks, so I used this inspiration picture from Pinterest to help: 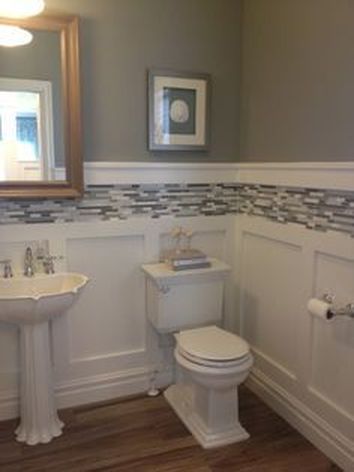 Although my floors aren't wood, I don't have a pedestal sink, and my walls sure as hell won't be this dark, I enjoyed the wainscoting and the tile backsplash. I thought they added elegance and some spice to an otherwise boring bathroom. We started with the wainscoting, and used the same technique that we did in the entry. The difference - we went with pine this time instead of MDF. 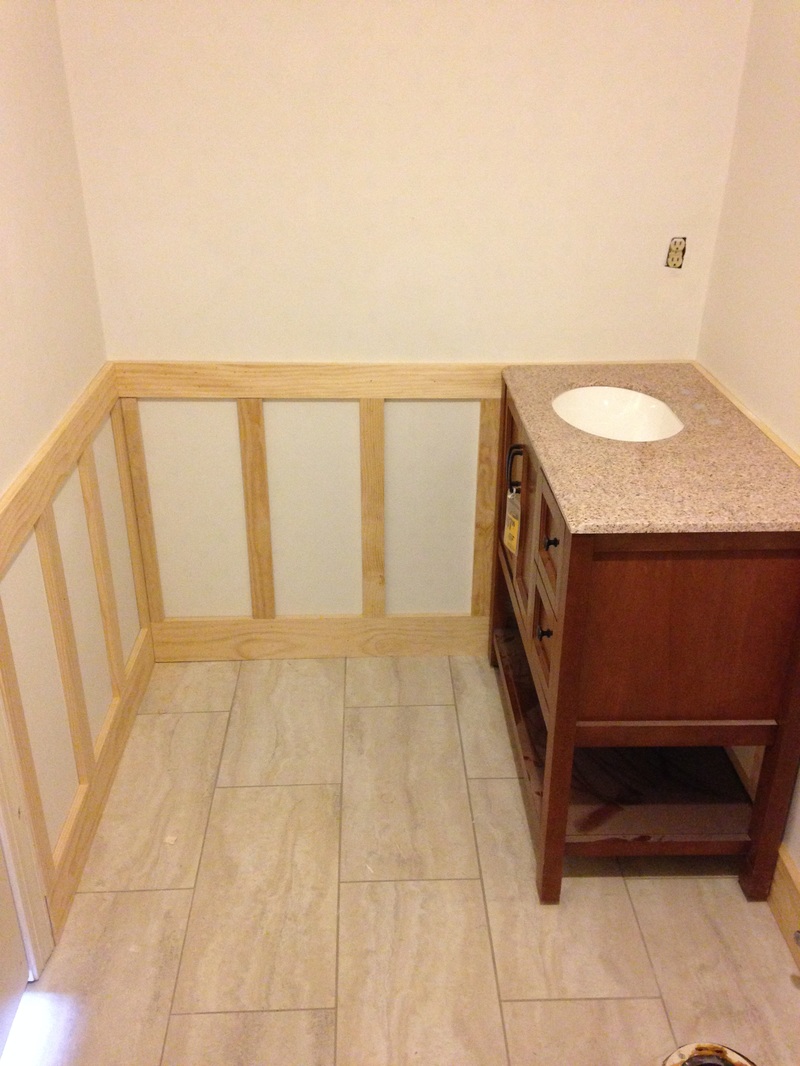 Then it was time to pick out a paint color. I suppose I didn't really care about the color, as long as it was light and bright (the bathroom has no windows, and it's attached to the dark blue room). Brian had a gallon of light blue semi-gloss laying around, so we went ahead and tried it out. 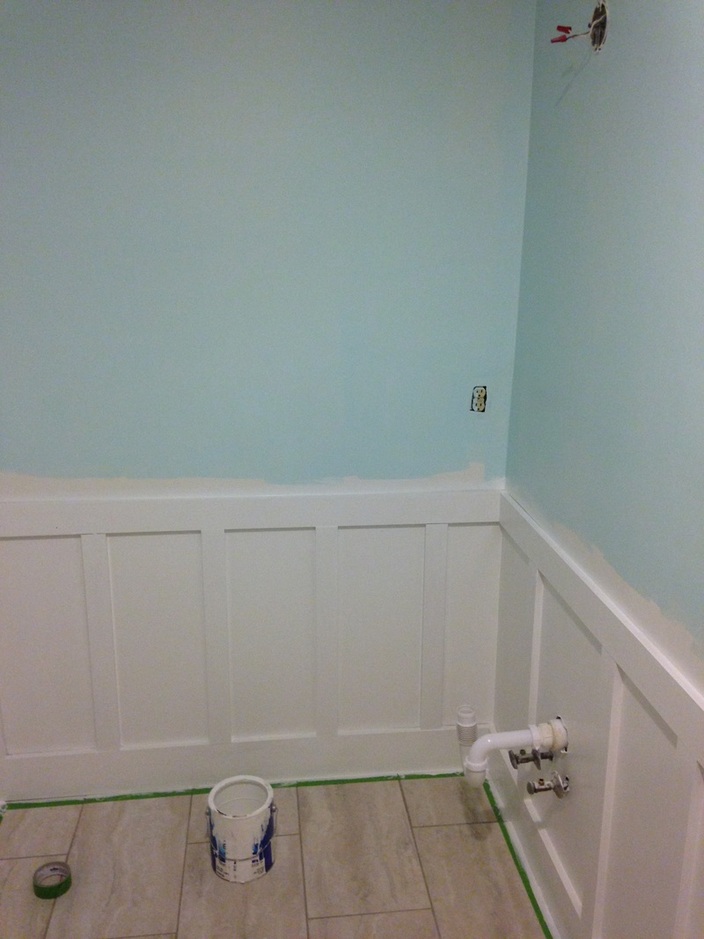 Needless to say, it got painted over the next day with some Sherwin Williams Sea Salt. 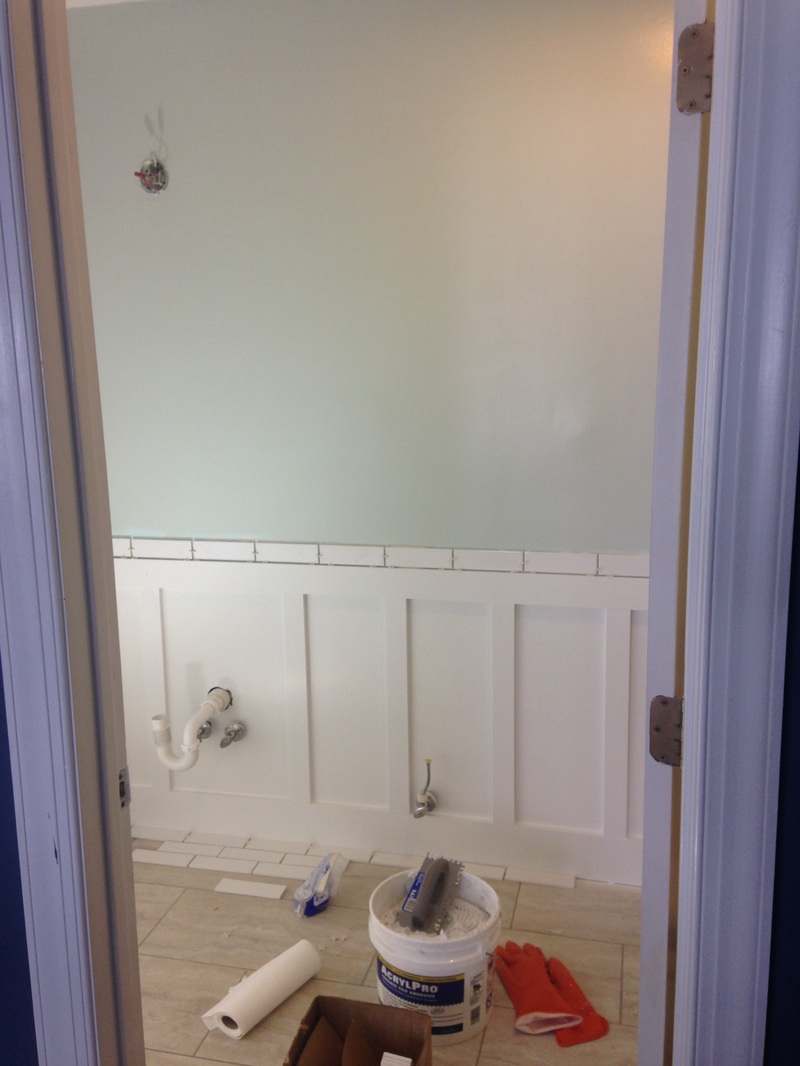 You can see in the above photograph that we are also testing out that tile backsplash I enjoyed so much from the inspiration photo. While my budget doesn't allow me to spend $10 a square foot on mosaic tile, it did allow me to buy 14 square feet of elongated subway tile (a whopping $15 total). Apparently I bought about twice as much as I needed because after installing we still had almost a full case left over! 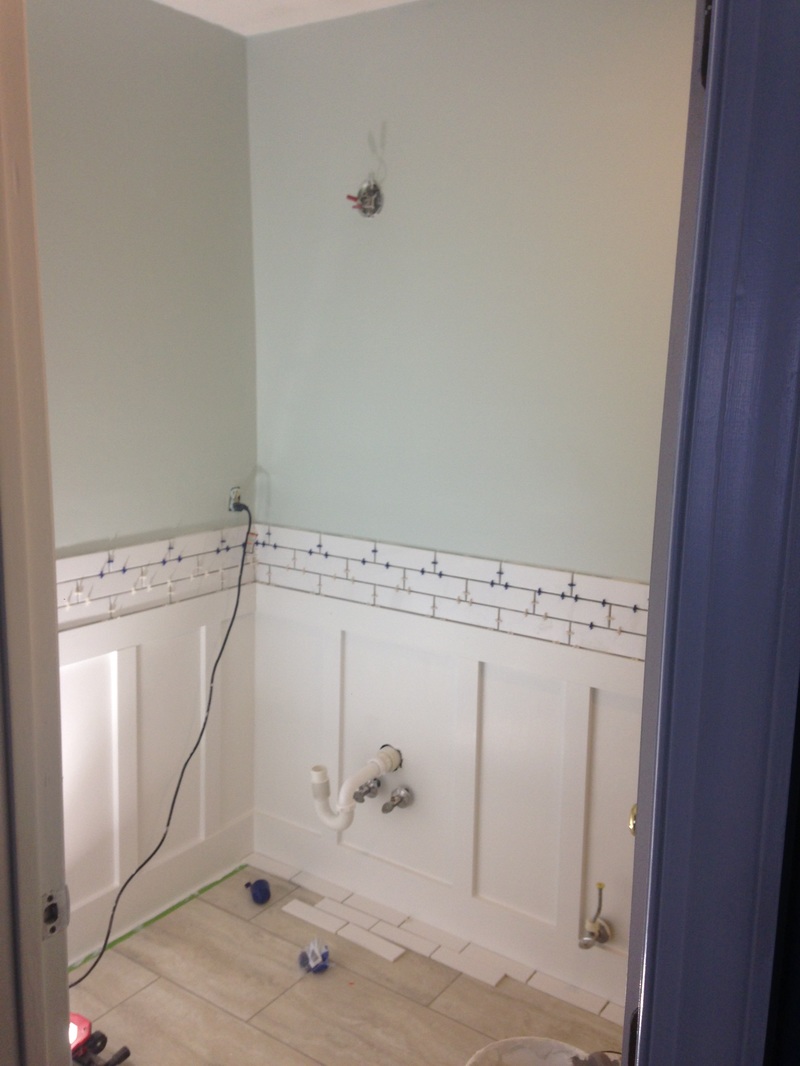 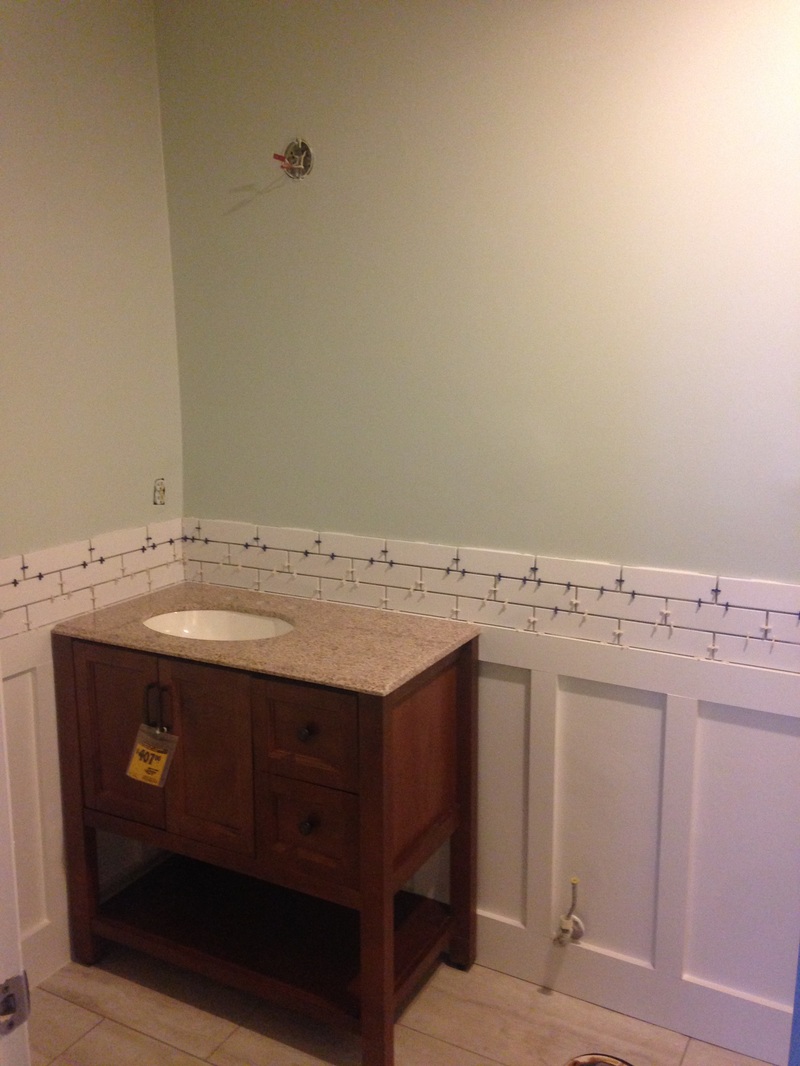 Don't worry, my frugal friends! I didn't spend $407 on that vanity! Between the one I bought in-store and the exact same one I found on Craig's List (both now in the guest bathrooms), I spent a whopping $400 on the two of them. Nice. 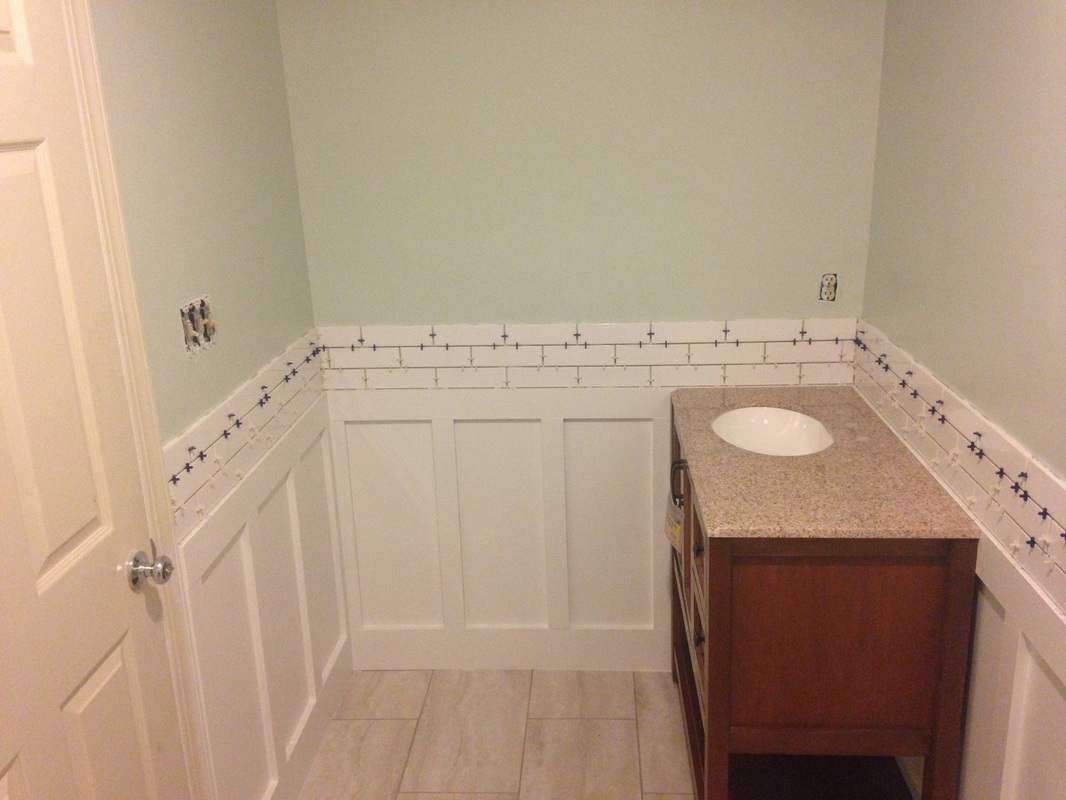 Now all that is left is to:
So apparently I never wrote a post about how we framed up the master bathroom. Well, to recap, this summer we ripped down the ceiling in the kitchen when we tore down the kitchen wall. When we removed the ceiling, it exposed the plumbing to the master bathroom. Not like this mattered one way or the other, except that I wanted to gut the bathroom - so this was the time to do it. Pressure was on because we really, really wanted to finish the kitchen, but that could not be complete until the master bath was replumbed. 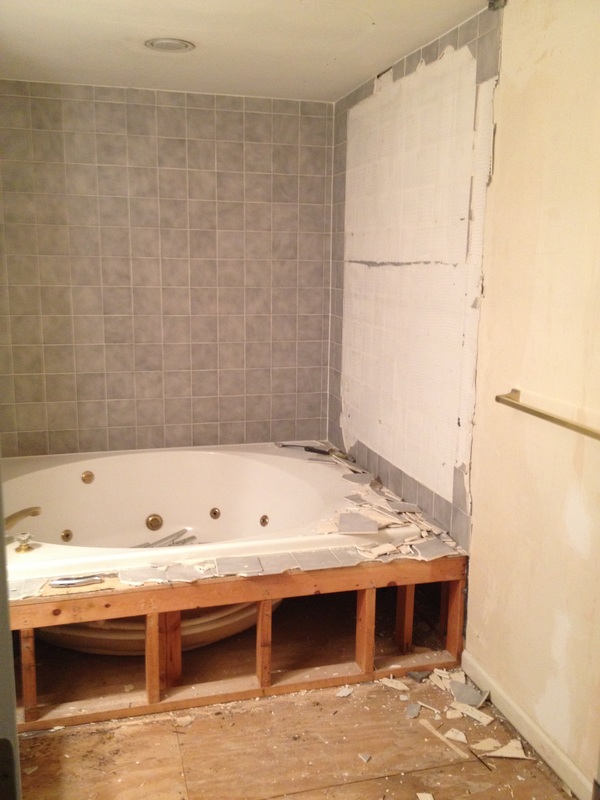 First on the list was to remove the old garden tub. Thanks to my awesome students, that was easily accomplished. Check! Next, we had to figure out some sort of layout. I went back and forth on this for a while, but finally decided to move the toilet across from where it was originally (and now behind the door), install a double vanity, have a smaller stand-up shower, and a relatively large closet (where the tub used to be). 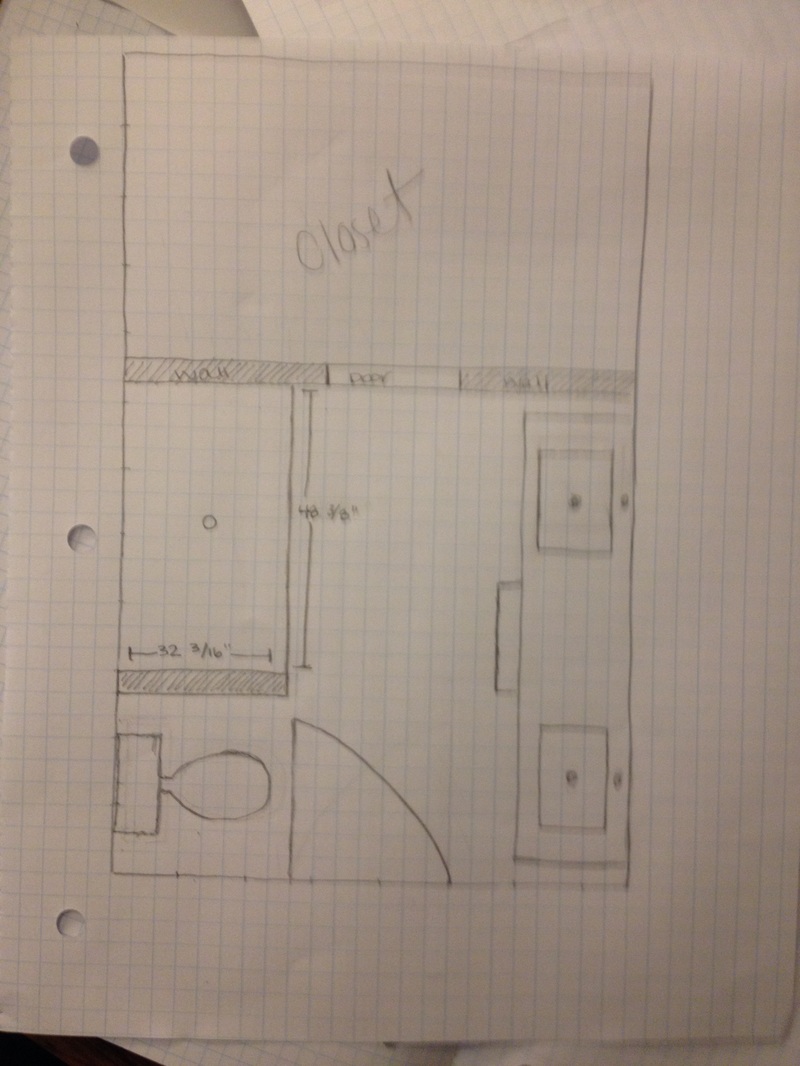 My dad was really the one who convinced me to go with a double vanity. He said, poignantly, it was better for resale. On a plus side, it could actually work in this space. The downside - the toilet is behind the door when it opens. Hopefully, however, no one is opening the door on you when you are using the golden throne! Since we gutted the bath, it was time to put it all back together. We now had my makeshift frame, so Brian and I put Terry to work to help us get the framing done. I was skeptical about putting the closet in the bathroom, however I'm really happy we decided to because it helped support the ceiling in the space. For real - framing up that wall alone raised the ceiling by about 2 inches! Yikes! 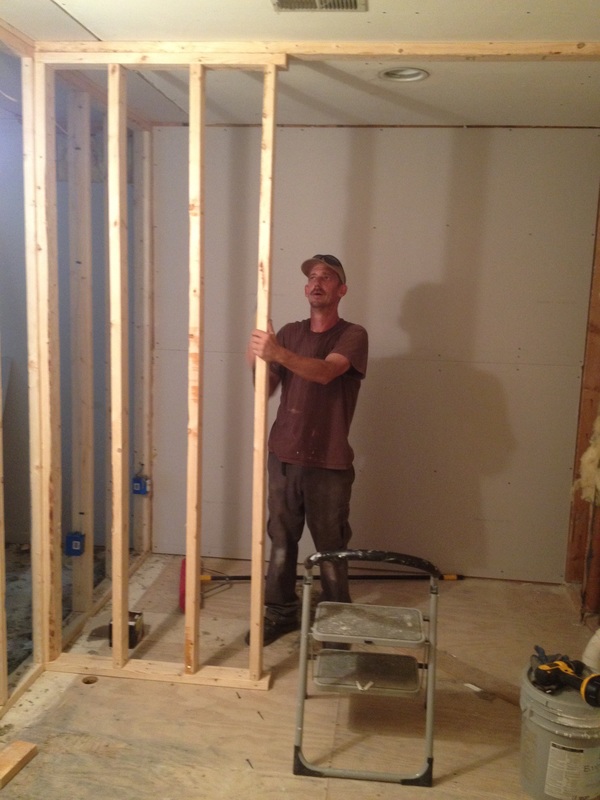 We were originally going to go with a pocket door (I bought the kit and framed the walls accordingly), however after some chats with my pops and his insistence on the walls being perfectly level (or else it is the worst experience in the world), I've decided that a barn door might work better. 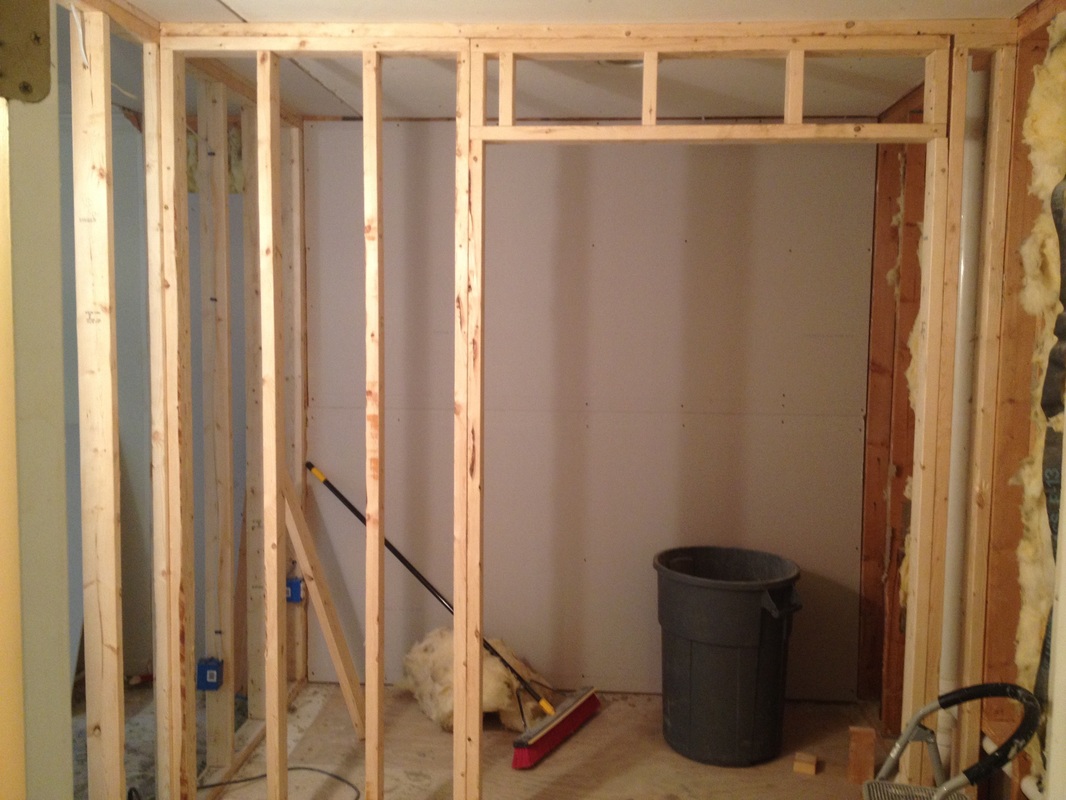 The bathroom stayed like this for about 2 months until the shower pan came in the mail. Tim-the-plumber then came in and replumbed the entire space. He moved the toilet from one side of the room to the other, and plumbed the right wall for my double sinks. (Tim also "forced" me to make my DIY double vanity so that he could get the measurements right.) Once he was satisfied that nothing would leak, Brian and I continued framing in the shower. 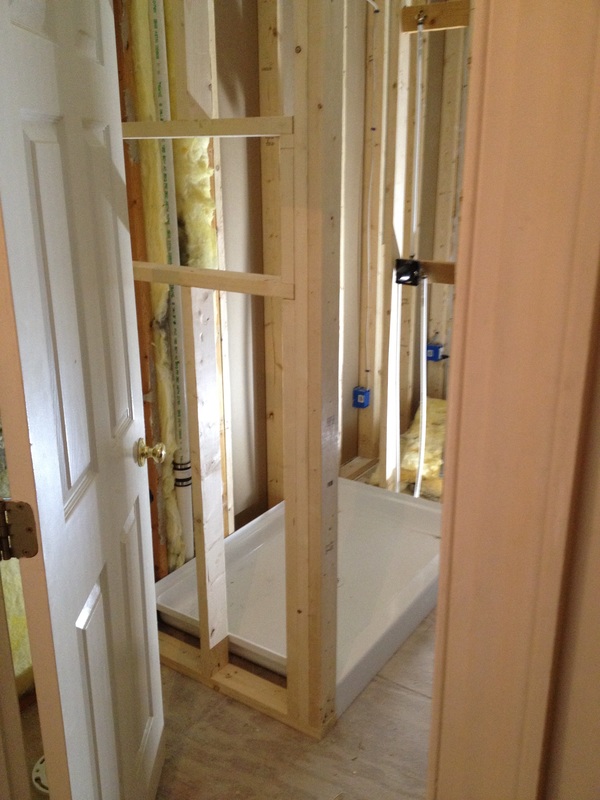 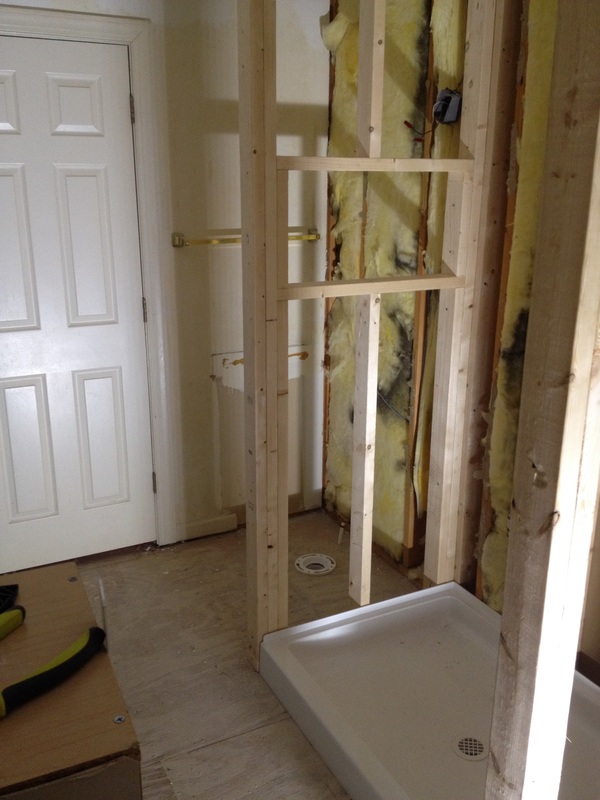 Below is a view from the toilet area, looking at my almost finished DIY double-vanities. 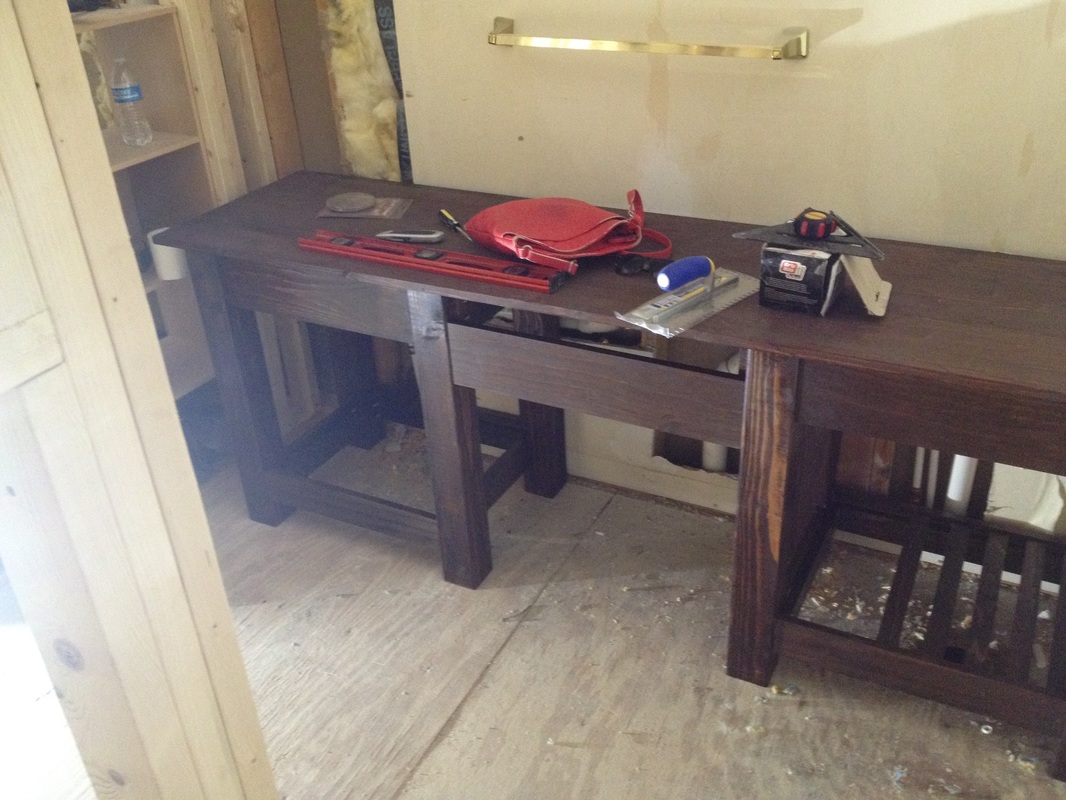 My only regret in the entire bathroom experience is that we stupidly didn't lay luan down before framing up the walls. Oh well. You live and you learn!
|

about meHi! I'm Lauren! I'm a twenty-something teacher and homeowner in North Carolina. I love math, decorating, and getting down and dirty learning new things about home renovation and repair. Categories
All
Archives
December 2018
|
 RSS Feed
